MOONEY INTERNATIONAL CORPORATION
M20V SERVICE AND MAINTENANCE
Page
Date
8
MAR 2017
Rev Date
CARBON FIBER RODS
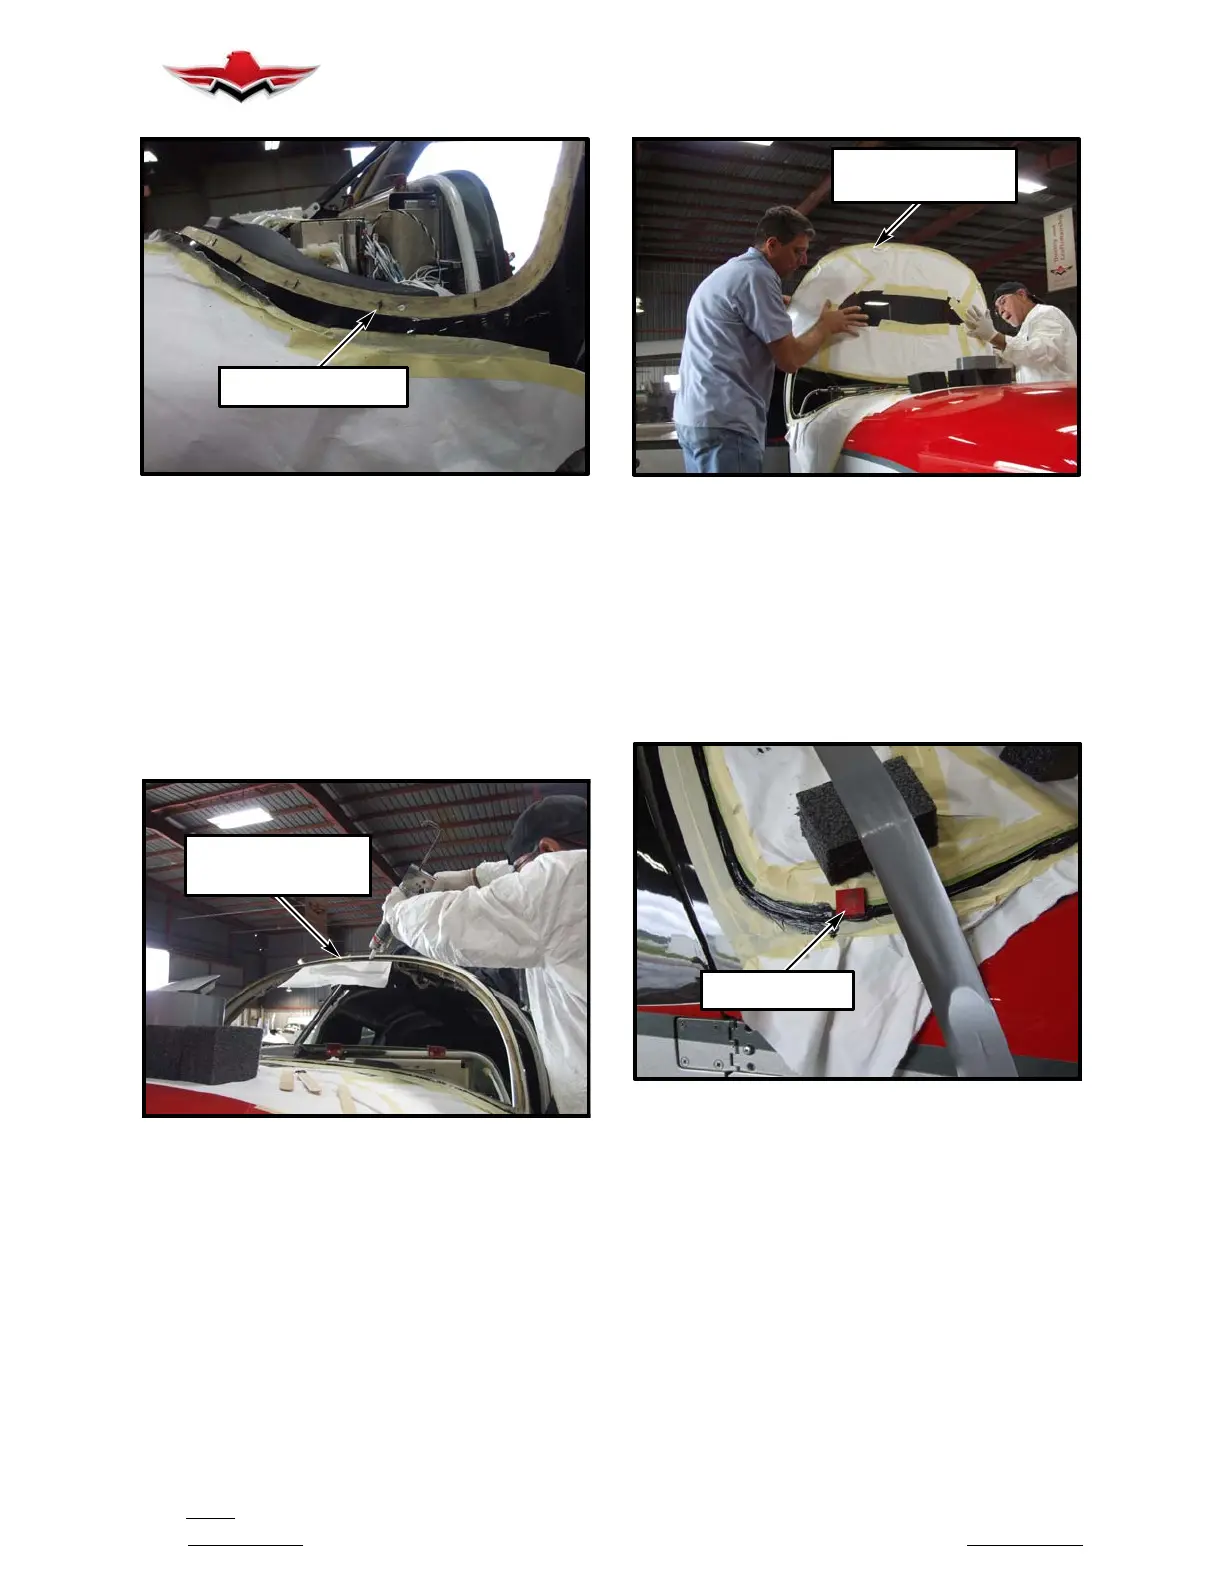
ATTACH CARBON FIBER RODS
FIGURE 56-6
b. Apply 70-03A elastic bonding adhesive/sealant
(reference Mooney Spec. 20, Section XII) with a
sealant gun around the inside rim of the windshield.
c. Smooth the line of sealant with a wooden tongue
depressor.
d. Apply 70-03A elastic bonding adhesive/sealant
(reference Mooney Spec. 20, Section XII) with a
sealant gun around the inside rim of the channel on the
composite shell until approximately half filled. (Figure
56- 11 and Figure 56-7)
APPLY SEALANT
WITH SEALANT GUN
APPLY SEALANT TO CHANNEL
FIGURE 56-7
e. Smooth the line of sealant with a wooden tongue
depressor.
f. Using two people, lower the windshield onto the
shell. Press windshield into place and situate as need-
ed, ensuring the windshield is flush with the shell. (See
Figure 56-8) After windshield is in place wipe excess
sealant off with a damp clean cloth.
LOWER WINDSHIELD
ONTO SHELL
INSTALL WINDSHIELD
FIGURE 56-8
g. Insert metal spacers into sealant around the
windshield. (See Figure 56-9)
METAL SPACERS
INSERT METAL SPACERS
FIGURE 56-9
h. Smooth the line of sealant with a wooden tongue
depressor.
i. Hold the windshield in place while it dries as
needed, using straps, masking tape, etc. (See Figure
56-10)
56-21-01
 Loading...


