MOONEY INTERNATIONAL C ORPORATION
M20V SERVICE AND MAINTENANCE MANUAL
Date
MAR 2017
Rev Date
Page
6
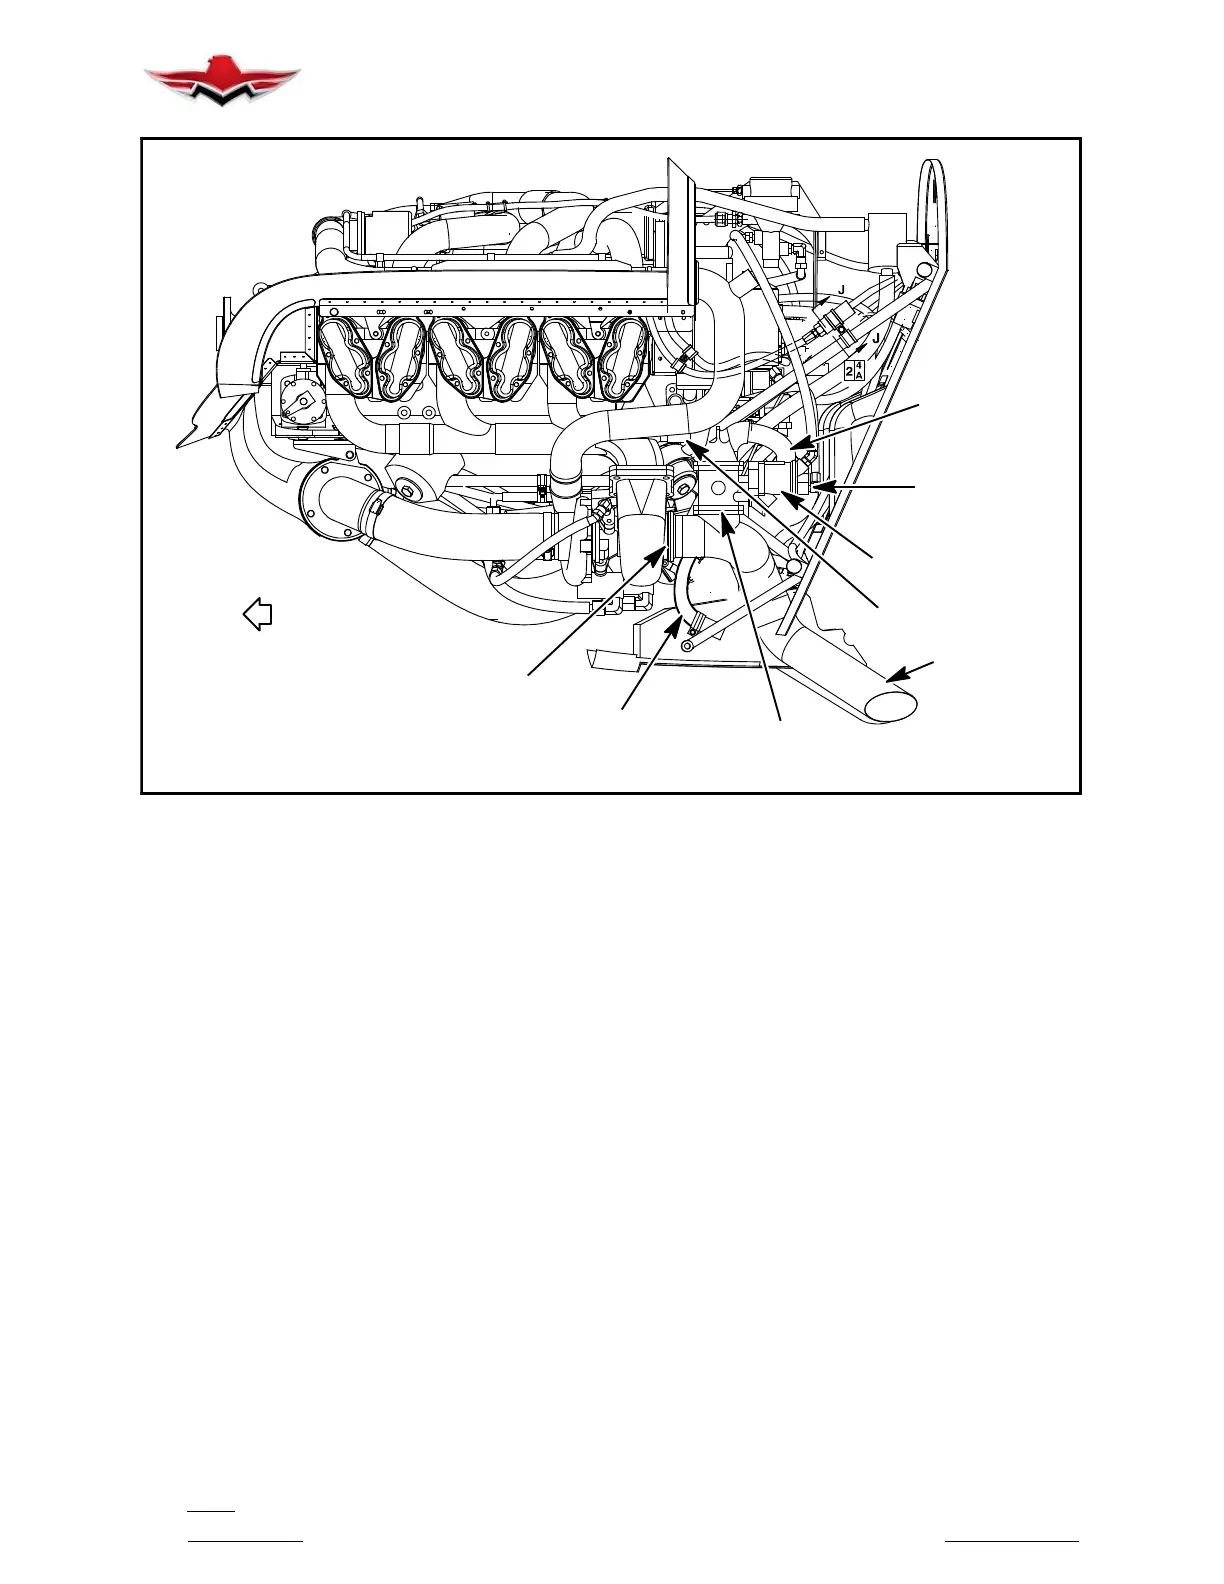
TAILPIPE
V- BAND CLAMP
CROSSOVER
PIPE ASSY.
OIL
BREATHER
TUBING
WASTEGATE
OIL INLET
LINE
SLIP
JOINT
WASTEGATE TO
TAILPIPE
ATTACHMENT
CONNECTION
WASTEGATE
ASSEMBLY
TAILPIPE
FORWARD
ENGINE LEFT SIDE
FIGURE 71- 2
From engine right side (Fig. 71- 1):
14. Loosen V- band tailpipe clamp, disconnect tail-
pipe from turbocharger (also refer to Chapter 78).
15. Loosen crossover pipe stabilizer bracket attach-
ing hardware at pipe.
From engine left side (Fig. 71- 2):
16. Loosen hose clamps securing oil breather tubing
to exhaust. Remove oil breather line.
17. Loosen tailpipe V- band clamp, disconnect tail-
pipe from turbocharger.
18. Disconnect wastegate oil inlet line. Cap and plug
line.
19. Loosen and remove attaching hardware from
wastegate at exhaust pipe connection flange. Discard
hardware and gasket.
20. Slide wastegate/crossover pipe assembly rear-
ward toward firewall. Two people may be required to
slide the crossover pipe assembly rearward off of the
slip joints to prevent binding at the slip joints.
21. Slide crossover pipe off of wastegate. A slip joint
is located between the crossover pipe heat shield as-
sembly and the wastegate connection. Lay wastegate
over top of engine and temporarily secure the waste-
gate to the engine to protect it from damage during en-
gine removal. Set crossover pipe aside, out of harms
way.
22. Disconnect fuel lines, inlet and outlet, at engine
fuel pump.
23. Shore up fuselage at tail skid; use shoring stand
to prevent tail from dropping after engine is removed.
24. Attach chain to forward and aft lifting eyes at top
of crankcase. Slightly lift engine to relieve weight from
engine mounts. Remove engine mount bolts from bed
mount/isolators.
25. Slowly raise engine. Be sure all lines, hoses and
wires are free.
71-00-20 - ENGINE INSPECTION & REPAIR
For specific engine inspection and overhaul instruc-
tions, consult engine manufacturer’s overhaul manual
and service instructions.
71-00-30 - ENGINE INSTALLATION
After engine has been secured to the engine mount per
engine mount sequence provided in Chapter 71-20-00:
71-00-02
 Loading...


