8 9
CONTROL PANEL & REMOTE CONTROL PLACEMENT & INSTALLATION
Cool
Fan
Dry
S
leep
High
ºC
ºF
Low
Time
F
ull
H
eat
1245 3
6
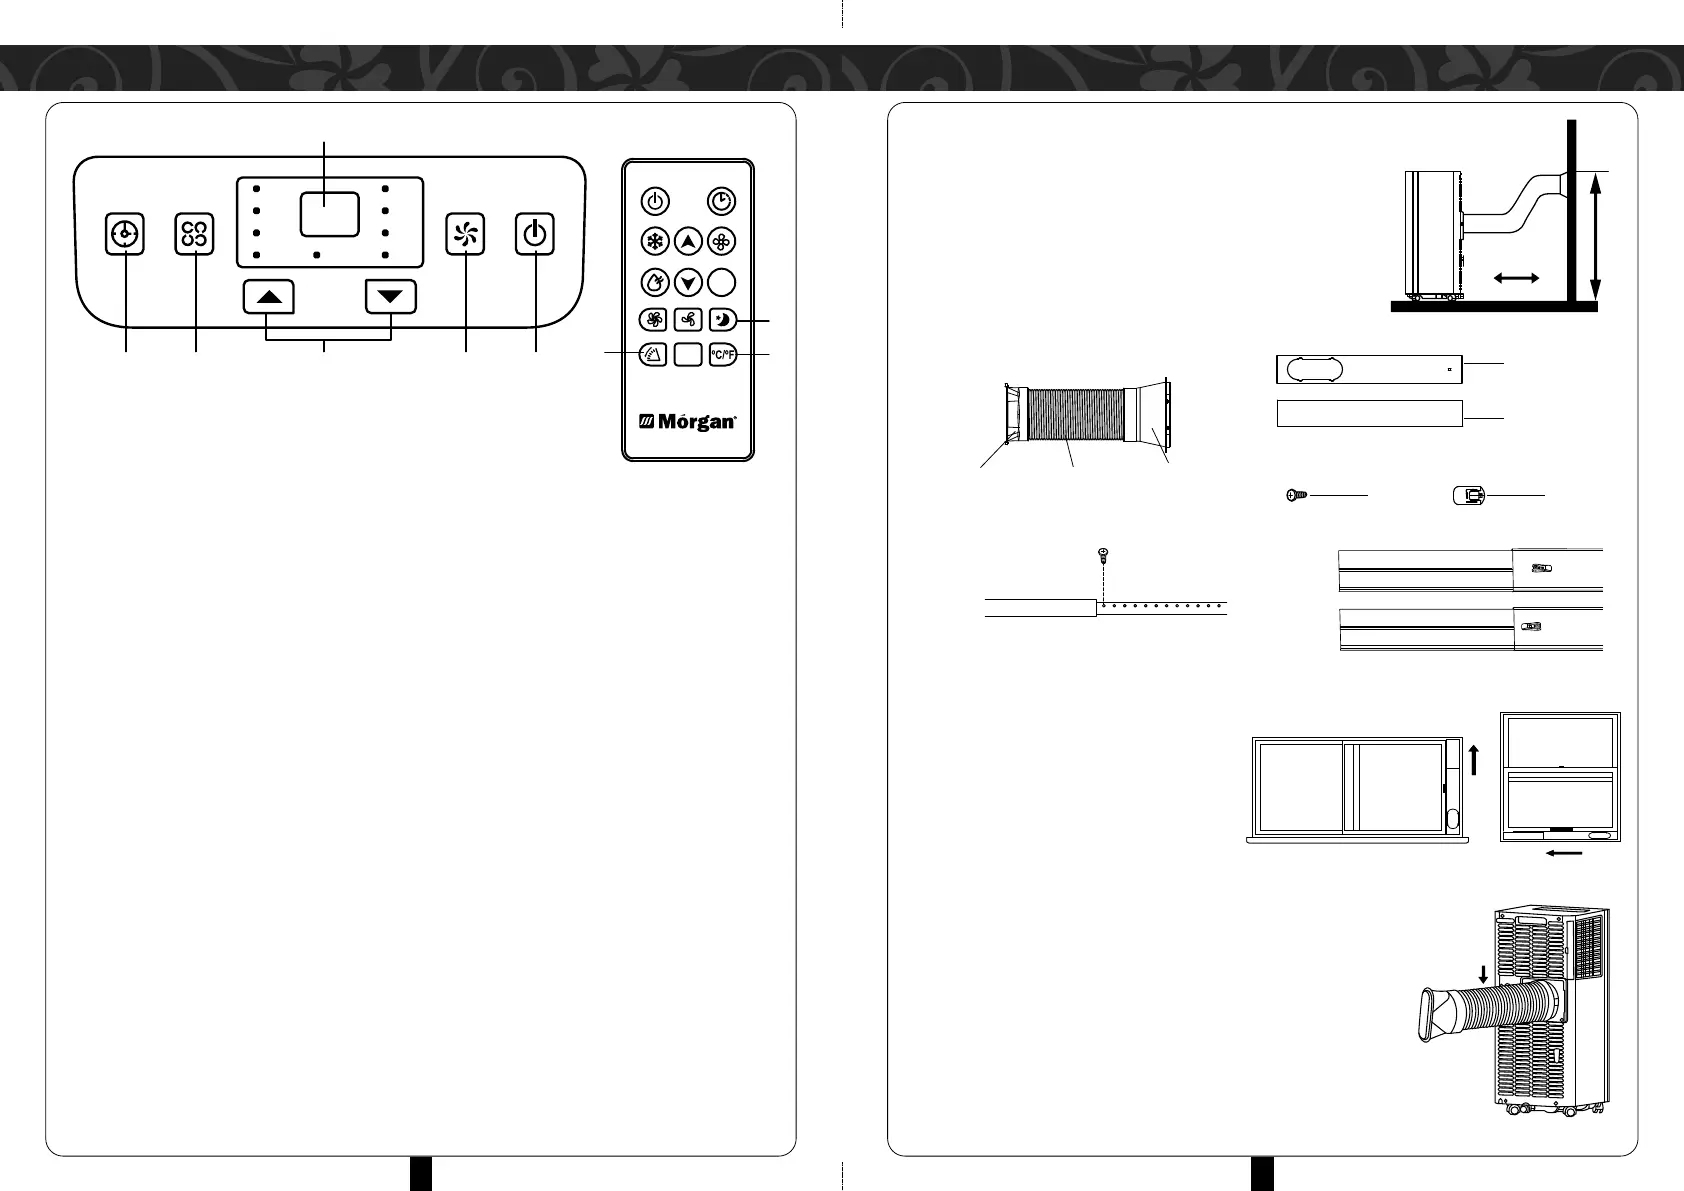
PLACEMENT
•
Place the appliance on a flat & sturdy floor,
preferably near a window.
•
The appliance should be placed at least 50cm
away from surrounding objects & the air
ventilations must operate unobstructed.
INSTALLATION
Exhaust pipe assembly
STEP 1:
Screw-fixture type
•
Measure window size.
•
Adjust length of window sealing plate to
fit window size.
•
Fix the plate with a screw
Clip-fixture Type
•
Measure window size.
•
Adjust length of window sealing plate to fit window size.
•
Once length of window sealing plate is determined, fix it by
using the toggle.
STEP 2:
•
Install the fixed window sealing plate on the window.
STEP 3:
•
Swirl the exhaust pipe assembly (exhaust fitting end) into the
rear panel outlet (counterclockwise).
Exhaust Joint Exhaust Pipe
Exhaust
Flat-mouth
T
ToggleScrew
Window
Sealing Plate 1
Window
Sealing Plate 2
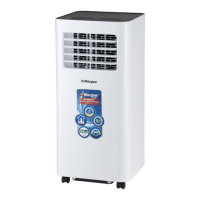
1. POWER BUTTON
Press button to power ON/OFF the unit.
2. FAN SPEED BUTTON
Press the key to select from high/low speeds.
3. TEMPERATURE/ TIME ADJUSTING KEY
Press the key at cooling mode to increase/reduce the setting temperature; press it at
timing mode to adjust timing ON/OFF time; press Up and Down keys simultaneously to
switch Fahrenheit and Centigrade degree temperature.
4. MODE BUTTON
Press key to select between "cooling", "heat", "fan" or "dry" modes
5. TIMER BUTTON
Press the key at standby mode to set ON time. Press the key at ON mode to set OFF
time.
6. TEMPERATURE/TIMER DISPLAY PANEL
The display will indicate current temperature and time.
7. SLEEP BUTTON
To activate sleep mode.
8. TEMPERATURE SWITCH BUTTON
Press this button to switch between ºC and ºF.
9. SWING BUTTON
After machine turns on, press this key, the louver will swing continuously left and right.
Press the button again to stop the movement and for the louver to remain in that
position.