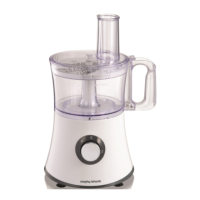
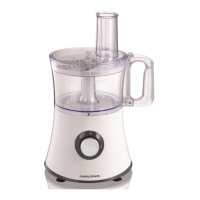
This document describes the Morphy Richards Food Processor, a versatile kitchen appliance designed for various food preparation tasks.
Function Description
The Morphy Richards Food Processor is a multi-functional appliance capable of blending, chopping, beating, whisking, slicing, chipping, and shredding. It comes with several attachments to perform a wide variety of tasks, making it a comprehensive tool for food preparation.
Important Technical Specifications
The appliance operates on an A.C. (Alternating Current) electricity supply. The voltage should correspond to the rating plate of the appliance. If the mains plug requires changing, a 3 amp BS1362 fuse must be fitted. The power cord is not replaceable; users should contact Morphy Richards for advice if it is damaged. The total operating time for blending should not exceed 3 minutes. For chopping, the total operating time should not be more than 90 seconds. When slicing, chipping, or shredding, a minimum 2-minute rest period must be maintained after each one-minute operation cycle. After three separate operational cycles, at least a 30-minute rest period is required to allow the appliance to cool down.
Usage Features
The food processor features a Speed Dial (8) with four settings: P (Pulse), 0 (Off), 1 (Low Speed), and 2 (High Speed). The pulse mode allows for quick, efficient bursts of power.
Blending:
- Assembly: Place the Blending Jug (15) on the Motor Base (7), aligning with the unlock position and turning clockwise until it locks into place. The blender will not work if the jug is not correctly positioned.
- Filling: Add food to the Blending Jug (15), ensuring not to exceed the maximum level indicated.
- Lid: Replace the Jug Lid (14) on the Blending Jug (15) and ensure it is fixed.
- Measuring Cup: Align the tabs of the Measuring Cup (13) to the grooves on the Jug Lid (14) and turn until locked.
- Operation: Connect the plug and set the Speed Dial (8) to the desired speed (1 or 2). For pulse blending, turn and hold the Speed Dial (8) to the P position.
- Completion: Turn the Speed Dial (8) to 0, remove the Blending Jug (15) by turning it anti-clockwise, carefully remove the Jug Lid (14), and serve.
- Operating Tips: For recipes with liquid, add liquid before solid ingredients. Not advised for mashed potato, grinding meat, or extracting juice. Avoid placing bones, large solid pieces, frozen food, or tough foods in the Blending Jug. Up to 6 ice cubes can be crushed; remove immediately to prevent refreezing.
- Warnings: Never use boiling liquids or run the appliance empty. The total operating time should not be more than 3 minutes.
Chopping:
- Assembly: Assemble the Driving Shaft (6) onto the Motor Base (7), ensuring it is clipped into position.
- Bowl Placement: Place the Bowl (5) on the Motor Base (7), aligning with the unlock position and turning anti-clockwise until locked.
- Blade Insertion: Insert the Chopping Blade (4) onto the Driving Shaft (6) securely, pressing it into position.
- Food Preparation: Place prepared food (cut into small chunks) into the Bowl (5).
- Lid: Place the Lid (3) onto the Bowl (5) and turn it clockwise until locked.
- Operation: Plug in and set the Speed Dial (8) to the desired speed (1 or 2). Use the P position for pulse blending.
- Completion: Turn the Speed Dial (8) to 0, unplug, open the Lid (3), remove the Chopping Blade (4), and then remove the Bowl (5) by turning it anti-clockwise.
- Warnings: Blades are extremely sharp; handle with care. Not suitable for hard substances (cheese, dried fruits, carrots, celery) or soft substances (onions, spinach). Raw and cooked meat should be boned and sliced. The total operating time should not be more than 90 seconds.
Slicing/Chipping/Shredding:
- Assembly: Assemble the Driving Shaft (6) onto the Motor Base (7). Place the Bowl (5) on the Motor Base (7) and lock it into place.
- Blade Selection: Fit the Shredding Blade (11), Slicing Blade (9), or Chipping Blade (10) (coarse or fine) into the Blade Holder (12). Hook the tab on the blade into the Blade Holder (12) at the left-hand side, then press down on the right-hand side to securely lock it.
- Blade Holder Placement: Place the assembled Blade Holder (12) with the chosen blade onto the Drive Shaft (6) and press down fully.
- Lid: Place the Jug Lid (14) onto the Bowl (5) and turn it clockwise until it locks.
- Operation: Turn the Speed Dial (8) to setting 1 for soft chopping or setting 2 for harder chopping. Use the Food Pusher (1) to feed food into the Feeding Funnel (2). Cut food to size to fit the funnel. Up to 1kg of food can be sliced at one time.
- Warnings: Minimum 2-minute rest periods must be maintained after each one-minute operation cycle. At least 30 minutes rest period must be maintained to let the appliance cool down after three separate operational cycles.
- Completion: Turn the Speed Dial (8) to "0", unplug, remove the Blade Holder (12), unlock the Bowl (5) by turning it anti-clockwise, and lift it off.
Maintenance Features
General Cleaning:
- Disconnect from power supply before cleaning.
- All detachable parts (except the Motor Base) should be washed with warm, soapy water and dried thoroughly.
- The Motor Base (7) should be wiped with a damp cloth and dried thoroughly; never immerse it in water. Ensure the interlock area is free of food particles.
- No parts are dishwasher safe.
Cleaning After Blending:
- Pour a little warm water into the Blender Jug (15), turn and hold the Speed Dial (8) to P position for a few seconds.
- Remove the Jug (15) and rinse under running water. Remove the Jug Lid (14) and Measuring Cup (13), then immerse in water and clean them with a soft brush, finally dry with a damp cloth.
- The Blade Base (16) can be disassembled for cleaning.
- Wipe the outside of the base with a damp cloth. Never immerse it in water. Then dry thoroughly. Ensure the interlock area is free of food particles.
Blade Cleaning (Blending Jug):
- Turn the Blending Jug (15) upside down and unscrew the Blade Base (16) anti-clockwise until loose, then remove.
- Clean the blade with a small brush in warm, soapy water and dry.
- Reassembly: Follow the instructions in reverse order, ensuring the Seal Ring (17) is correctly fitted on the Blade Base (16). Tighten the Blade Base (16) until secure.
- Warning: Sharp blades.
Cleaning After Chopping (Quick Cleaning):
- Pour 200ml of water and a drop of washing-up liquid into the Bowl (5), turn and hold the Speed Dial (8) to the P position for a few seconds. The Chopping Blade (4) should be fitted to agitate the water.
Cleaning After Slicing/Chipping/Shredding:
- Immerse the Bowl (5), Lid (3), Food Pusher (1), and Shredding (11), Slicing (9), or Chipping (10) Blade in warm soapy water and clean with a cloth or soft brush. Dry thoroughly.
- Disassembly: To remove the blade from the Blade Holder (12), turn the holder upside down and press the blade on the opposite side to the tab until it is released.
- Wipe the outside of the Motor Base (7) with a damp cloth. Never immerse the Motor Base (7) in water. Dry thoroughly.
- Note: Some food may discolour the Blade Holder (12), which is normal and will not harm the plastic or affect food flavour. Rub with a cloth dipped in vegetable oil to help remove discolouration.
Health and Safety
- This appliance can be used by persons with reduced physical, sensory, or mental capabilities, or lack of experience and knowledge, if supervised and instructed on safe use and hazards.
- Children shall not play with or use the appliance. Keep the appliance and cord out of reach of children.
- Do not use the food processor continuously for longer than 3 minutes when the blender jug is fitted. Allow to cool for 10 minutes after such use. Refer to pages 7-9 for other times.
- Avoid touching moving parts. Keep hands, hair, clothing, and utensils away from attachments during operation to prevent injury or damage.
- Switch off and disconnect the appliance from the supply before changing accessories or approaching moving parts.
- If the supply cord is damaged, it must be replaced by the manufacturer, its service agent, or similarly qualified persons to avoid a hazard.
- Unplug from the outlet when not in use, unattended, and before assembling, disassembling, or cleaning.
- Do not use outdoors or in a bathroom.
- Always locate the appliance away from the edge of the worktop.
- Do not let the mains cable hang over the edge of the worktop where a child could reach it, run across an open space, or run across a cooker or other hot area.
- The mains cable should reach from the socket to the base unit without straining connections.
- Do not use the appliance for anything other than its intended purpose.
- Misuse of the appliance could cause personal injury.
- The use of attachments or tools not recommended or sold by Morphy Richards may cause fire, electric shock, or injury.
- Do not operate any appliance with a damaged cord or plug, or after it malfunctions or has been damaged.
- Check that the voltage on the rating plate corresponds with your house electricity supply. A 3 amp BS1362 fuse must be fitted if the mains plug fuse needs changing.
- Morphy Richards products are intended for household use only.
Guarantee
The product comes with a 1-year guarantee. It is important to retain the retailer's receipt as proof of purchase. The guarantee covers faults caused by accidental use, misuse, negligent use, or use contrary to manufacturer's recommendations. It does not cover damage caused by power surges or transit. Repairs attempted by unauthorized persons, use on incorrect voltage, for hire purposes, or if the appliance is second-hand are not covered. Batteries and damage from leakage are also excluded. The guarantee does not cover consequential loss or damage and is an additional benefit that does not affect statutory rights. The company reserves the right to change product specifications at any time due to continuous improvement.
For electrical products sold within the European Community, at the end of their useful life, they should not be disposed of with household waste. Please recycle where facilities exist and check with your local authority or retailer for recycling advice.