9
I
f the unit is switched on with the Steam
Control Dial
(6)
on, all buttons will flash. The
S
team Control Dial must be turned to the off
p
osition.
I
f you want to make another coffee after using
steam, ensure the Steam Control Dial
(6) is in its
off state and the Two Cup and One Cup Buttons
(
2/3)
a
re pulsing, the unit is cooling down. The
buttons will illuminate solidly when it’s back down
to temperature and ready to make coffee again.
This can be accelerated by turning the Steam
Control Dial to on, water will pump through and
cool. Ensure there is a receptacle under the
Steam Wand
(12)
.
ENSURE THE FILTER HOLDER (21) IS LOCKED
INTO POSITION CORRECTLY AT A RIGHT
ANGLE TO THE MAIN UNIT AND SECURELY
LOCATED IN THE BREWING HEAD (10)
BEFORE USE.
WHEN FROTHING MILK, ENSURE THE STEAM
CONTROL DIAL
(6) IS OFF BEFORE REMOVING
THE STEAM WAND (12) FROM THE MILK.
When dispensing coffee, (see ‘Using Your Coffee
Maker’, step 5, page 7) you may press and hold
the Two Cup or One Cup Button
(2/3) to continue
dispensing coffee until the button is released. The
machine will store dispensed volumes up to a 60
second maximum limit. If you dispense for longer
than 60 seconds, it will dispense the volume but
not store it in the program. For subsequent use,
one press will dispense the programmed amount
for that button.
Factory dispense settings can be restored by
pressing the One Cup Button
(3) and Steam
Button (1) together for 3 seconds, until you hear
a beep.
NOTE: Both the Two Cup and One Cup Buttons
(2/3) can be programmed.
After using the Steam Wand
(12), the water in the
boiling chamber will be too hot to brew coffee
without burning the grinds. The water will be the
correct temperature when the Two Cup and One
Cup Buttons
(2/3) illuminate solidly. The Two Cup
and One Cup Buttons will not function until they
are illuminated solidly.
Your Espresso Coffee Machine will automatically
s
witch off 30 minutes after brewing coffee.
To reactivate the coffee maker, press the
On/Standby Button (4) once to exit standby and a
s
econd time to start pre-heating for further use.
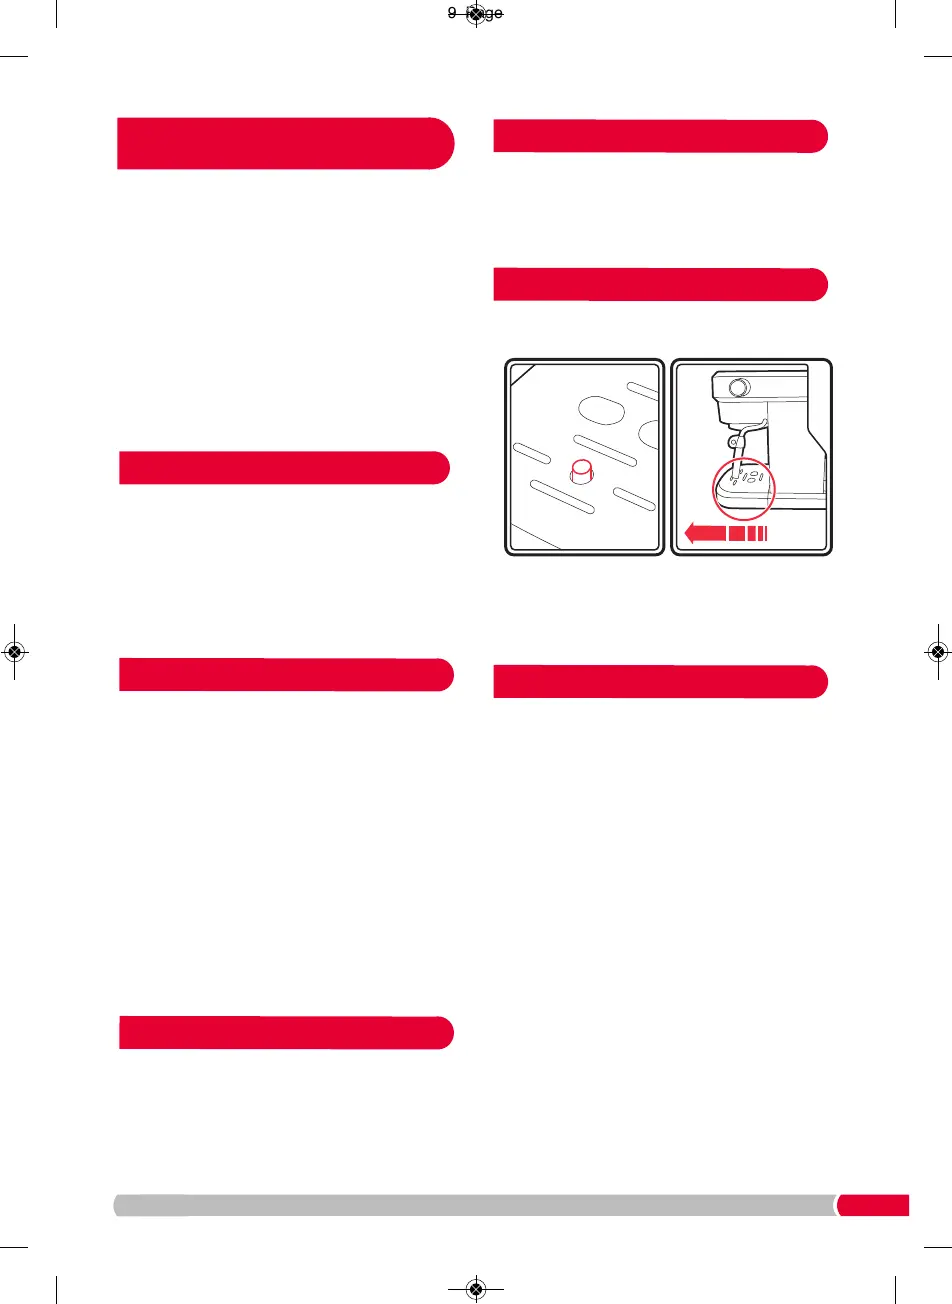
W
hen the water in the Removable Drip Tray
(
15)
i
s
full, the Drip Tray Full Indicator
(16) will be visible.
1. Remove the Drip Tray from the appliance and
empty.
2. Clean the Drip Tray Grid (11) and Drip Tray with a
damp cloth before replacing.
The best method to make a long drink is to press
and hold the Two Cup or One Cup Button (2/3).
NOTE: If this time is below 60 seconds the
volume will be stored, see 'Altering Dispense
Amounts'.
In addition, hot water can be dispensed from the
Steam Wand
(12).
Ensure the Steam Control Dial
(6) is in the closed
position. Turn the unit on, and place a cup or
vessel under the Steam Wand (12). Ensure the
Steam Button (1) is off, and the Two Cup and One
Cup Buttons (2/3) are illuminated solidly. Open
the Steam Control Dial, and hot water will flow
through the Steam Wand.
Take care performing this process as the hot
water will 'pulse' into the cup.
USAGE WARNING
Altering
D
isp
ense
Am
o
unts
Notes on Using the
Steam Wand
Ti
p
S
t
a
nd
b
y
M
o
d
e
Em
p
ty
ing
T
he
D
rip
T
r
ay
Ad
d
ing
H
o
t W
ater