Page 3
Attaching the Wheels / Adjusting the Front Wheel Alignment
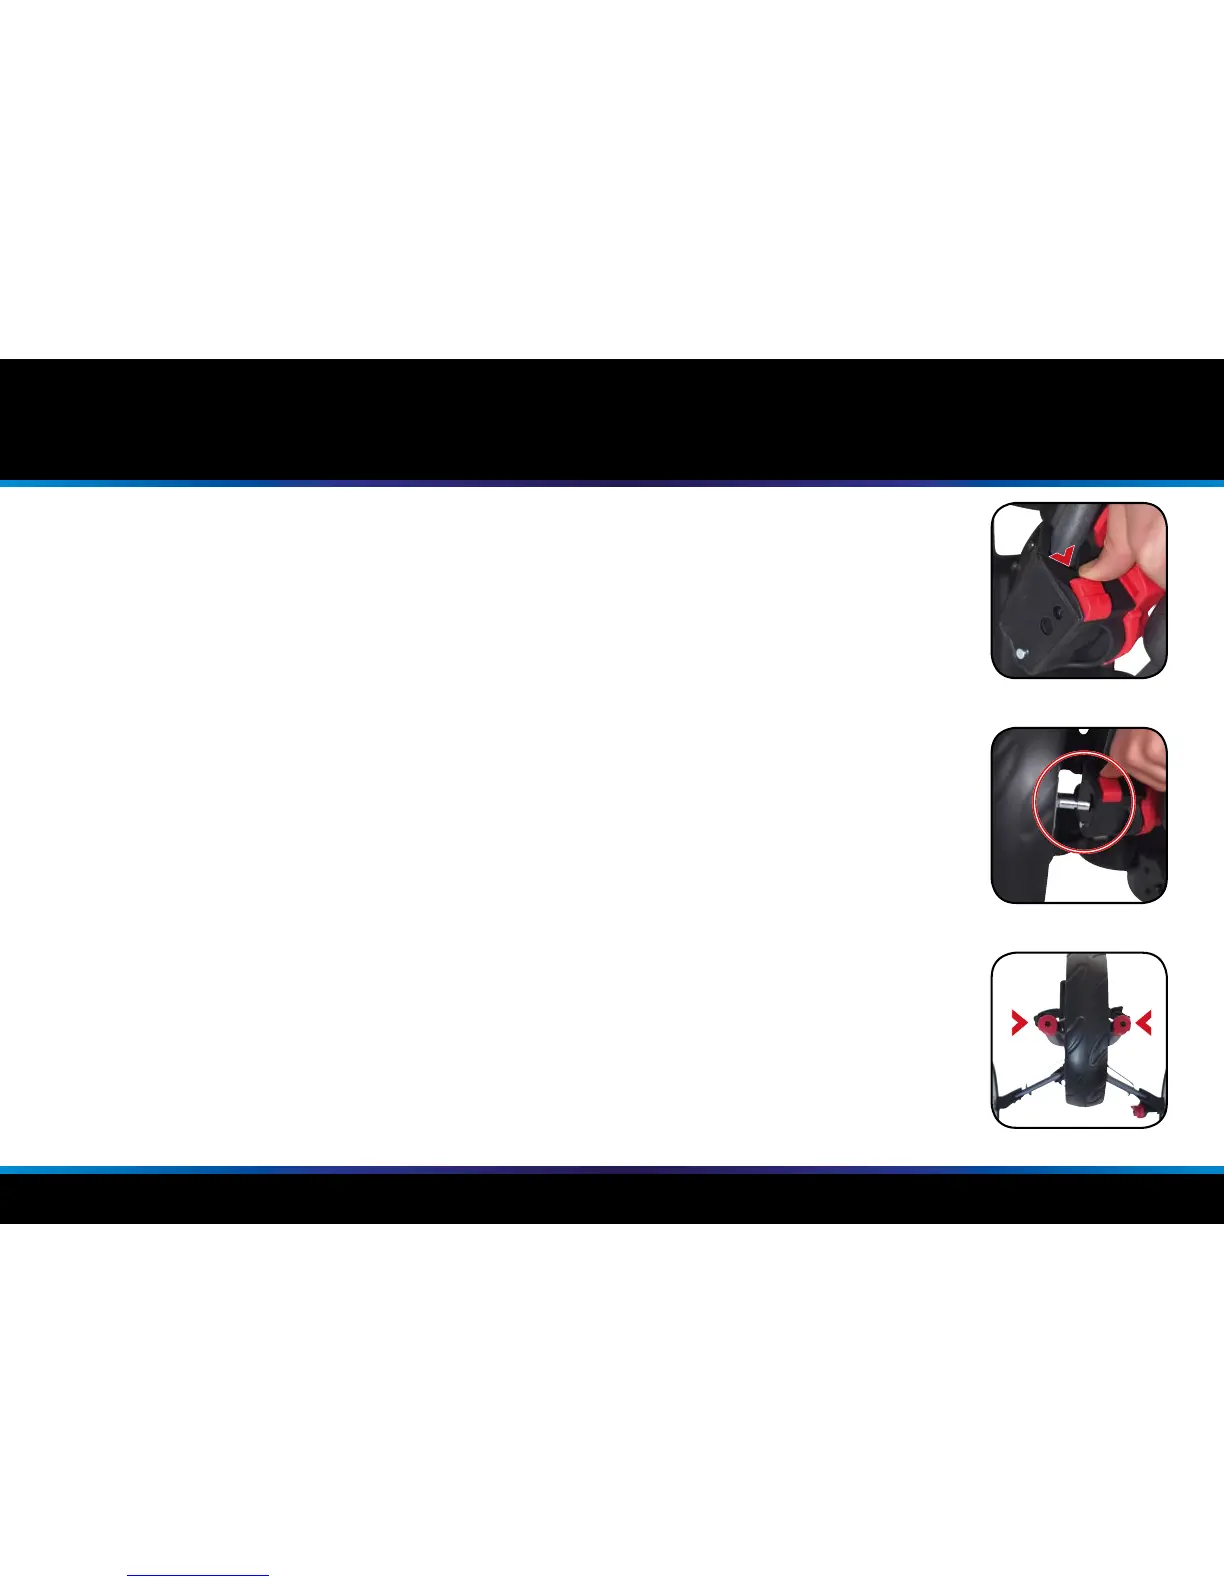
Fig 1
Fig 2
Fig 3
Attaching the Rear Wheels
The Motocaddy CUBE / CUBE CONNECT has no denitive left or right wheel.
To attach the wheels, slide the release button down (g. 1) and push the wheel axle into the housing (g. 2).
Adjusting the Front Wheel Alignment
In the unlikely event that your trolley is not tracking in a straight line, the alignment of the front wheel
can be adjusted to rectify the fault. This problem can be caused by a number of factors including a
slightly loose bag support or an unevenly packed golf bag. Should you wish to alter the alignment of
the front wheel you will require a Phillips screwdriver to follow these simple steps:
1. There are two screws on either side of the housing that are used to realign the wheel (g. 3)
2. If your trolley is veering to the right, turn the left screw counter clockwise and the right screw clockwise
3. If your trolley is veering to the left, turn the right screw counter clockwise and the left screw clockwise
This procedure can be carried out until you are happy the trolley is moving in a straight line (please
note you may only need to adjust one screw at a time).
NB : These instructions are based on positioning yourself in front of the trolley looking at the wheel.