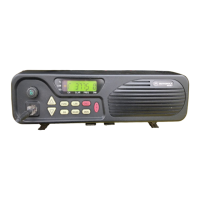
3-2.1.3 Removing the MICOM-3T Front Cover
Release the four screws of the front cover.
Figure 3-3. MICOM-3T Front Cover
Removal
3-2.2 Removing the Cover (8)
See the corresponding MICOM-3 exploded view.
1. Remove the 2 screws (15) securing the cover (8) to the chassis (1).
2. Lift the cover over the chassis.
3. Remove the 2 RF coax cables (16) and the 40-pin flat cable (3).
3-2.3 Removing the RF Shield (13)
See the corresponding MICOM-3 exploded view.
1. Release the 6 screws (14) of the RF shield (12).
2. Remove the RF shield (12) and upper contacts (11) by gently prying up each corner of the
shield.
3-2.4 Removing the High Power Board (4)
See the corresponding MICOM-3 exploded view.
1. Remove the PA shield (7).
2. Unplug the antenna connector from the PCB.
3. Remove the screws (5) and (6) securing the High Power board to the radio chassis.
4. Remove the screws securing the power transistors and the final transformers.
5. Remove the 4 screws securing the 4 regulators.
6. Carefully remove the High Power board (4) by rotating it out of the chassis.
3-2.5 Control Head Disassembly
See the corresponding Control Head exploded view.
1. Release screw (15) from the PCB and unplug the speaker connector.
2. To pull out the printed circuit board from the control head housing, insert a small blade screw
driver in the side groove near the five protruding tabs. Remove the board from the control
head housing.
3. Remove the keypad from the PCB assembly.
4. Disconnect the board from the speaker by removing it from the socket.
Cat. No. 6886859J01 3-3
 Loading...