5. Take the LCD frame or other parts out of the control head.
3-3. MICOM-3 Assembly
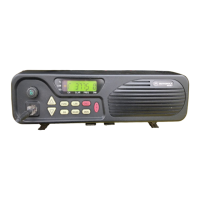
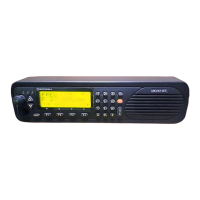
3-3.1 Control Head Assembly
See the corresponding Control Head exploded view.
1. Place the speaker gasket (2) on the front panel (1) with the adhesive side towards the speaker.
2. Make sure the speaker (3) including the gasket is well positioned.
3. Position the speaker spacer (4) on the speaker (3) and secure it with 4 screws (5).
4. Insert the volume knob (6) into the knob opening located on the front panel. Ensure the knob
fits and that you are able to rotate it in the clockwise direction.
5. Insert the LCD frame gasket (7) into its place.
6. Position the color sheet on the LCD frame.
7. Position the LCD display 18) onto the LCD frame and snap it into its place.
8. Insert the LCD frame with LCD and Zebra connectors into its place.
9. Place the keyboard onto the board assembly, making sure the keypad (12) is flush with the
board.
10. Rotate the knob counter-clockwise to the OFF position.
11. Position the PCB holder 114) on the PCB and snap it in place. Secure it with the screw (15).
12. Position the LCD window (16) and the logo label (17) in the front panel.
3-3.2 High Power Board Assembly
See the corresponding MICOM-3 exploded view.
1. Ensure the regulator insulators are located on the chassis.
2. Inspect and if necessary, reapply thermal grease to the heatsinking pads on the chassis.
3. Replace the PA insulator (2) on the High Power board.
4. Connect the 40-pin flat cable (3) to the High Power board connector and replace the board on
the chassis.
5. Insert the 40-pin flat cable through the opening towards the Control Head.
6. Position the High Power board correctly on the chassis (the 3-pin connector faces its recess in
the chassis).
7. Install the power transistor screws (6).
8. Install the regulator screws.
9. Install the transformer screw.
10. Install the board screws (5).
11. Connect the antenna connector plug to the PCB.
3-4 Cat. No. 6886859J01
 Loading...