12 Getting Started
2.
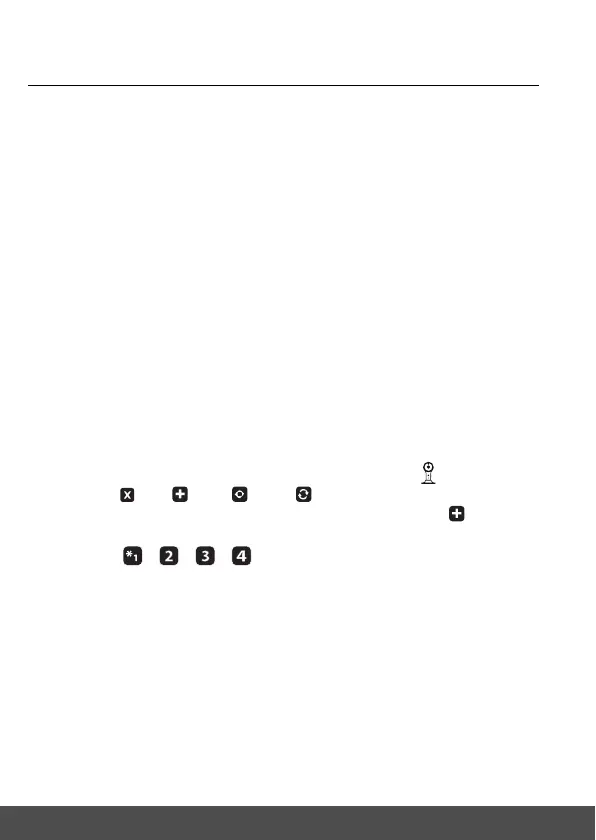
4 Registration (Pairing)
The Baby Monitor is pre-registered to your Parent Unit. You do not
need to register it again unless the Baby Unit loses its link with the
Parent Unit.
To re-register your Baby Unit, or register a new Baby Unit, follow the
procedures below:
1. Press the
M
button and the menu bar will pop up.
2. Press the
<
LEFT button or
>
RIGHT button until is highlighted,
and the del/ add/
view/
scan menu will pop up.
3. Press the
+
UP button or
-
DOWN button to select add, and
press the
O
button to confirm.
4. Camera
/ / / will pop up. Press the
+
UP button or
-
DOWN button to select the desired Camera, and press the
O
button to start searching for a camera unit.
Note: If a camera is currently paired with the Parent Unit, its
camera location (with a * against it) cannot be selected for a new
registration.
5. Press and hold the PAIR button on the underside of the Baby
Unit until the Parent Unit finds the camera, beeps and PAIR OK
appears on the screen. The video from the camera will then
appear.
NOTE
A camera can only be registered to one Parent Unit at any one time.
1. Mark the positions of 2 screw holes on the wall. Drill a screw hole at each
marking.
2. Install the supplied wall anchors into 2 screw holes on the wall.
3. Insert the supplied wall mounting screws into the wall anchors.
4. Fix and fasten the underside of the baby (camera) unit and the wall mount
bracket with the supplied separate screw.
5. Hang the wall mount bracket on the wall mounting screws on the wall.
6. Adjust the camera manually if necessary.
Note
The pack includes a power adapter with a longer cord which is beneficial for
wall mount application, where your wall socket is far from the camera.

 Loading...