Use the steps below as a guide to quickly set up your camera so it will function using the factory
default settings.
STEP 1
Open camera cover. Install 4 C-cell alkaline batteries. Make sure that the polarities on the
batteries match the polarities indicated in the battery chamber. Recommended for use:
Duracell® or Energizer ® batteries.
STEP 2
Insert SD Memory Card until you hear an audible click. Camera will not operate without SD card.
Slide the Mode switch to setup. To set the time and date, press the enter button and use the
Up/Down buttons to change settings. Press Select to lock in the setting.
STEP 3
Mount camera in desired location using a mounting
strap. Switch camera to IR AIM. Aim camera using
motion detection to determine target area. Walk in
front of at the desired distance and the camera LED
will ash indicating the area which is detected.
STEP 4
Set the Delay and Resolution. Slide the Mode switch to
Auto. The camera will start count down. Close cover
and secure. The camera will operate using default
settings. You may also customize the settings if required.
Slide the UNLOCK switch on the bottom of Camera and use the knob to pull the
slide-out Battery Tray. Install or eight(8) AA size alkaline or lithium batteries
with polarities as indicated in the Battery Tray. Re-install the Battery Tray.
Thread the provided Mounting Strap through the Eyelets on the back of the
camera and secure to a tree or pole approximately 36" from the ground as shown.
Turn Camera on by sliding ON/OFF/IR TEST switch
to the ON position.
Press the MODE button one time to get to the
Camera Setup Menu. Set Time and Date by pressing
ENTER, using UP/DOWN to adjust selected field,
LEFT/RIGHT to move to the next field and ENTER
when done.
Press MODE button until MENU SELECTION
screen is displayed. Use the UP/DOWN buttons
until the MAIN SCREEN option is highlighted
yellow. Press ENTER.
Your Camera will now automatically take pictures
whenever an animal is detected in range -based on
the default settings below.
M-880 GameSpy Digital CameraPlotStalker Software Page 3
Page 14
PLOTSTALKER ACTIVITY SEARCH
B
ACTIVITY SEARCH
The Search Feature will scan through your photos and automatically
look for changes in regions that you identify in Setup.
In search mode, the PlotStalker software scans through the .mlt photo file, stops
on a photo when changes are found in your identified region, and then highlights
the changes in blue. You can click anywhere in the video viewing area to remove
the blue highlights.
ACTIVITY SEARCH SETUP
Click the Settings button to activate
the Region and Sensitivity settings
for the Activity Search
1
2
3
Click on the Set Motion Search Area Button.
Use the mouse to select and drag the red outline around the area you want to
search for movement. This allows you to focus on a very precise area if
required.
Click OK button on the Settings Popup window to confirm your settings and
exit the menu.
Set to High, Medium or Low - This sets the level of pixel change the program
will detect. Note; a pixel change will occur with a color, intensity, lighting or
movement so this setting is critical to obtain the desired results.
1
SENSITIVITY
Click on Default button to return to the default values for Search Area and
Sensitivity settings.
GPS Latitude - 000.000000 N
GPS Longitude - 000.000000 W
1
DEFAULT SETTINGS
DEFINE SEARCH REGION
Provides the ability to search for
changes in the photo in a specific
region rather than the entire photo.
Photo Delay after each photo is taken 5 SEC
Info Strip printed on photos
ON
GPS Longitude & Latitude:
000.000000 N / 000.000000 W
Delete All?
Default Setting
Security Code 00000
TIME/DATE:
AM
12:00 2011/1/01 CAMERA ID: 1
QUICK START INSTRUCTIONS
II
DEFAULT SETTINGS
III
Page 3
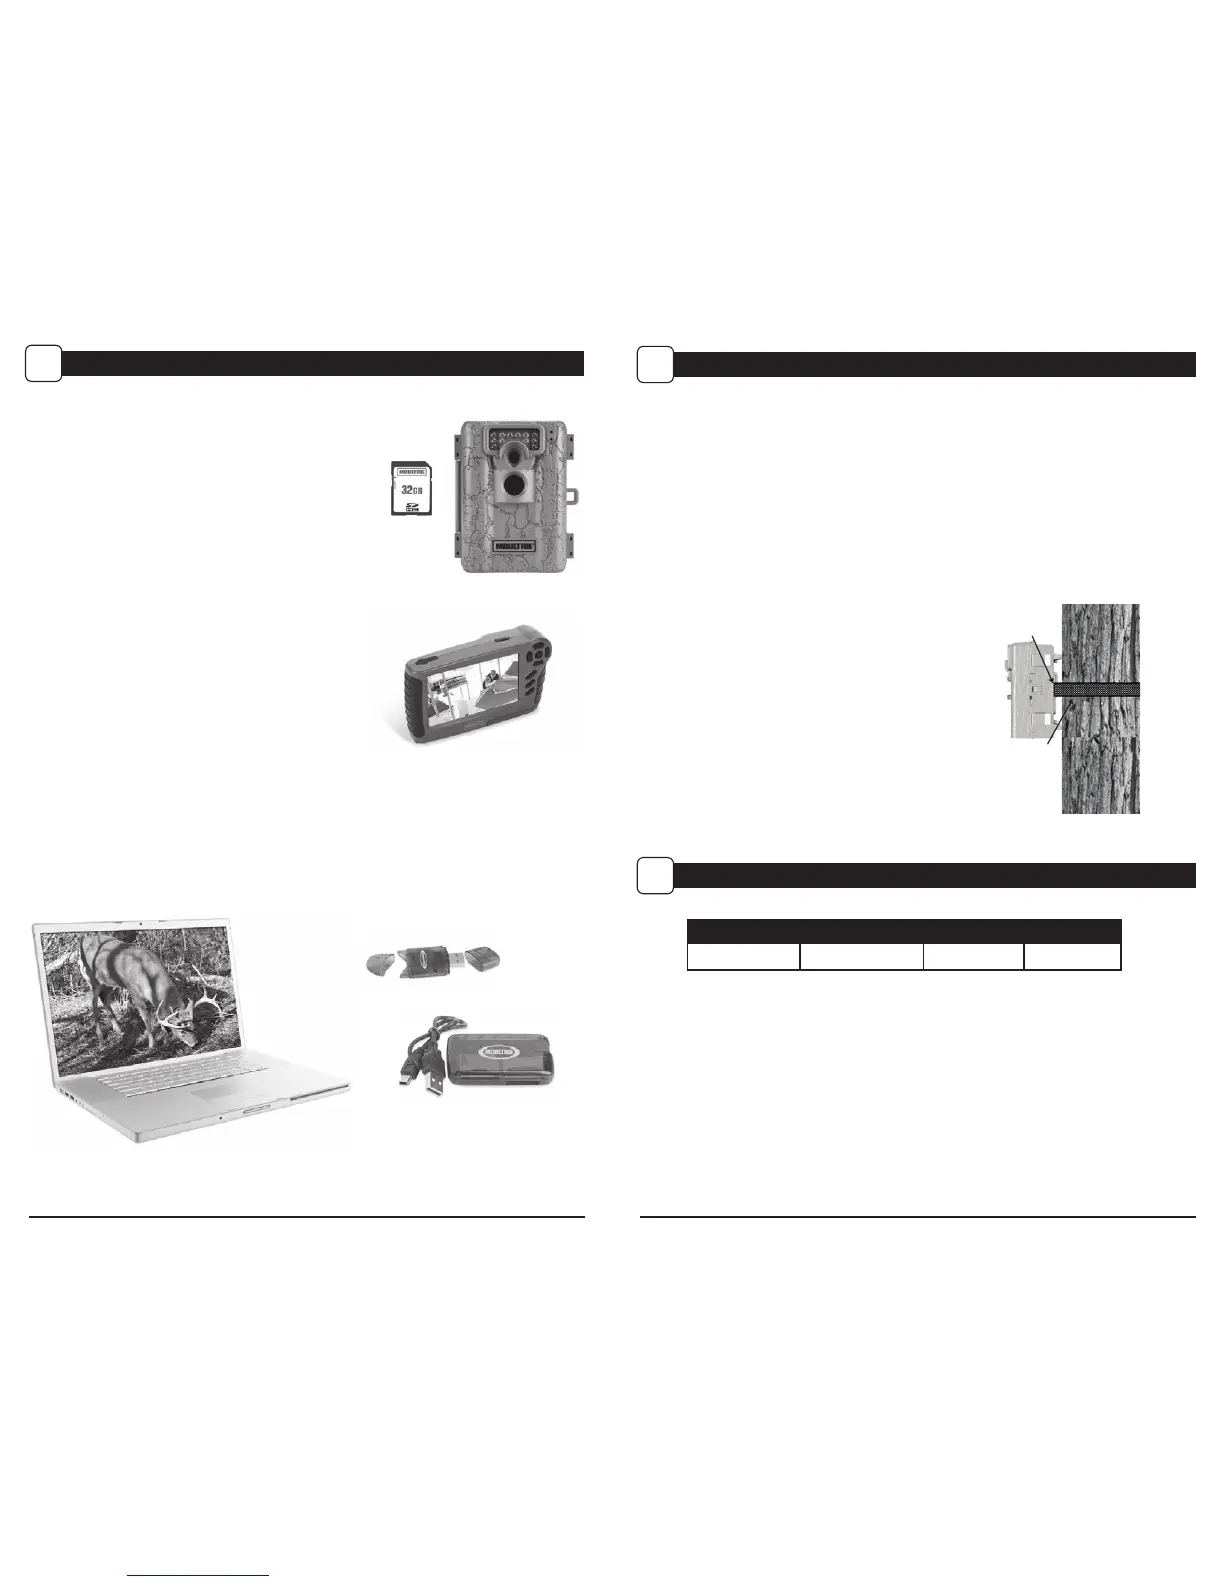
A-5/A-8 Digital Game Camera
Page 10
A-5/A-8 Digital Game Camera
Factory Settings
There are a number of ways for you download and view
the pictures, videos in the eld or at another location.
Removing the SD Card
To remove the SD Memory Card, open the camera cover
and push gently on the SD card and it will pop out slightly
allowing you to remove it. Load the SD card into the
player or card reader to view or move stored images to
another location.
Important
Make sure that the camera is in the OFF position before
removing SD card.
ln the Field
You can download the pictures or videos with the aid
of external devices. To download, use an external player
or card reader that is supported by 12V DC or Mini USB Jack.
At Home
Remove the entire camera and transport to another location to download images. To connect the
camera to a PC computer, turn the camera ON, press the MENU button once to change to SETUP
Mode. Connect the mini USB cord (not included) between the USB out port and the PC computer. The
computer will recognize the camera as a removable drive. The unit works with Windows XP/Vista/7
and Mac OS X. Copy the images and videos from the camera onto your PC for further editing or
printing. When the USB cable is disconnected, the camera will go back to SETUP mode.
VIEWING YOUR IMAGES
IX
See the full line of Moultrie camera accessories at www.moultriefeeders.com
 Loading...