Installaon instrucon:
Secon 1: Wood Stud Installaon:
2x4 Stud Wall
(16-24" Spacing)
Outlet located
next to stud
5
Note: Please read all installation instructions carefully before installation.
For standard wood stud installation please start at Section 1: Wood Stud Installation.
For Concrete/Mortar installations please refer to Section 2: Concrete/Masonry Installation.
1. Locating a Stud: First you will need to locate the stud in the wall you wish to mount your TV
to. If you know how to locate your stud please continue to Step 2. If you do not know how to
locate your stud please continue.
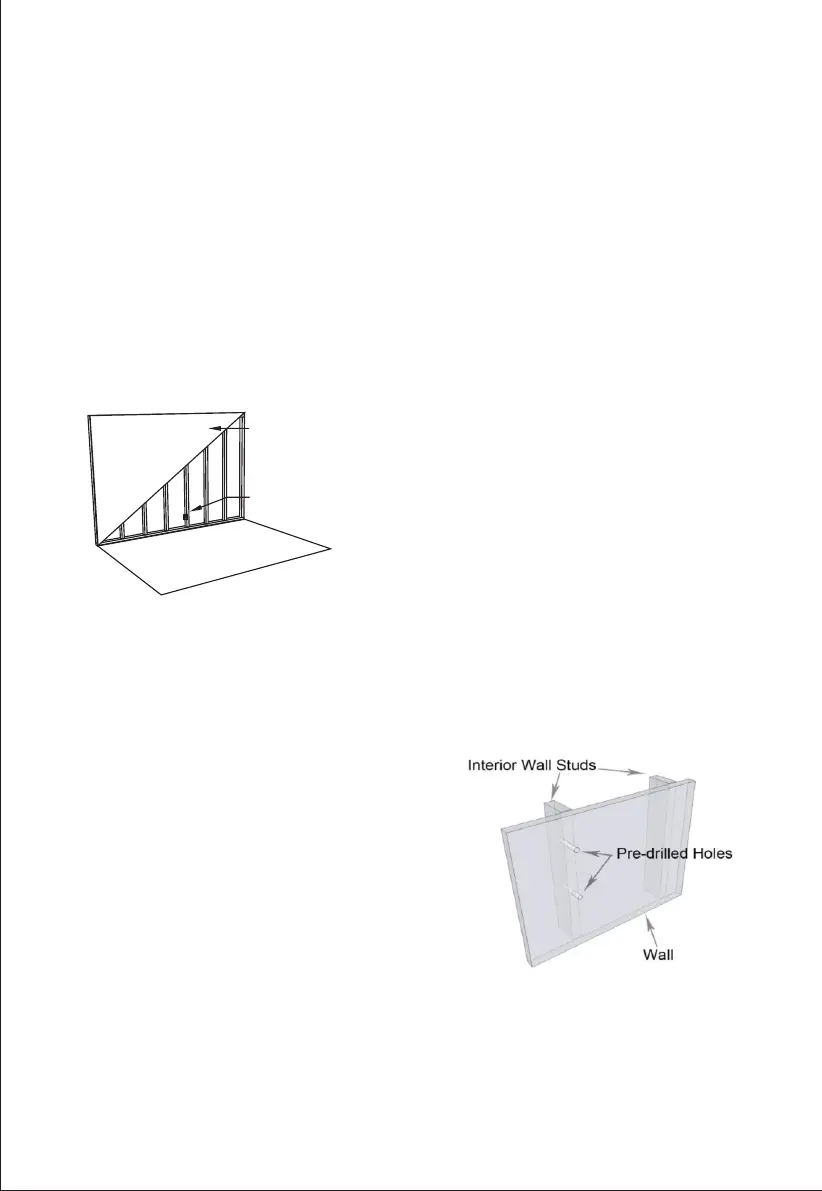
Finding a Wooden Stud in Your Home: One quick way to nd a wall stud is to nd a power
outlet on the wall. Wall outlets are normally located next to a stud. The easiest way to conrm
the location of a stud is with an electronic stud nder, which you can purchase at any
hardware store.
Once you nd an initial stud, other wall studs are
typically located in the wall every 16”. Please note in
some homes they are constructed with studs every
24". Additionally, many walls have “non-standard”
studs located next to doors, windows and replaces.
To get the best support for your mount, it is important
that you put the mounting screws for your wall plate
into the center of the wall stud. If it is difcult to
determine the exact center of the stud with your stud
nder, you can get the exact location of the stud
using a thin nail and hammer. With the hammer, pound the thin nail into the wall in the area of
the stud. If the nail is to the side of the stud it will go through the drywall and easily into the
empty space in the wall. If the nail is on the stud, once it goes through the drywall, it will not go
into the wall easily as it is hitting the wood of the stud. Keep repeating this process in the area
of the stud until you can tell exactly where the stud starts and ends. The middle of these two
points is the center of the stud.
2. Mark and Pre-Drill Installation Points: Once
you have located your studs, Mark the hole
locations where you intend to drill, assure that
they are level with one another. Use a 5mm drill bit
to pre-drill four holes to a depth of 2”. If you do not
have a metric drill bit a 3/16” drill bit will work as
well.