11
GB
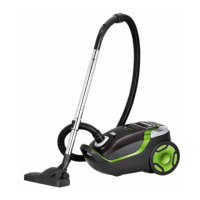
12. Carrying handle
13. Suction hose connection opening
14. Motor filter
15. Dust bag
16. Dust bag frame
17. HEPA 13 filter
18. Air discharge filter sponge
19. Air discharge filter grill
20. Metal telescopic wand
21. Suction hose
22. Suction hose mounting ring
23. Suction hose handle
24. Floor and carpet tool
25. Parquet brush tool
26. Crevice tool
27. Oval brush
28. Rubber-tyred wheels
29. Power cord
STATIC ELECTRICITY
Vacuum cleaning certain surfaces at a low air humidity may cause slight electrification of the
appliance. This is natural, does not damage the appliance and does not constitute its defect.
To minimise this phenomenon, it is recommended to:
frequently discharge the appliance by touching items in the room with the metal pipe,
increase air humidity in the room,
use generally available anti-electrostatic products.
APPLIANCE ASSEMBLY
1. Press both latches on the suction hose mounting ring (22), insert the ring into the opening
(13) and release the latches. To disassemble, press the latches again and remove the ring (22)
from the opening (13).
2. Connect the wand (20) to the handle (23) on the other end of the suction (21). Install one of
the tools, (24), (25), (26) or (27), on the end of the wand.
3. The oval brush (27) and crevice tool (26) are located in the accessory holder. The holder can
be accessed by pressing the button (10) and opening the cover (11).
USING THE APPLIANCE
1. Before turning on the vacuum cleaner, unwind the power cord (29) to a suitable length and
plug it into the mains socket. The yellow mark on the power cord indicates the optimum
length. Do not pull out the cord beyond the red mark! While unwinding the cord, do not
press the cord winder button (2).
2. Press the switch (1) to turn on the vacuum cleaner.
3. To wind the power cord, press the cord winder button (2) with one hand while holding the
cord with the other hand to prevent a sudden movement that could damage it.

 Loading...