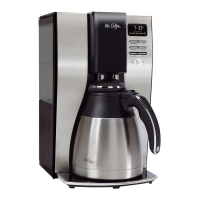
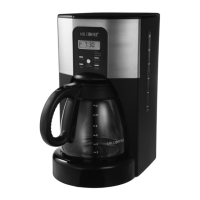
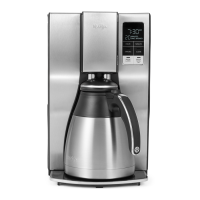
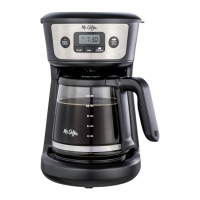
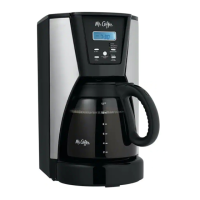
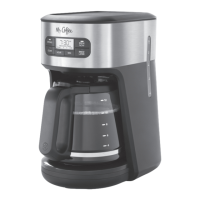
This document describes the Mr. Coffee PC12 Series 12-cup coffeemaker, a device designed to brew coffee.
Function Description:
The Mr. Coffee PC12 Series coffeemaker is designed to brew coffee. It offers both "Brew Now" for instant brewing and "Brew Later" for delayed brewing, allowing users to wake up to freshly brewed coffee. The coffeemaker features a "grab-a-cup auto pause" function, which temporarily stops the brewing cycle if the carafe is removed, allowing a user to pour a cup before brewing is complete. It also includes a 4-hour auto shut-off for safety and energy conservation.
Important Technical Specifications:
The coffeemaker is a 12-cup capacity device, meaning it can brew up to 12 cups of coffee at a time. It uses a standard basket-style paper filter or a reusable filter. The device is equipped with a polarized plug for electrical safety, which means it has one blade wider than the other to reduce the risk of electric shock. The power cord can be a short power-supply cord or a detachable power-supply cord, and if a longer detachable power-supply cord or extension cord is used, it must be rated at least as great as the electrical rating of the appliance and be a grounding type 3-wire cord.
Usage Features:
- Brew Basket: Holds the coffee grounds during brewing.
- Water Reservoir: Stores the water for brewing.
- Brew Later Button: Used to set a delayed brewing time.
- Brew Now Button: Initiates immediate brewing.
- Clock Display: Shows the current time and brewing settings.
- Hour/Minute Buttons: Used to adjust the time settings.
- Carafe: The glass pot that collects the brewed coffee. It has measurement markings for 4, 6, 8, 10, and 12 cups.
- Shower Head: Distributes water evenly over the coffee grounds.
- Warming Plate: Keeps the brewed coffee hot for up to 4 hours after brewing, after which it automatically shuts off.
Control Panel:
The control panel includes:
- Clock Display (A): Shows the current time or programmed brew time.
- PM Indicator (B): Lights up when the time displayed is PM.
- Brew Now Indicator (C): Illuminates when the "Brew Now" function is active.
- Brew Now Button (D): Activates immediate brewing.
- Minute Button (E): Used to set the minutes for the clock or brew later time.
- Hour Button (F): Used to set the hours for the clock or brew later time.
- Brew Later Button (G): Activates the delayed brewing function.
- Brew Later Indicator (H): Illuminates when the "Brew Later" function is active.
Getting Started:
- Unpacking: Remove all packaging and plastic bags, cartons, and tape from the unit.
- Cleaning: Wash the carafe, lid, and brew basket in a mixture of mild detergent and water. Rinse thoroughly. Wipe the exterior with a damp cloth.
- First Brew: Fill the water reservoir with clean water up to the 12-cup line. Add a standard basket-style paper filter or reusable filter to the brew basket. Do not add coffee grounds for the first brew. Run a brew cycle to clean the internal components. Discard the water in the carafe and rinse the carafe, carafe lid, and brew basket.
- Setting the Clock: Plug in the coffeemaker. The display will flash "12:00". Press the "HR" and "MIN" buttons to set the current time. 5 seconds of inactivity will set the time.
- Water Filtration System (optional): The coffeemaker can use a carbon-based water filter to improve water quality. The filter should be replaced every month (approximately 30 brewing cycles).
Brewing Coffee:
- Brew Now: Fill the water reservoir with water to the desired level. Add coffee grounds to the filter. Press the "Brew Now" button. The "Brew Now" light will illuminate, and brewing will begin. The warming plate will keep coffee hot for up to 4 hours.
- Brew Later: Set the desired brew time using the "HR" and "MIN" buttons. Press the "Brew Later" button. The "Brew Later" indicator will light up, showing that the coffeemaker is pre-set to brew at a later time.
Suggested Coffee Measurement Chart:
- 12 cups = 60 oz. = 12 tbs.
- 10 cups = 50 oz. = 10 tbs.
- 8 cups = 40 oz. = 8 tbs.
- 6 cups = 30 oz. = 6 tbs.
- 4 cups = 20 oz. = 4 tbs.
For a bolder cup, use heaping tablespoons.
- Reusable Filter: A reusable filter can be used instead of paper filters.
Maintenance Features:
- Daily Cleaning:
- Unplug the coffeemaker and allow it to cool completely before cleaning.
- Remove the brew basket, filter, carafe, carafe lid, and wash them in a solution of hot water and mild liquid soap. Rinse thoroughly. These parts are top-rack dishwasher safe.
- Wipe the exterior of the coffeemaker with a soft, damp cloth. Do not use abrasive cleaners.
- Decalcifying: Mineral deposits (calcium/limestone) can build up over time and affect performance. Decalcification is recommended every 30 days.
- Remove the water filtration system (if applicable).
- Pour 4 cups (20 fl. oz. / 592ml) of undiluted, white household vinegar into the water reservoir.
- Place an empty 10-12 cup basket-style paper filter or a Mr. Coffee reusable filter into the brew basket and close the coffeemaker's lid.
- Place the empty carafe back in the unit, centered on the warming plate.
- Brew a prepared cleaning solution through the coffeemaker.
- Discard the cleaning solution and rinse the carafe thoroughly with clean water.
- Fill the water reservoir with 12 cups of clean, fresh water.
- Place the empty carafe back on the coffeemaker, centered on the warming plate.
- Remove and discard the paper filter used during the cleaning cycle. If a Mr. Coffee reusable filter was used during cleaning, remove it and rinse it thoroughly before replacing it in the brew basket.
- Press "Brew Now" and allow the full brew cycle to complete, rinsing the coffeemaker with hot water.
- Discard the water and rinse the carafe thoroughly with clean water.
- Repeat steps 8 through 11 one more time to ensure it is fully rinsed.
Cleaning Frequency:
- Soft Water: Every 80 Brew Cycles
- Hard Water: Every 40 Brew Cycles
Carafe Use and Care:
- Discard the carafe immediately if it is ever cracked.
- Protect the carafe from sharp blows, scratches, or rough handling.
- Do not use harsh abrasive cleaners that may scratch the carafe. Scratches may cause the carafe to break.
User Maintenance:
This appliance has no user-serviceable parts. Any servicing beyond what is described in the cleaning section should be performed by an Authorized Service Representative only.
Service Maintenance and Warranty:
Service Maintenance and Warranty information can be found online at www.mrcoffee.com or by calling the Consumer Service Department at 1-800-MR COFFEE (1-800-672-6333).