Do you have a question about the mr. steam MS-225E and is the answer not in the manual?
General instruction to read all safety guidelines before proceeding with the operation.
Prohibits use by children under 16 due to potential hazards.
Lists specific warnings to prevent injury during steambath use.
Instruction to keep safety instructions for future reference.
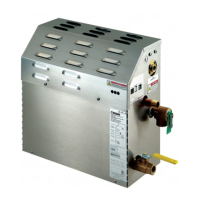
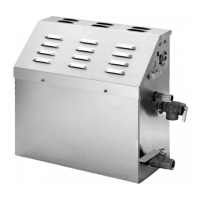
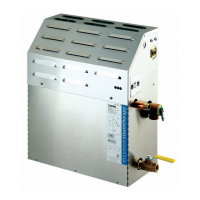
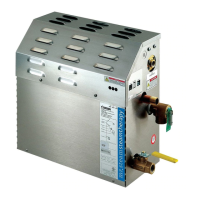
Details specifications like KW, Amps, Room Volume, and dimensions for various Mr.Steam models.
Provides essential guidelines for constructing a safe and functional steam room enclosure.
Illustrates a general setup for installing the Mr.Steam generator and control.
Shows the printed circuit board component for the interconnecting cable.
Illustrates the typical installation of MS Super 4E, 5E, 6E with optional AutoFlush.
Details plumbing requirements and codes for installing the steam generator.
Specifies connection and pressure requirements for water, drain, and steam lines.
Instructions for safety valve connection and drain pan recommendations.
Information on installing the optional AromaSteam Electronic Oil Delivery System.
Step-by-step instructions for mounting the steamhead, including placement and sealing.
Provides important notes regarding clearances, connections, and model variations.
Illustrates wiring diagrams for connecting power to the steam generator units.
Wiring diagram specific to the MS90E, MS150E, MS225E, MS400E models.
Wiring diagram specific to the MS SUPER-1E, 2E, 3E models.
Provides the single-phase wiring diagram for these specific Super models.
Guides through the initial power-up and verification process of the control system.
Refers to installation and operation of optional equipment like eTEMPO and STEAM GENIE.
Lists status codes displayed by the control, their meanings, probable causes, and remedies.
Details the plumbing and connection steps for the AutoFlush valve.
Provides specific guidance on using sweat fittings for plumbing connections.
Outlines steps to verify the correct operation of the AutoFlush system.
Describes the Express Steam feature and its factory-installed components.
Explains the function of the LEDs on the Liquid Level Control Board for diagnostics.
Provides key dimensions and box contents for the eTempo and eTempo/Plus controls.
Offers crucial pre-installation notes and warnings for the eTempo/Plus controls.
Step-by-step guide for installing the eTempo and eTempo/Plus controls.
Illustrates key steps like routing cable, applying sealant, and mounting the control.
Shows the location for drilling the hole for the temperature probe cable.
Illustrates connecting the temperature probe cable to the steam generator's circuit board.
Shows routing the probe cable into the steam room and applying sealant.
Provides a cross-section view of the installed probe, showing minimum/maximum bulb exposure.
Illustrates the final installation of the remote temperature probe.
Clarifies that the diagram is for illustrative purposes and the eTempo cable is not shown.
Provides troubleshooting steps for controlling the steam generator with the remote.
Offers advice on cleaning and maintaining the controls and steamheads.
Covers essential safety precautions and operating recommendations for the controls.
Details the minimal maintenance required for the steambath generators.
Explains fundamental control functions including power, pause, and timer features.
Guides on adjusting temperature settings and changing display units between °F and °C.
Covers initial power-up sequence and setting the unit's clock.
Explains controlling steam, setting duration, and viewing the clock.
Details setting temperature, changing units, and memory feature.
Guides on using PROG I/II, AromaSteam, and ChromaSteam features.
Provides information on the Steam Genie control system.
Step-by-step guide for replacing the battery in the STEAM GENIE remote.
Explains how to operate the STEAM GENIE for controlling the steam generator.
Describes the function and status lights of the Genie Interface Module.