Pre-operation inspection
size of the wall-mounted backplane,
then punching holes of 4-φ6*35mm
and inserting expansion tubes.
Lock the 4-M4*32 self-tapping screws
into the expansion tube, and fix the
wall-mounted backboard on the wall.
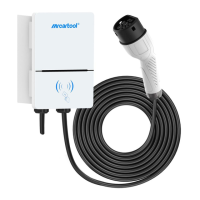
Open the upper cover of the charging
pile, hang the pile on the wall-mount-
ed backboard, and lock the screws
from the bottom of the pile.
Pass the power cable of 3*6mm
through the corresponding water-
proof head and connect it to the
corresponding input terminal.
Lock the screws of the upper cover
panel.
The installation location of the AC
pile should be convenient to operate
and maintain.
Make sure the power cable of the AC
pile is properly connected and
securely installed.
Make sure that the selection of
leakage protection switch at the AC
inlet is appropriate.
Power on the equipment
Close the leakage protection circuit
breaker of the power supply line.
After the AC pile is powered on, there
will be a power-on self-check for about
a few seconds, and the indicator light
alternately displays red, yellow and
green for 1S.
Normal standby: the green light is
always on.
Equipment failure: the red light stays
on.
Insert the EV charger (connect the
charging plug).
Start charging (Method 1: Plug the
charger and start charging; Method 2:
Use the designated charging card to
swipe. The green light flashes
indicating normal charging.) Swipe
the card again to end charging.
Method 1: Pull out the charger to end
the charging; Method 2: Swipe the
card again to end the charging.
Put the EV charger back to its place.
Inspection & Debugging
The Operation
Of Charging
For the first installation, attention
should be paid to the power cable
according to IN-L (fire), IN-N (zero), PE
(ground) one by one, and the fire wire
and zero wire cannot be reversed.
PE (ground wire) needs to be
grounded reliably.
Make sure the emergency stop
switch is activated after power on.
Before charging, make sure that the
tip of the EV charger is free from
stains and water.
Precautions
2