8
Device Name
This column shows the default device name, which may be user re-defined. A user
can change the name by either using the rename button or by clicking on the name
and editing in-place.
MAC Address
This column shows the Remote device’s MAC address.
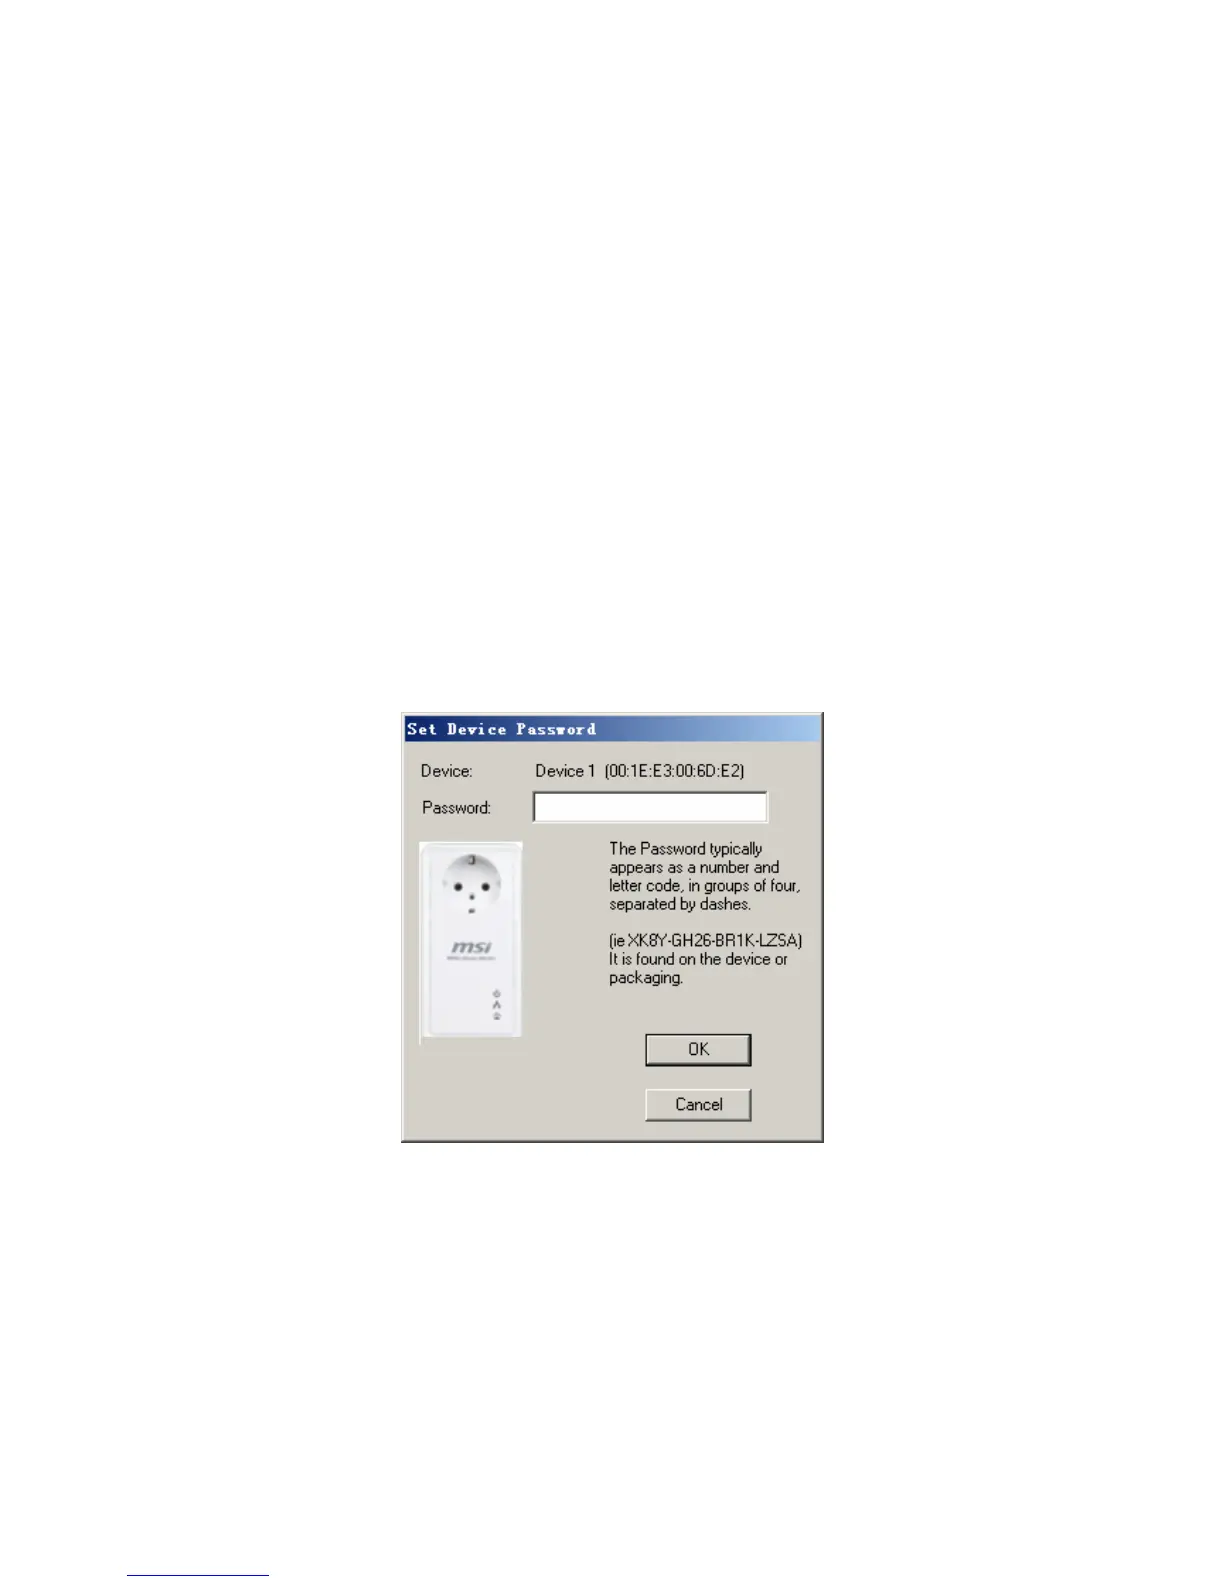
Password
This column by default is blank and “Enter Password” button can be used to enter it.
To set the Password of the device (required when creating a private network), first
select the device by clicking on its name in the lower panel and then click on the Enter
Password button. A dialog box will appear as shown in Figure 5-2 to type the
password. The selected device name is shown above the password field and the
password can be verified by hitting the OK button. The Password field accepts the
Device password in any case formats, with or without dashed between them.
A confirmation box will appear if the password was entered correctly. If a device was
not found, the user will be notified along with the suggestions to resolve common
problems. This process might take a few seconds to get completed.
Figure 5-2: Set Device Password
Add
This button is used to add a remote device to the existing network by entering the
device password of the device. A dialog box will appear as shown below in Figure 6.
The dialog box allows the user to enter both a device name and the password.
A confirmation box will appear if the password was entered correctly and if the device
was found in the Powerline network. If a device was not found, the user will be
notified and suggestions to resolve common problems will be presented.