Deck and Transmission
29
NOTE: The side discharge door will typically be serviced
as an assembly, and there is little need to sepa-
rate the parts of the assembly in the field. Disas-
sembly is not reccomended, but if it is necessary
for any reason, the following procedure can be
used.
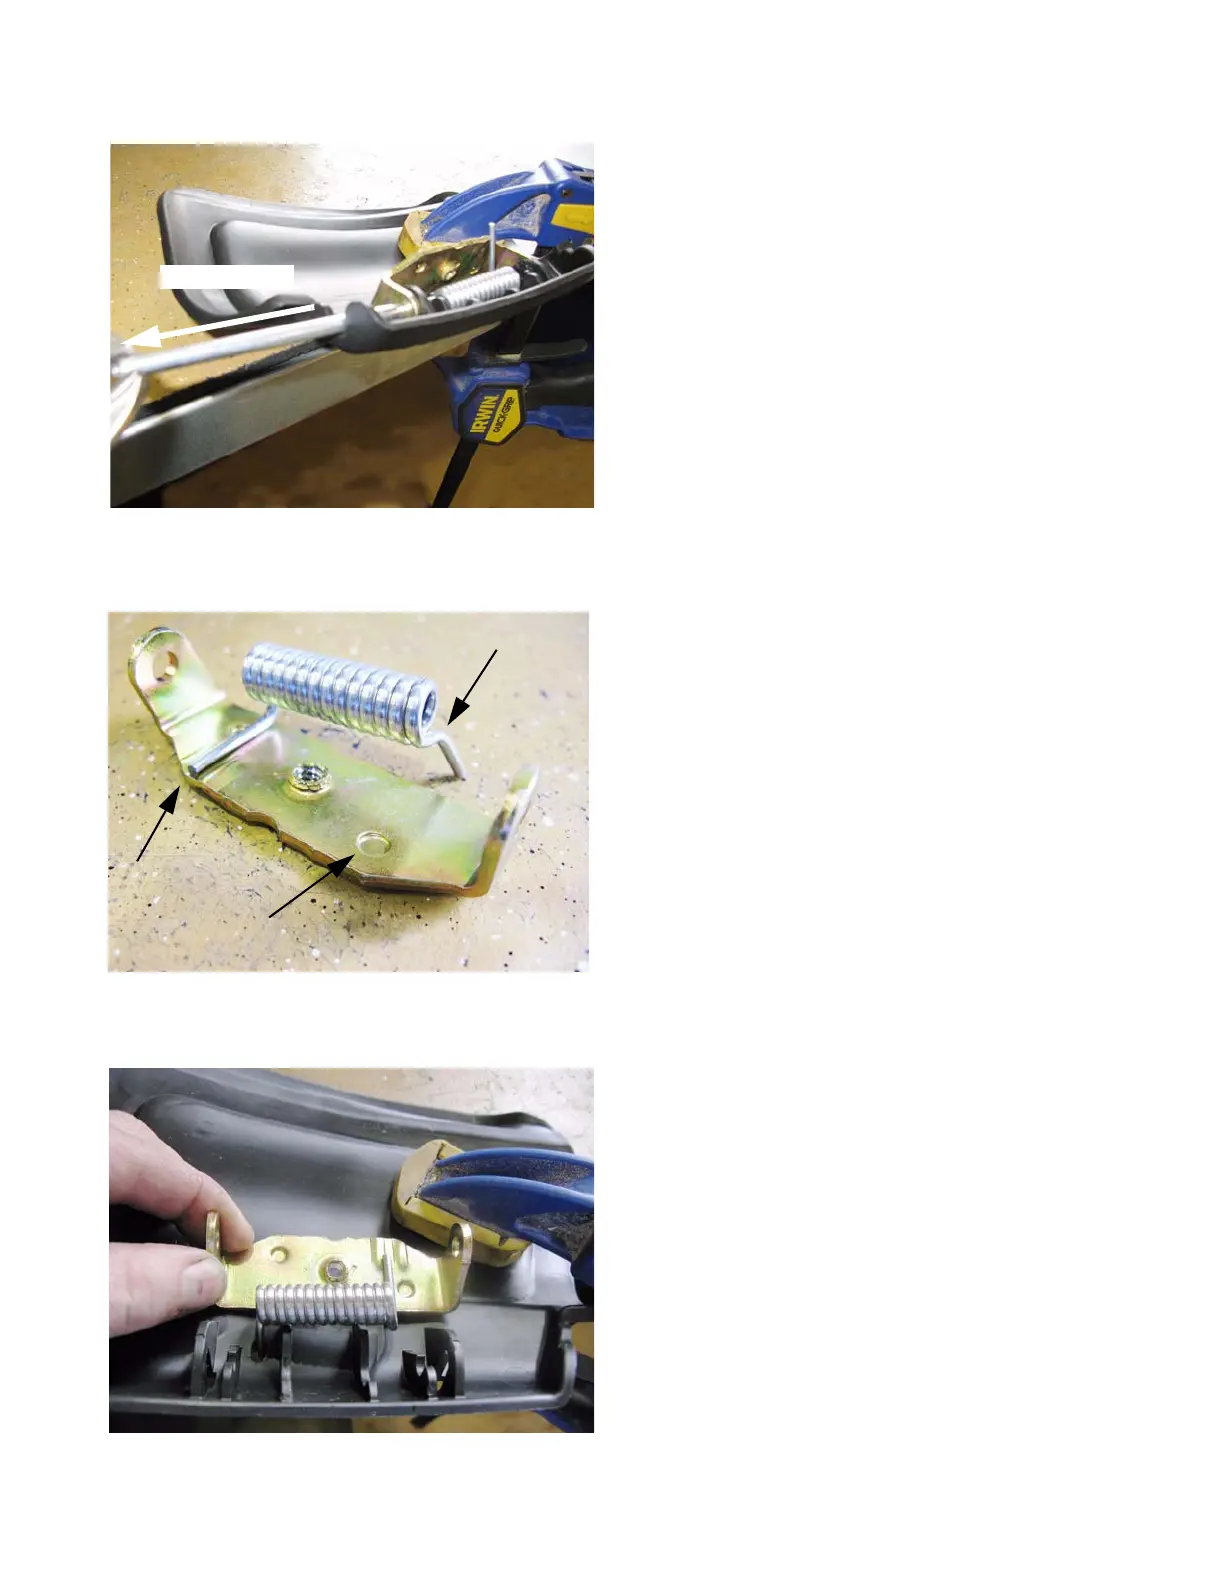
5. To separate the door from the hinge: See Figure 4.5.
5a. Clamp the discharge door and hinge to a work-
bench so that the hinge is easily accessible.
5b. Grasp the rear edge of the hing pin with a pair
of locking pliers and withdraw the pin.
NOTE: There is a notch on the rear edge of the side dis-
charge door to provide clearance for removing the
hinge pin.
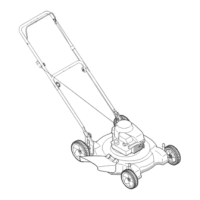
NOTE: There are two extruded bosses on the bottom of
the hinge. They seat into holes in the mower deck
to align the hinge.
NOTE: There is a trough formed near the front leg of the
hinge. The L-shaped tail of the closure spring fits
into this trough on assembly. See Figure 4.6.
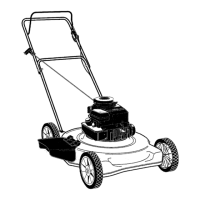
6. For assembly: Clamp the side discharge door to a
workbench top. See Figure 4.7.
7. Insert the question mark-shaped tail of the spring
through the small hole in the side discharge door.
8. Position the hinge with the L-shaped spring tail in the
trough.
9. Roll the hinge into position, and secure it by inserting
the hinge pin. Stake the hinge pin with a punch once
it is installed, so that it does not back out.
Figure 4.5
Withdraw pin
Figure 4.6
Trough
Boss
Question-mark
shaped tail
Figure 4.7