〔100%/START〕 key, and the LCD displays
‘SAVE ’, denoting that the calibrated
point has been stored;
6) Press the key〔STEP/AUTO〕and the LCD
displays ‘CAL FS’ , and repeat the
operation of steps 5.
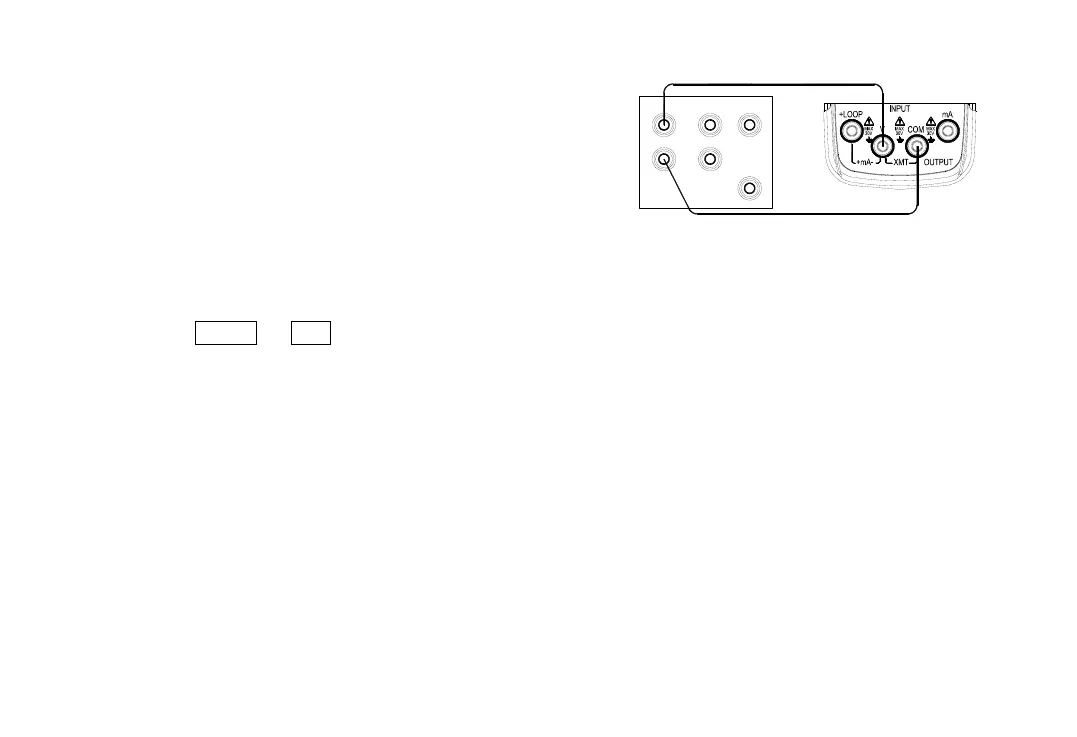
Voltage Measurement Calibration
1) Press the key〔mA % / V〕to select voltage
measurement function , and the LCD
displays ‘INPUT ’、‘CAL 0’、‘V ’;
2) Connect to the Instrument as shown in
Figure 10-3;
3) Set the standard source to an appropriate
range;
4) Set the output of standard source as the
value given in Table 10-3 and when the
output stabilized , press the
key〔100%/START〕, and the LCD displays
‘SAVE ’, denoting that the calibrated point
has been stored;
T R I G
O U T
A U X
S C O P E
Lo
N O R M A L
Hi
S ta nd a r d S o u r c e
( 5 5 2 0 A )
Figure 10-3
5) Press the key〔STEP/AUTO〕and the LCD
displays ‘CAL FS’ , and repeat the operation
of steps 4.