7
WARNING
Do not allow the rear flap to slam closed,
always close gently to avoid damage.
Always replace rear flap and mulching plug
if damaged.
NOTE: Refer to Figure 9.
• To remove the mulching plug, lift the rear flap (1).
• Grasp the handle (2) of the mulching plug and pull the mulching plug out using the
handle.
• The mulching plug (3) is inserted on an angle, so it requires some force to remove it.
• The mulching plug must be removed in order to install the grass catcher.
• The mulching plug must be re-installed when the grass catcher is removed.
Installing & Removing the Mulch Plug
Installing the Grass Catcher
WARNING
Always replace damaged or worn grass
catchers.
Do not operate if catcher is incorrectly
installed.
Do not hold open the flap when the
machine is running.
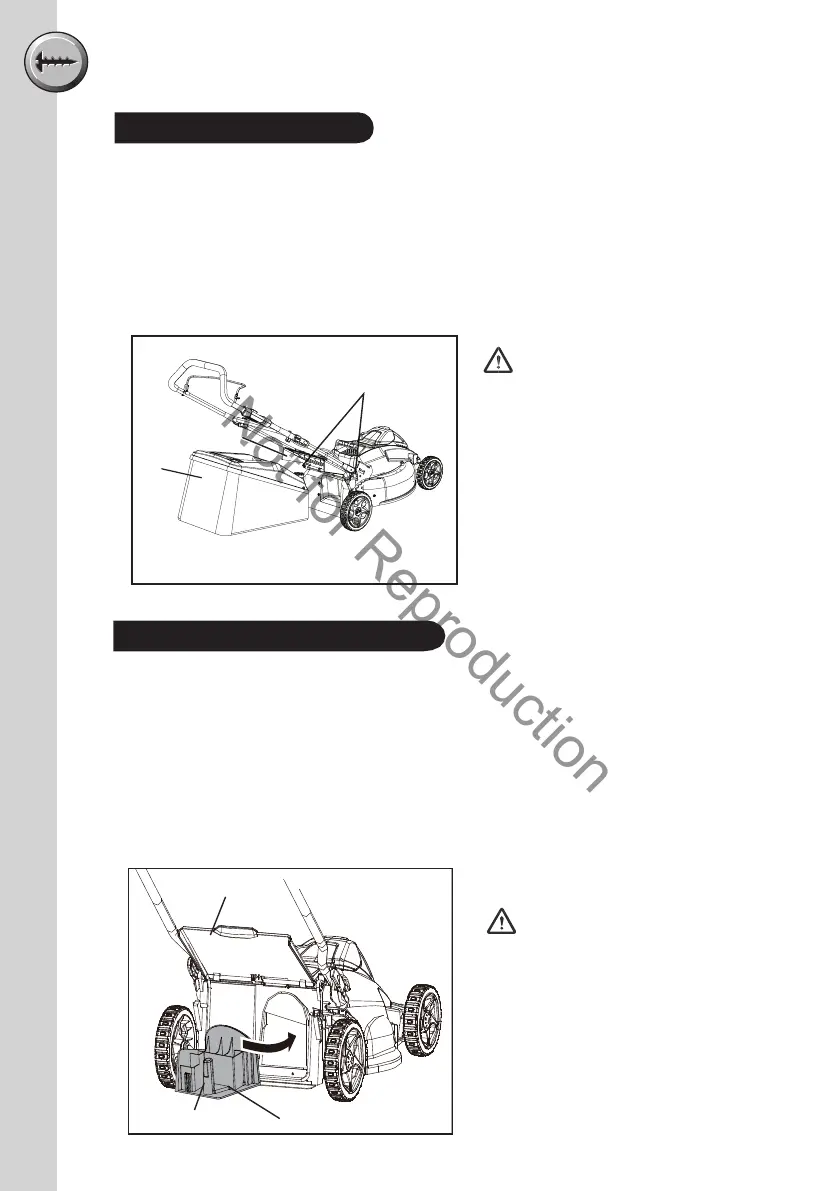
NOTE: Refer to Figure 8.
• Lift the grass catcher by its handle and place under the rear flap so that the hooks on
the grass catcher frame are seated into the slots in the handle bracket.
• Release the rear flap gently.
• When installed correctly, the hooks on the grass catcher will rest securely in the slots
on the handle brackets.
2
Slots
1
2
ASSEMBLY PROCEDURES
Fig. 1
Fig. 2
Fig. 6
Fig. 3
Fig. 7
Start Button
Fig. 4
Fig. 8
Fig. 8
11
35
10
12
2
1
3
6
9
8
7
5
4
1
3
2
4
5
Model #: 25157 / 25347
Bail
3.Mulch Plug
2.Mulch Plug Handle
1.Rear Flap
Fig. 8
Fig. 9