Open LXi Production Manager. If this is your first time opening LXi, a popup screen will request a Brand
and Model selection. Otherwise, select Setup and from the drop-down menu, click Add Setup.
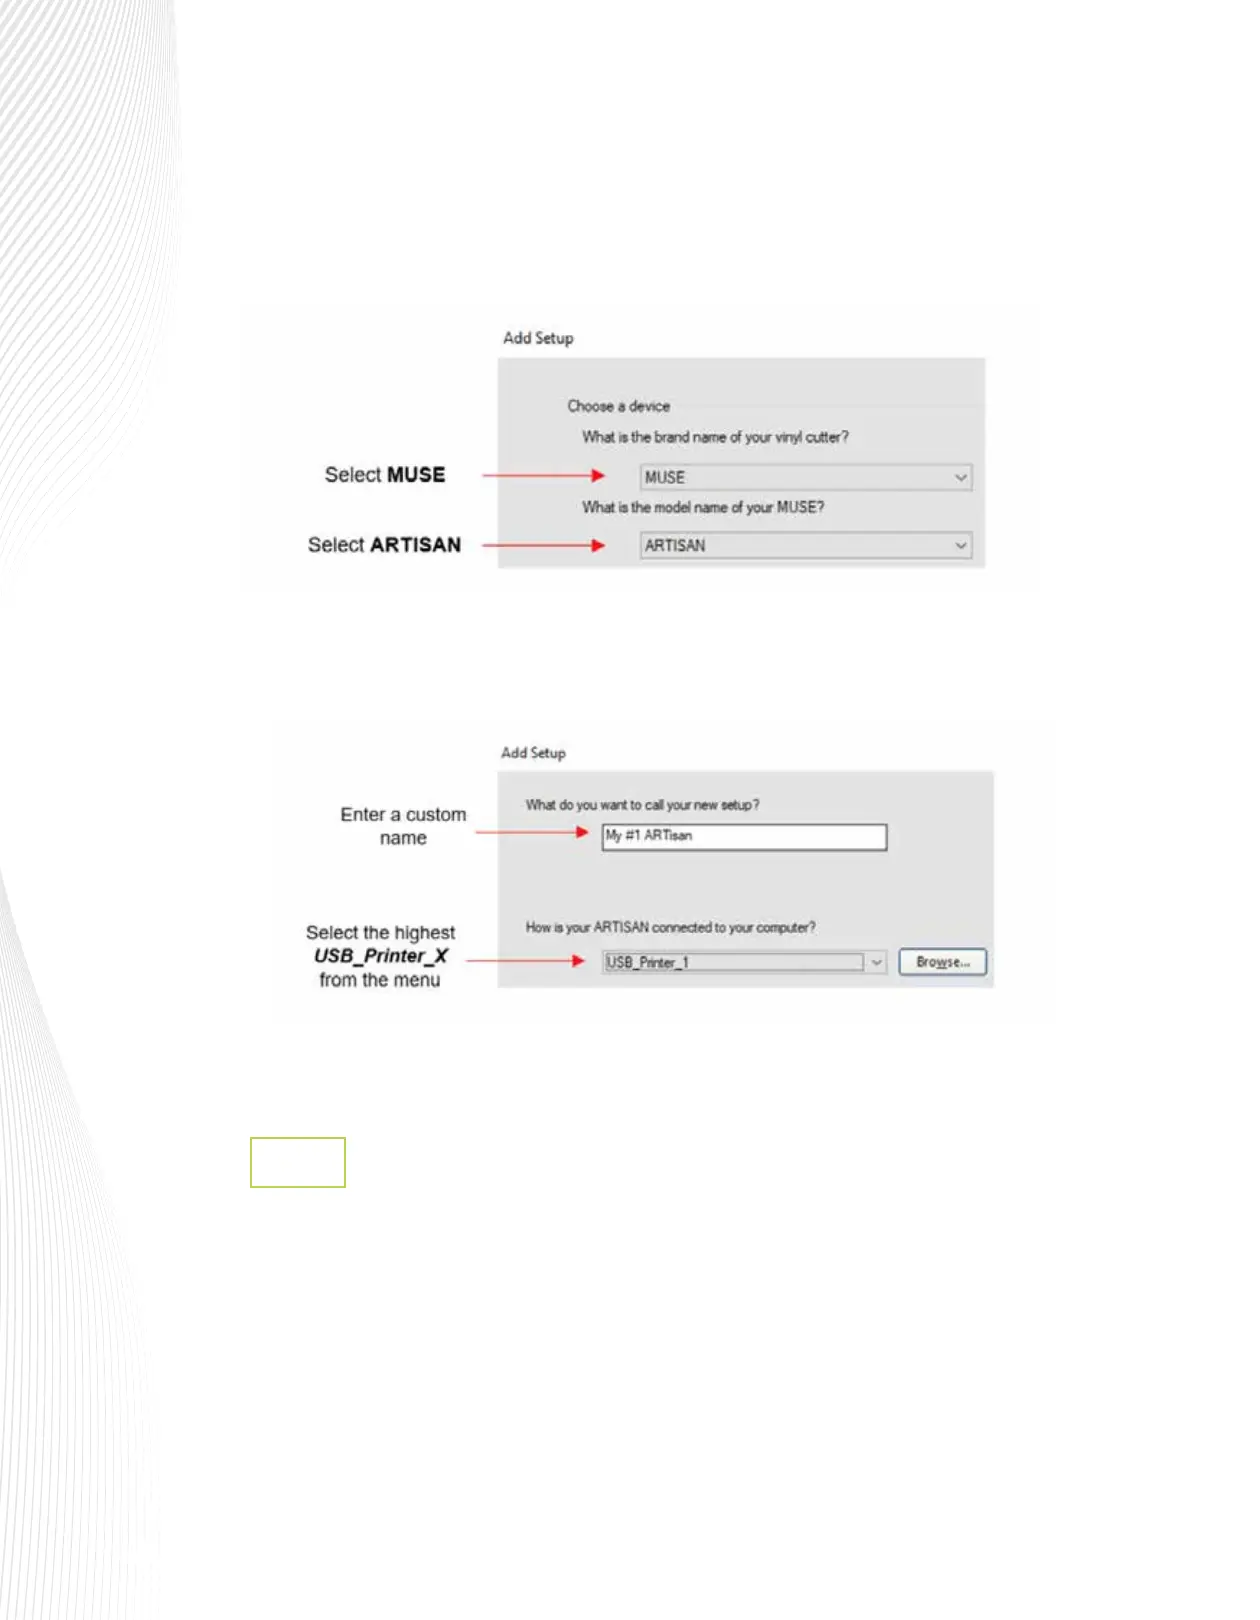
From the pop-up window, choose MUSE as the Brand. Find and select ARTISAN as the Model:
Click Next. The setup window will ask how your ARTisan is connected to the computer. Open the
drop-down menu and select the largest available option for USB_Printer_X where X will be 0, 1, 2, etc.
For example, if you see both USB_Printer_0 and USB_Printer_1 then you would select USB_Printer_1
because it is the higher of the two.
Click on Finish at the bottom of the Add Setup window.
Turn on the ARTisan before connecting to your computer. Using the USB cable that came with the
cutter, plug the wider end into your computer’s USB port, and the squarish end into the cutter’s USB port
which is on the right cover.
Open Create Space and select New Project.
Go to Cutter>My Cutter>Manage Cutters and a new window will open. On the right side, under
Company/Brand select MUSE and under Model select ARTisan. Click Add to list. Click Done to apply
and close the window.
USB Connection in Create Space
1.9.2