Once you are ready to cut, click the Cutter icon on the Toolbar at the top of the screen. The Cut
Settings window will open and, in the Connection drop-down menu, select USB. You can leave Port set
to Auto Detect. If you click on Test Connection, it should move the blade carriage back and forth one
time. This does not send a cut, just a signal to the cutter.
For initial setup using the Wi-Fi option, you may need to place the ARTisan in the same room or in
close proximity to the Wi-Fi router. This will create a stronger connection and faster Wi-fi network
configuration. Once the connection is set, you can move the cutter around within the limits of your
router’s coverage area.
You will need the name of the network and the password.
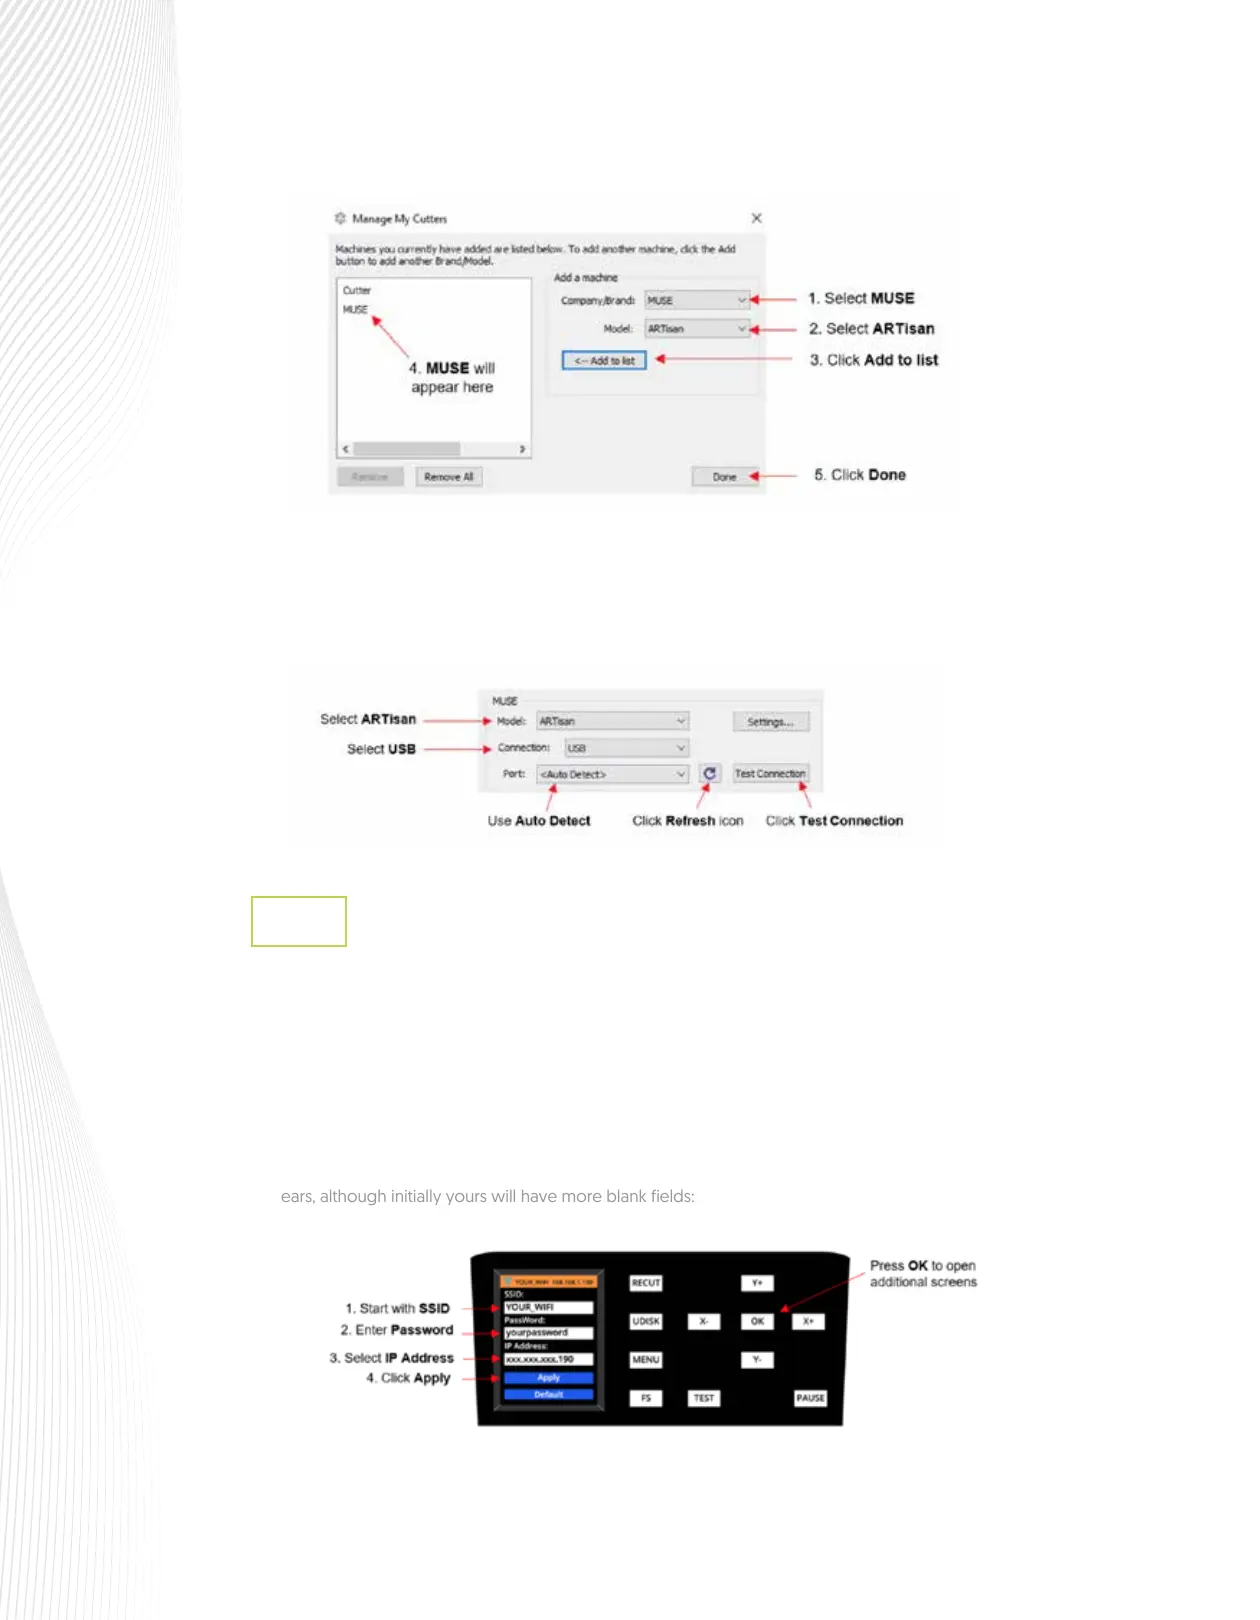
On the Control Panel, press the MENU button, select WIFI, and press OK. The following screen
appears, although initially yours will have more blank fields:
Connecting the ARTisan to a Wi-Fi Network
1.9.3
Work in order downwards, starting with SSID: