1.
2.
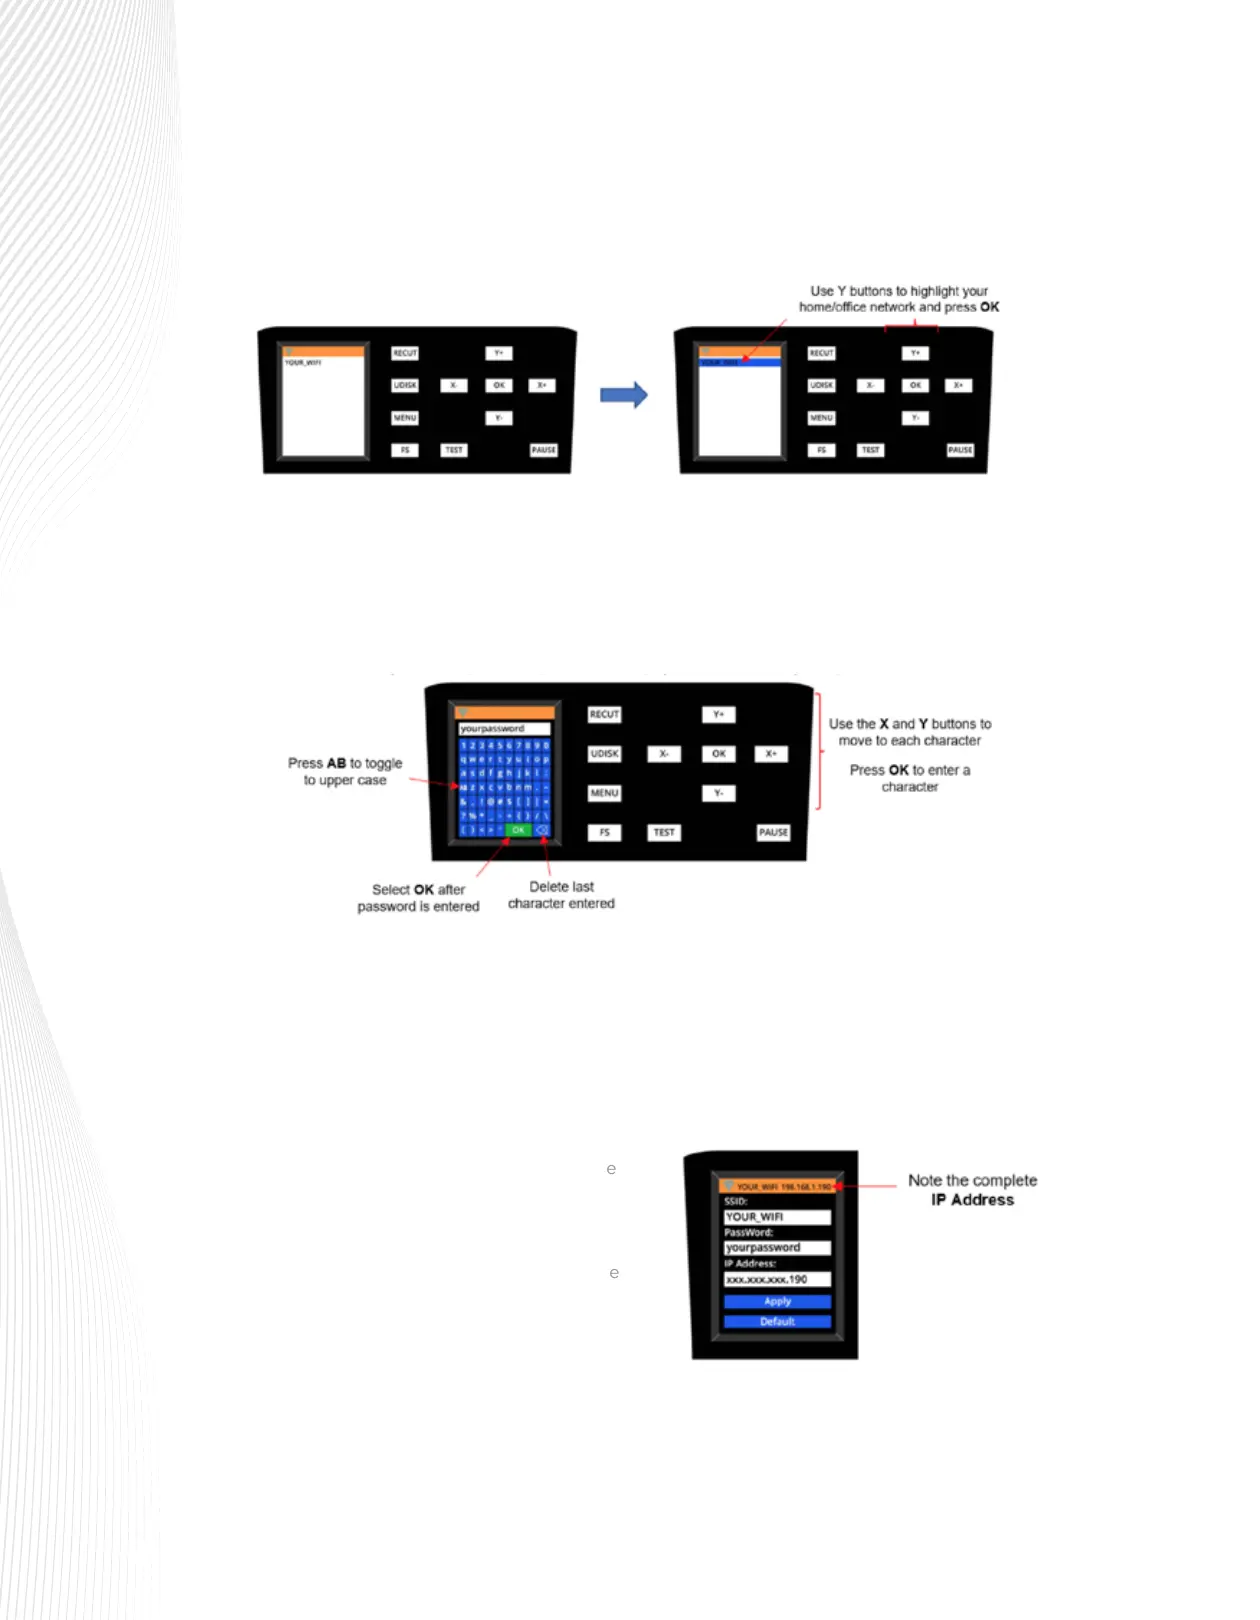
Use the Y buttons to highlight SSID in blue. Then press OK and the ARTisan will begin scanning for
available networks. This may take a minute before a menu of networks appears. Select the network you
wish to use (should match what your computer is using) and press OK.
Use the Y- button to move down to PassWord and press OK. A screen resembling a keyboard will
appear. Use the X and Y buttons to move to appropriate keys in order to enter your network’s
password, pressing the OK button to add a character to the display of your password. Note that the AB
key will toggle to upper case keys, if needed. The button in the lower right will delete the last character
showing. When your correct password appears in the display, move to the OK key, and press it.
3.
4.
5.
6.
Use the Y- button to move down to IP Address. The first three sets of values will be obtained from your
network but will continue to be displayed with the letter “x.” Use the X+ or X– buttons to set the last
digits of the IP Address you wish to use. Press OK.
Use the Y- button to move down to Apply and press OK. Wait a minute or two and the IP Address will
then appear in the orange strip at the top of the display. Your ARTisan is now a connected device on
your network.
Note the complete IP address at the top of the
window. You will be entering this same IP
address in the software you use for cutting.
If you need to reset or change networks, move
to the DEFAULT option and press OK. After a
minute, this will reset the settings and enable
you to change the network.
7.
Before connecting the ARTisan to your computer using a Wi-Fi connection, you must verify that
your computer is also connected to the same network. To do this, locate and launch the network
icon for your computer: