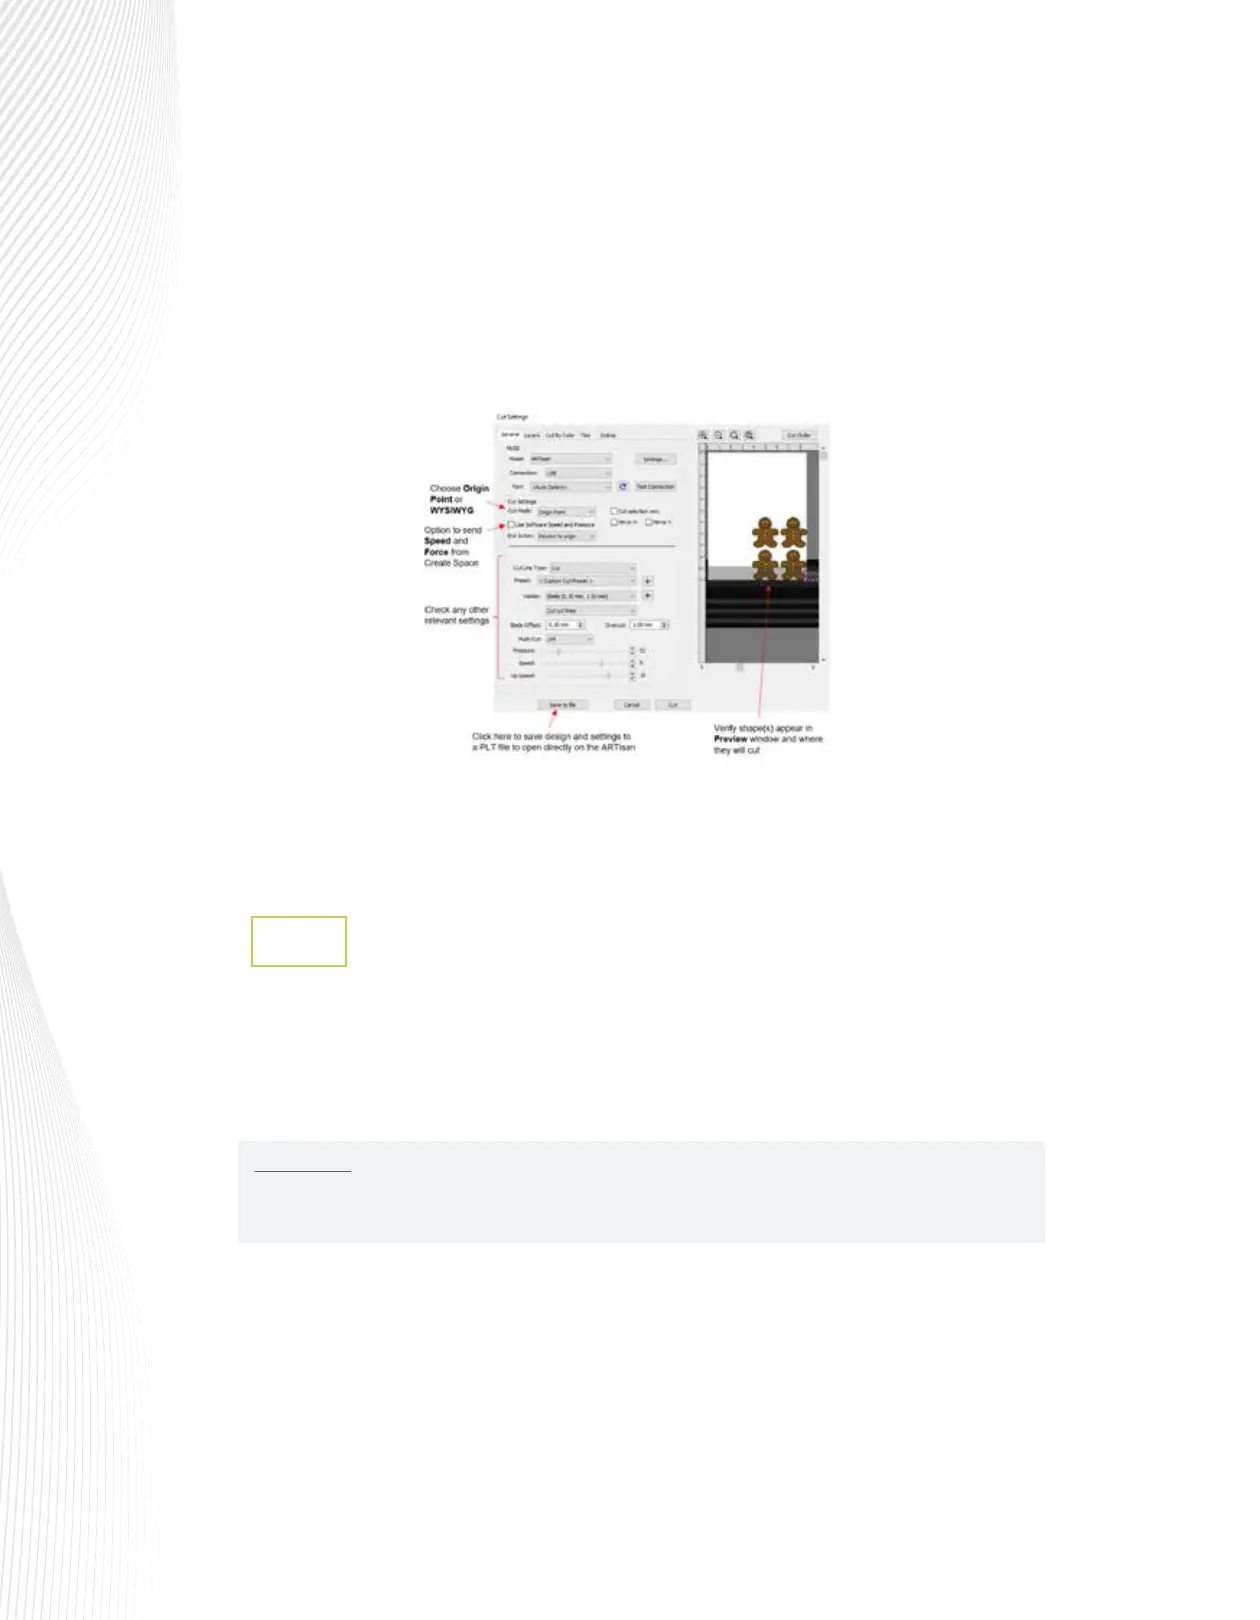
In the Cut Settings window, verify you see the design in the Preview and choose either Origin Point
(move shapes to cut at the origin) or WYSIWYG mode (leave shapes in location on virtual mat in main
window) depending on which you prefer.
Mark the box for Use Software Speed and Pressure, if you want those included in the file. Otherwise,
leave the box unchecked and you can set those values on the ARTisan’s control panel. The other cut
settings including Blade Offset, Overcut, and Multi-cut (Passes) will always be included in the .PLT file:
Once your file is ready to cut, insert a USB flash drive into the computer. Click on Save to File at the
bottom of the Cut Settings window. A new window opens where you can browse to find the USB
flash drive and name the file.
Loading and Cutting a .PLT File from the USB Drive
1.9.8
Press the UDISK button on the control panel. The ARTisan will browse the contents of the installed
USB thumb drive and display all readable .PLT files. Note that if there are folders on the drive,
highlight the folder and press the OK button to display that folder’s contents. Use the X- button to
exit from a folder.
Once you have the desired PLT file highlighted, press OK to begin the cut:
Insert the USB flash drive into your ARTisan cutter’s USB flash drive port on the right cover.
On the control panel, press the FS button and change the FORCE and SPEED settings if you did not
elect to send them within the .PLT file (refer to Section 2.2.1). Perform a test cut, if needed.
IMPORTANT: Once the PLT file has been selected, cutting will begin immediately! Thus, make sure the
media is inserted and aligned in the cutter, the pinch wheels are down, and the blade is positioned at
the desired location for the origin.