10
Control Elements and Terminals
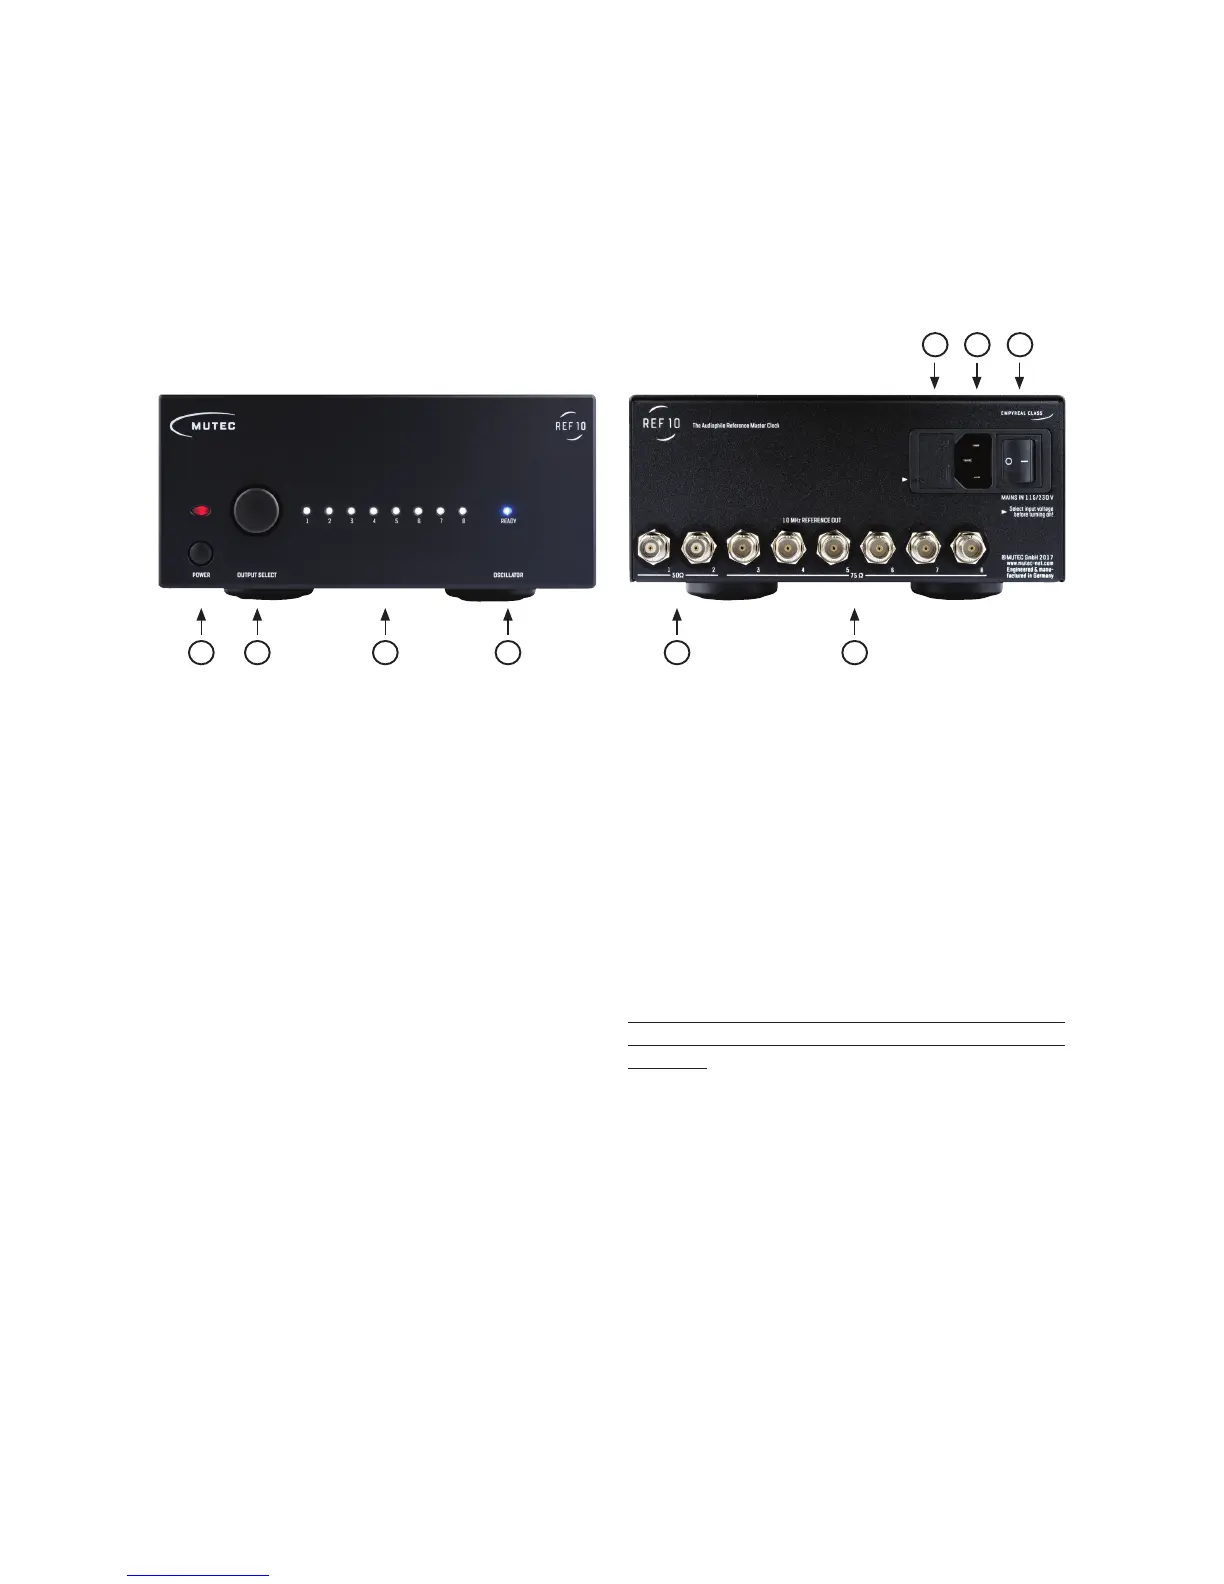
Front Panel
1) »POWER«
This red LED illuminates when the device has been powered
up. First engage the rear panel power switch next to the mains
terminal. Always ensure the appropriate choice of line voltage
»115 V / 230 V«! Then, depress the front panel power switch
and the red LED will light up.
2) »OUTPUT SELECT«
This combined push button rotary encoder is used to select
the individual outputs and to disengage or re-engage them.
3) »LEDs 1 – 8«
These eight white LEDs represent the eight rear panel clock
outputs and reflect if the respective output has been turned
on or off. An illuminated LED means the output is active, i.e on.
4) »OSCILLATOR«
This blue LED reflects the status of the oscillator heat-up pro-
cess. Upon powering the device up this LED will be flashing
until the oscillator has reached its correct operating tempera-
ture. Once the temperature has been established, the LED will
be permanently lit.
Rear Panel
1) »50 , Outputs 1 – 2«
These two clock outputs are equipped with a 50 Ω terminati-
on. Use only BNC cables with the appropriate 50 Ω impedan-
ce with these outputs.
2) »75 , Outputs 3 – 8«
These six clock outputs are equipped with a 75 Ω terminati-
on. Use only BNC cables with the appropriate 75 Ω impedan-
ce with these outputs.
3) »110/120 V & 220/240 V«
This is is the line voltage selector that also serves as the holder
for the mains fuse.
Attention
It is imperative to make sure the proper line voltage has
been selected prior to powering up the device for the
first time!
Information on how to change the line voltage can be
found in the chapter “Changing the line voltage” on pa-
ge 15 in the appendix.
4) Mains Connector
Connect the supplied IEC power cable here. Make sure that
the power switch is turned off before connecting the device
to your power source.
5) Mains Power Switch
The mains power switch engages the power supply for the
device. Do not turn the unit on before completing the wiring
and installation, particularly with respect to the choice of line
voltage according to you country’s power grid. Please make
sure to read the safety instructions at the beginning of this
manual!