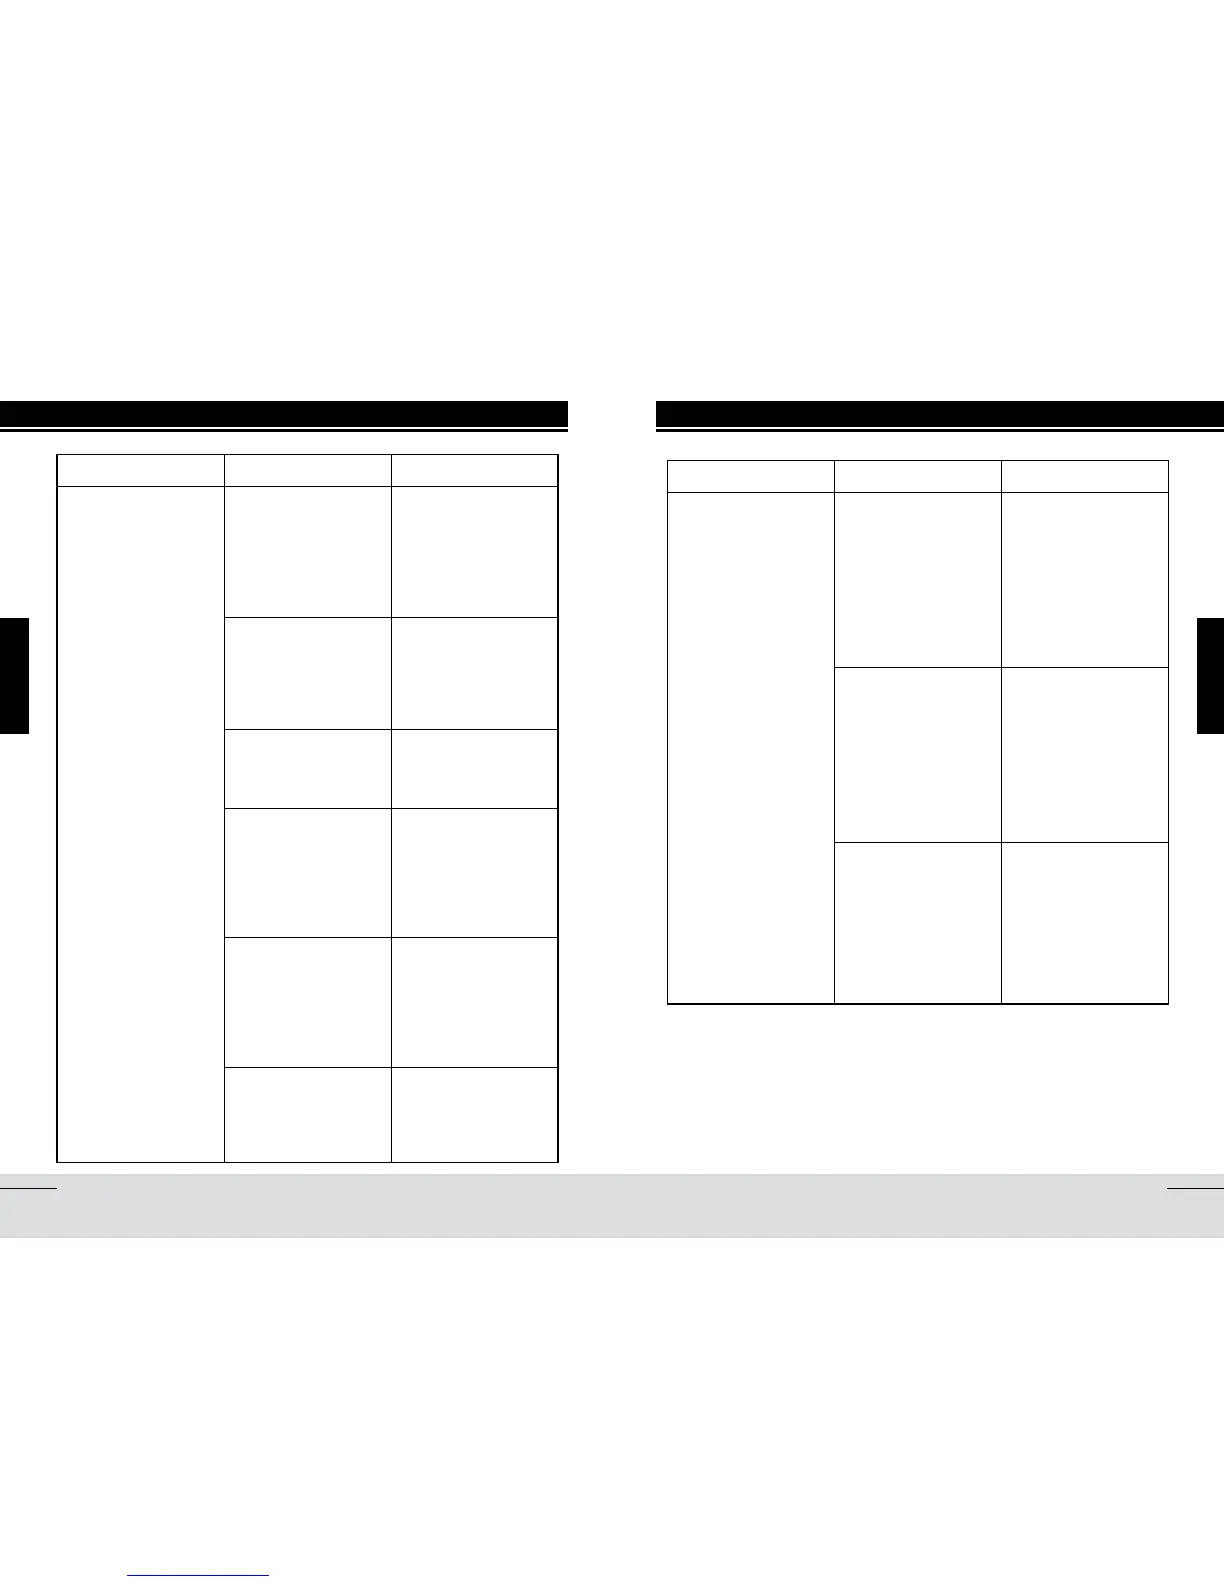
TrOubleshOOTinG
PROBLEM POSSIBLE CAUSE CORRECTIVE ACTION
Vacuum will not start
The electrical power is
not connected properly
Ensure that the
power cord is plugged
into a dedicated
grounded electrical
outlet, according to
specifications on pages
13 and 14.
Low voltage wire not
connected properly
Verify the low voltage
wires, make sure they
are properly inserted
into the low voltage
inlet, as per instructions
on pages 15 and 16.
Faulty vacuum inlet
Start the vacuum unit
from other inlets in your
home, to identify the
defective inlet.
Unit circuit breaker
is off
Press the reset button
to reset the unit circuit
breaker. If unit restarts
and automatically shuts
off shortly after, contact
an authorized service
center.
In-house circuit breaker
is off
Reset the circuit breaker
in your electrical
panel. Verify that your
central vacuum unit is
connected on a dedicated
grounded circuit (see
pages 13 and 14).
Defective on/off hose
Turn the hose 1/4 turn
in the vacuum inlet.
If unit starts, have the
vacuum hose checked by
a certified service center.
TrOubleshOOTinG
PROBLEM POSSIBLE CAUSE CORRECTIVE ACTION
Vacuum will not stop
Hose improperly
inserted into vacuum
inlet
Ensure that the hose
end is properly placed
in the vacuum inlet: the
tab on the hose should
fit into the slots on the
inlet, to ensure adequate
contacts for the hose
switch to function (see
page 19).
Defective on/off hose If the hose is properly
placed in the vacuum
inlet, and the unit
continues running
despite the fact that
the hose switch is in
the “off” position, have
the hose checked by a
service center.
Low voltage wire not
connected properly
While vacuum is on,
unplug low voltage
wires from unit. If
vacuum stops, there’s a
faulty low voltage wire.
Contact your installer
or authorized service
center.