This document serves as a comprehensive guide for users of MXL microphones, offering insights into their functionality, optimal usage, and maintenance practices. MXL microphones are engineered to deliver high-quality audio performance across various recording scenarios, from vocals and acoustic instruments to amplified electric guitars and drum kits. The manual emphasizes the importance of understanding microphone characteristics, particularly polar patterns, to achieve the best recording results.
Function Description
MXL microphones are designed to convert acoustical energy into electrical energy, a fundamental process for capturing sound. The document highlights different types of microphones, including condenser, dynamic, ribbon, and USB, each with unique strengths and weaknesses depending on the application. A key concept introduced is the "polar pattern," which describes how a microphone reacts to sound waves arriving from different directions.
Three primary polar patterns are discussed:
- Cardioid: This pattern primarily picks up sound from the front, with less sensitivity from the sides and good rejection from the back. It is recommended for situations where specific sound sources, like a guitar within an ensemble, need to be isolated, and for recording in environments with good but not perfect acoustics, as it helps minimize ambient noise from equipment.
- Omni-directional: This pattern picks up sound equally from all sides. Omni-directional microphones are ideal for environments with excellent acoustics, as they tend to pick up ambient noise. They are well-suited for capturing sound from a wider recording area and are less sensitive to "plosives" (popping sounds), handling noise, and proximity effect.
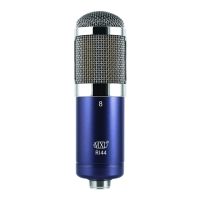
- Figure 8 (Bi-directional): This pattern picks up sounds from both the front and back sides with equal sensitivity, while maintaining significant rejection 90° off-axis. Figure 8 patterns are most susceptible to proximity effect and are commonly used in "mid-size" stereo recording setups.
The manual provides detailed guidance on recording various sound sources:
- Vocals & Dialog: For vocals, a "dead" room with sound-absorbing materials is recommended to minimize echoes. The vocalist should be positioned 6-8 inches from the microphone, aiming the microphone's axis towards the nose and mouth for a full sound. Experimenting with slight off-axis angling can help minimize plosives. A "pop" filter is essential, placed 3-4 inches in front of the microphone, to reduce plosive sounds and protect the microphone capsule from moisture.
- Acoustic Guitar: Optimal recording of acoustic guitars begins with a properly tuned instrument and strings. Two primary microphone placements are suggested:
- Twelfth Fret Placement: Positioning the microphone 2-4 inches from the twelfth fret, aimed directly at the strings, produces a warm, full-bodied sound with good tonal balance. This moderates the sound hole's contribution, preventing a "boomy" sound often associated with direct sound hole miking.
- Bridge Placement: Placing the microphone 3-6 inches from the guitar's bridge yields a brighter tonal quality. Experimentation with off-axis positioning may be necessary to manage low-frequency response from the sound hole. The acoustical characteristics of the room significantly impact the sound, with "live" rooms producing brighter tones and "damped" rooms creating a mellower tone. Using two microphones—one close to the guitar and another a few feet away to capture room ambience—can produce excellent blended results.
- Amplified (Electric) Guitar: While direct recording is possible, using a real amplifier is often preferred for its authentic "crunch" sound. A small guitar amp can be effective, focusing on increasing the amp's initial gain for desired overdrive rather than high volume. The microphone should be close-miked, roughly 4 inches from the grill, aimed directly at the center of the loudspeaker for maximum "edge." Angling the microphone slightly off-axis and towards a wall can add "room sound." Amplifier placement also affects tone: a carpeted floor reduces brightness, while elevating the amp may lead to low-end loss. For a big reverberant tone, placing the amp and microphone in a bathroom with hard, reflective surfaces can be effective, with the microphone positioned a few feet from the loudspeaker.
- Piano: Recording a piano is challenging, with results heavily dependent on the instrument's quality and maintenance. Close miking is the general technique.
- Grand Piano: Ideally, two microphones are used. For upper strings, position a microphone approximately 8 inches from the hammers and 8-11 inches above the strings, with the Pan position set to left of center. For lower strings, position a microphone towards the far end (away from the keyboard), roughly 6-12 inches from the end and 8-11 inches above the strings, with the Pan position set to right of center. The piano's lid should be at full stick. For a single microphone, it should be positioned approximately 8 inches from the hammers and 8-11 inches above the strings, centered over the piano's midpoint, with the Pan position centered and the lid at full stick.
- Upright Piano: Two microphones are typically placed either just over the open top of the piano or by removing the front panel beneath the keyboard and placing microphones below.
- Drum Kit: Capturing drums requires careful microphone positioning to avoid accidental hits.
- Stereo Overhead Pair: Two microphones are positioned approximately 16-20 inches above the performer's head, separated laterally by 2-3 feet, and placed 5-6 feet in front of the drum kit. Pan positions are adjusted for a good stereo spread.
- Single Overhead Microphone: One microphone is positioned approximately 16-20 inches above the performer's head, centered 5-6 feet in front of the drum set, with its pan position centered for mono drums. For best results, drums should be recorded in an acoustically "dead" room to prevent muddy sounds and allow for post-recording signal processing.
Usage Features
The manual provides practical tips and answers to frequently asked questions (FAQ) to enhance the user experience:
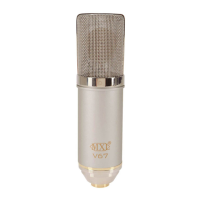
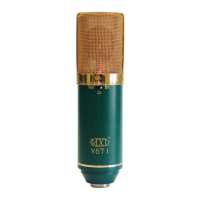
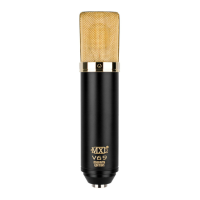
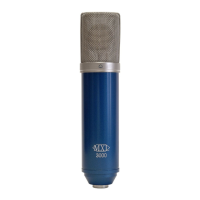
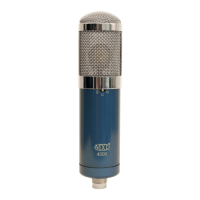
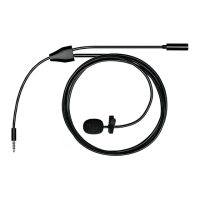
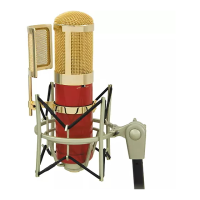
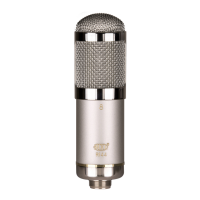
- Microphone Orientation: MXL microphones come in two styles: side-address (with a cardioid pattern symbol or MXL logo indicating the front) and end-address (where the front is opposite the XLR jack).
- Phantom Power: Condenser microphones require phantom power (typically 48-volt DC, though 9V-52V is possible) to operate. This power is supplied by a dedicated preamplifier or an audio mixer's input channel. MXL microphones specifically require 48-volt phantom power for maximum efficiency, though some may function at 15 volts. An XLR cable is essential for transmitting phantom power; cables with XLR on one end and a quarter-inch phone plug on the other will not work. Phantom power is generally not harmful to microphones that don't require it, but caution is advised for ribbon microphones, and users should consult their specific microphone manual.
- Troubleshooting Sound Issues: If a microphone cuts in and out, it may be due to condensation on the capsule. Using a pop filter is crucial to prevent this, as it collects breath condensation and protects the capsule. If condensation occurs, leaving the microphone uncovered to dry for approximately two weeks may rectify the problem.
- Shockmounts: Shockmounts are recommended as standard equipment for all recording applications. They de-couple the microphone from the mic stand and the environment, minimizing floor noise and handling noise.
- -10 dB Pad: This switch or knob lowers the level of an incoming signal (e.g., from a loud guitar amp) before it reaches the rest of the circuitry. It helps manage input signals to prevent overpowering the recorder.
- Lo-cut Filter: An electronic filter that allows only frequencies above a certain point to pass, eliminating lower frequencies. It functions similarly to a shockmount by reducing low-end rumble and noise. It can be useful for recording acoustic guitar and vocals to alleviate low-frequency noise.
Maintenance Features
While the manual doesn't explicitly detail routine cleaning or repair procedures, it implicitly emphasizes maintenance through proper usage:
- Protection from Moisture: The use of a "pop" filter is highlighted as a critical maintenance practice for vocal recording. It not only minimizes plosive sounds but also protects the microphone's sensitive capsule from moisture caused by saliva and breath condensation. This prevents short circuits and ensures consistent performance. If condensation does occur, the suggested remedy is to allow the microphone to air dry for about two weeks, implying that moisture management is key to preventing damage.
- Proper Cable Usage: The document stresses the importance of using the correct type of XLR cable for phantom power, which is a form of preventative maintenance against electrical issues that could damage the microphone or affect its performance.
- Environmental Considerations: The advice to record in "dead" rooms for drums and to manage room acoustics for acoustic guitar and vocals indirectly contributes to microphone longevity by preventing the microphone from being exposed to excessive vibrations or harsh sonic environments that could potentially stress its components.
- Instrument Condition: For acoustic instruments like guitars and pianos, the manual advises using instruments that are properly tuned and in good mechanical condition. While not direct microphone maintenance, this ensures that the microphone is capturing optimal sound, reducing the need for excessive signal processing that could potentially strain the microphone's capabilities or highlight its limitations.
In summary, the MXL microphone manual is a practical guide that equips users with the knowledge to effectively use and maintain their microphones, ensuring high-quality recordings and prolonging the life of their equipment through informed practices.