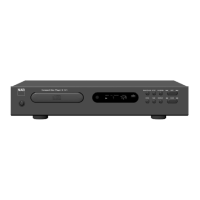
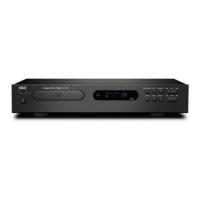
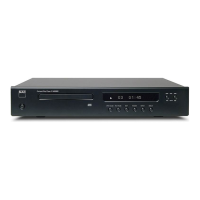
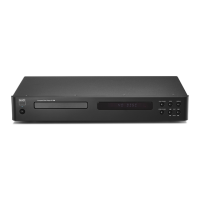
The NAD C541i is a Compact Disc Player designed for high-fidelity audio playback. It is engineered to deliver a rich and detailed musical experience, incorporating advanced digital audio technologies and user-friendly features.
Function Description:
The primary function of the NAD C541i is to play musical program material from Compact Discs (CDs), CD-R, and CD-RW discs recorded in the 16-bit, 44.1 kHz PCM Compact Disc format. It is not designed to play other disc formats, such as CD-V, DVD, CD-I, CD-ROM, PHOTO CD, or discs containing data or pictures. The player features both analogue (Line Out) and digital (Optical and Coaxial) audio outputs, allowing for flexible integration into various audio systems. It also includes NAD-Link for system control, an IR In port for remote location control, and a 12V Trigger In for remote power switching.
Important Technical Specifications:
While specific numerical technical specifications (like frequency response, signal-to-noise ratio, etc.) are not explicitly detailed in the provided manual excerpts, several key technological aspects are highlighted:
- HDCD® (High Definition Compatible Digital®) Decoding: The C541i incorporates HDCD® decoding technology, developed by Pacific Microsonics. This patented encode/decode process is designed to deliver the full richness and detail of recordings. HDCD® encoded CDs are said to contain 20-bits of real musical information, compared to 16-bits for standard CDs, overcoming the 16-bit CD format limitation. This results in a larger dynamic range, a more focused 3-D soundstage, and natural vocal and musical timbre. The player automatically identifies and activates its HDCD® decoder when an HDCD® encoded disc is played, indicated by a red light. Enhanced performance is also claimed for standard CDs played on the C541i.
- Digital Outputs: The player provides both Digital Optical and Coaxial outputs. The serial data output is taken after error correction but before digital-to-analogue conversion and filtering. The output is transformer-isolated from the built-in D-to-A circuits and conforms to the Sony/Philips (SPDIF) standard. For best results with digital outputs, a 75-ohm coaxial cable (video signal type) with RCA phono plugs or an optical cable with a TOS Link connector is recommended.
- Optical Pickup: The Compact Disc player uses a solid-state semiconductor diode laser, mounted on a tracking servo-mechanism. This laser operates at a wavelength of 7800 Angstroms (infrared), making it invisible to the human eye. The laser operates at very low power and is concealed within the player mechanism, ensuring safety.
- Error Correction: The tracking and error-correction circuits are described as "unusually sophisticated," providing secure tracking of flawed discs that might be unplayable on other players.
Usage Features:
The NAD C541i offers a comprehensive set of playback and control features, accessible via both the front panel and a wireless remote control.
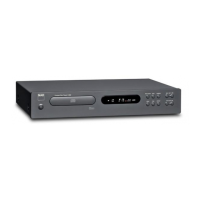
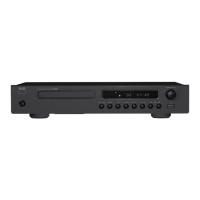
Front Panel Controls:
- POWER ON/OFF: A green button to toggle power on and off.
- DISC DRAWER (OPEN): Opens and closes the disc drawer. When a disc is playing, pressing OPEN stops playback, resets the pickup, and opens the drawer.
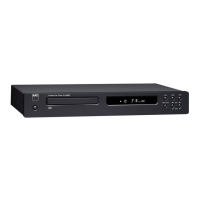
- DISPLAY: Provides information on playback status, optical pickup location, track number, and time.
- TRACK NUMBER: Shows the currently playing track number.
- TIME: Defaults to elapsed time of the current track. Can be switched to show remaining tracks and total playing time of the disc/program.
- REMAIN: Lights up when remaining tracks/time is displayed.
- REPEAT 1 / REPEAT ALL: Indicators for single track or entire disc/program repeat.
- RANDOM: Lights up when random play mode is active.
- CALENDAR DISPLAY TRACK LISTING: Shows available tracks, with the current track blinking and played tracks blanked out. Displays up to 16 tracks, with "OVER" indicating more than 16 tracks.
- MEMORY / PROGRAM: Lights up during Program Play or programming.
- STATUS Indicators: A right-pointing arrowhead for PLAY, two vertical bars (II) for PAUSE.
- "no dISC": Lights up when no disc is present or readable.
- REMOTE RECEIVER: Infrared sensor for remote control commands.
- HDCD® indicator: Lights up when an HDCD® encoded disc is played.
- PLAY/PAUSE: Dual-function button to start play, resume play after pause, or temporarily stop playback while retaining the pickup's position.
- TIME: Toggles between elapsed/remaining track and time display.
- STOP: Stops playback and resets the pickup to the beginning of the disc. A second press clears program memory and disengages Repeat/Random play.
- REPEAT: Engages Repeat Play mode (REPEAT 1 for current track, REPEAT ALL for entire disc/program). A third press cancels repeat.
- RANDOM: Plays tracks in a random order. Can be combined with Repeat Play All but not Program Play.
- SCAN (◄◄ / ►►): Scans backward or forward through the recording at high speed (3x to 15x normal speed). Operates during PLAY or PAUSE.
- SKIP (◄◄ / ►►): Skips to the beginning of the current, previous, or next track.
Remote Control Features:
The wireless remote control duplicates most front panel functions and adds:
- POWER ON/OFF (Green/Red buttons): Separate buttons for Power On (from Standby) and Power Off (to Standby).
- NUMERIC KEYPAD (0-10, +10): Direct track selection.
- PROGRAM: Allows programming up to 20 tracks in a desired order.
- Programming Steps: Press PROGRAM, use SKIP or numeric keypad to select track, press PROGRAM to store. Repeat for up to 20 entries.
- Review/Edit Program: Press PROGRAM repeatedly to cycle through entries.
- Play Program: Press PLAY after programming.
- DELETE: Allows deletion of unwanted tracks in Program Mode or Stop Mode.
Rear Panel Connections:
- LINE OUT (L/R): RCA jacks for analogue audio output to an amplifier's CD or line-level inputs.
- DIGITAL OPTICAL OUT: Optical output for digital audio.
- DIGITAL COAXIAL OUT: Coaxial output for digital audio.
- NAD LINK IN/OUT: RCA jacks for system control with other NAD components.
- IR IN: Input for an infrared repeater for remote control from a different location.
- TRIGGER IN (12V): Input for remote power switching from ancillary equipment.
- TRIGGER SWITCH (OFF/AUTO): Configures the behavior of the TRIGGER IN.
- OFF: Ignores trigger commands; front panel/remote buttons control power.
- AUTO: Unit powers on when 12V is present at TRIGGER IN; front panel/remote ON/STANDBY controls are defeated.
- AC LINE CORD: Power input.
Maintenance Features:
- Transit Screw: An important red plastic transit screw is located on the bottom of the unit and must be removed before installation. It should be re-installed if the player is to be transported.
- Cleaning:
- Unit: Periodically open the disc drawer and wipe with a damp cloth to remove loose dust.
- Discs: Handle discs by their edges. Clean soiled discs by wiping with a soft, damp cloth (water, mild kitchen detergent). Use RADIAL strokes (from center to edge) only; avoid circular wiping motions. Do not use conventional LP record-cleaning products or chemical solvents.
- Battery Replacement (Remote Control): Requires two 1.5-volt AAA-size alkaline cells. Instructions are provided for opening the compartment and correct orientation. Cleaning battery contacts with a clean cloth or pencil eraser is recommended if operation is poor.
- Installation: Install on a level, vibration-free surface. Ensure adequate ventilation. Avoid close proximity to tuners, VCRs, or TVs if static interference occurs.
The manual includes important safety instructions, warnings about electric shock risk, and precautions regarding power lines and outdoor antenna grounding (if applicable, though the C541i is a CD player, this is general safety information). It emphasizes that servicing should only be performed by qualified service personnel. The laser is a Class 1 product and is safe under normal operating conditions.