EasyManuals Logo

NAMCO Final Furlong 2 User Manual

NAMCO Final Furlong 2
19 pages
To Next Page IconTo Next Page
To Previous Page IconTo Previous Page
Page #13 background imageLoading...
Page #13 background image
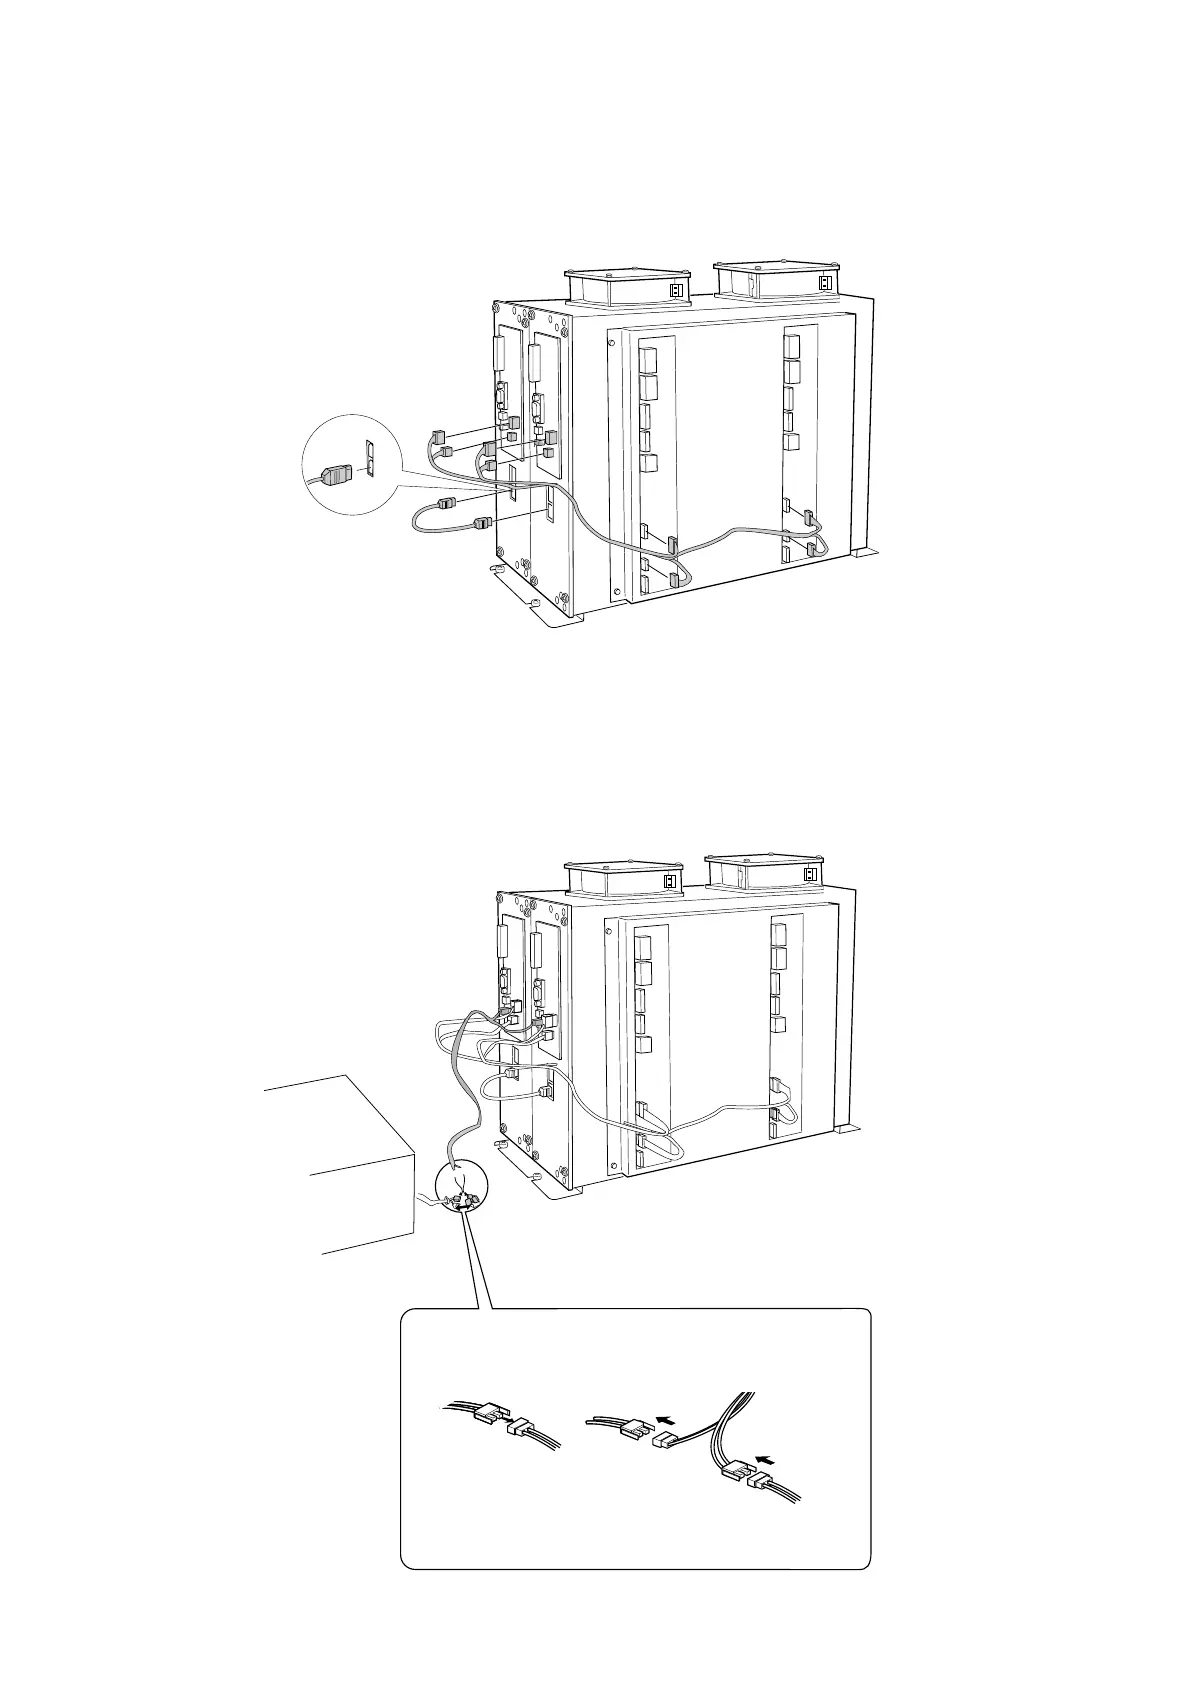
6. Refit the new Game PCB and fully tighten the 4off pozi head screws (Mx25).
7. Connect the new cables linking the I/O boards to the Front Cover Boards, and the
new HSB cable linking the two front cover boards.
8. Locate and separate the two way connector with yellow and black wires. This is
located to the right of the Switchmode Power Supply.
9. Fit the new break out cable to the two way connectors and connect the other ends to
the front cover boards, as shown in the diagram below.

Questions and Answers:

Question and Answer IconNeed help?

Do you have a question about the NAMCO Final Furlong 2 and is the answer not in the manual?

NAMCO Final Furlong 2 Specifications

General IconGeneral
BrandNAMCO
ModelFinal Furlong 2
CategoryArcade Game Machines
LanguageEnglish

Related product manuals