14
D3
heatless desiccant air dryer
3. If a dewpoint sensor is tted, disconnect the nut attached
at outlet block and pull through the tubing, (maintain
attachment to the sensor assembly).
4. Undo the M12 retaining bolts from the top manifold.
(8 bolts per column)
5. Remove the top manifold (care should be taken not to
damage the sealing face).
6. Remove all of the column caps exposing the drying
media.
7. Using a suitable vacuum cleaner, remove the expended
dessicant media from each column.
8. Remove any contaminants from the columns internal
surface.
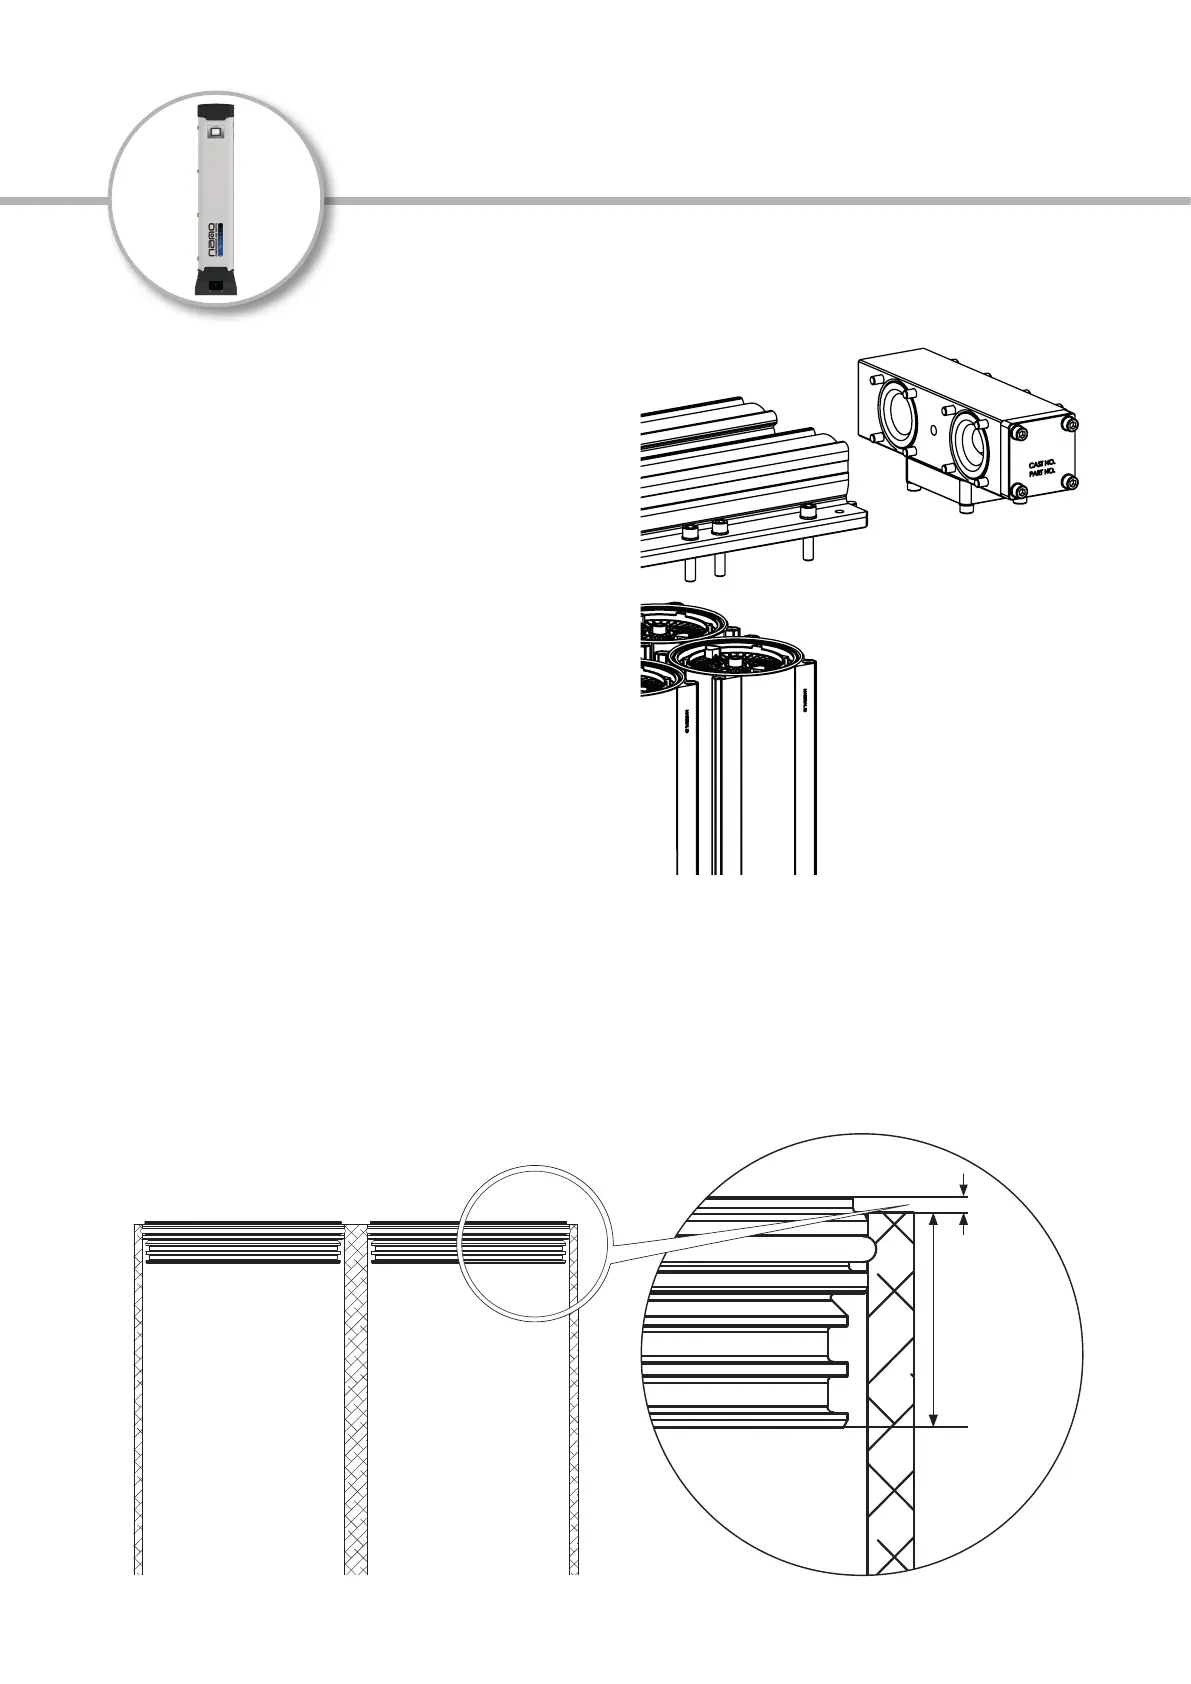
9. Using a nano suitable snow storm ller, replace
the dessicant media ensuring continuous lling is
maintained. A gap of 30mm must be left free at the top
of each column for the column cap [gure B.5].
10. Install a new 150mm diameter media disc onto the top of
the dessicant ll and t column caps.
11. New column top caps must be installed. (Caps should
stand approx. 2mm above column length).
12. Clean top manifold and replace all gaskets (use a suitable
grease to hold gaskets into place).
13. Ensure all column sealing faces are clean and free from
dust.
14. Reassemble the dryer by replacing the top manifold
ensuring it is lined up correctly with the columns, using
Guide Pins (see parts list). Insert all M12 bolts and torque
to a setting of 80Nm following the correct tightening
sequence on page 19-20.
15. Ret the door.
16. Re-connect the outlet manifold connection
using 4 x M10 bolts.
17. Start up the Dryer (see page 8)
30mm
2mm
 Loading...