NAPCO Gemini C-Series Control Panel Installation Instructions--Volume 2
Installation Instructions, Volume 2 Page 49
GEMC-FPRINT Formatting
The "GEMC-FPRINT Formatting" tab in PCD-Windows Quickloader allows you to enter in GEMC-FPRINT formatting print op-
tions. Selections are performed using combination boxes and Edit/Thumb wheels for number limits.
Group Bypass See Closing Report
IO
Initially Off (Alarm Code feature)
Used for scheduled access control. If a User Code is scheduled to turn on and off, upon power up it will remain off until
scheduled to turn on.
Interior Stay Zones; Interior 1 Normally Bypassed; Automatic Interior Bypass/Easy Exit
Removal of a programmed group of interior (STAY) zones from the system will permit freedom of movement throughout the
premises but still allow protection from intrusion through armed perimeter zones. Pressing E prior to arming will select
the Interior Zones, then arm to bypass. The next time the control panel is disarmed, all bypassed zones will automatically
revert to non-bypassed (disarmed) zones. When E is pressed, the "BYPASS" reminder will turn on.
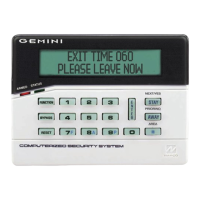
The bypassed zones may be displayed on the keypad (see GEMC-BK1 FUNCTION MODE).
If Interior Normally Bypassed is selected, all Interior (STAY) Zones will always be inactive. The "BYPASS" reminder will always
display, indicating that only partial protection will be provided upon arming. To temporarily restore interior protection, press
E; the "BYPASS" reminder will go out upon arming, denoting full protection, however Interior (STAY) Zones will once
again be bypassed the next time the panel is disarmed.
If "Auto Interior Bypass" is programmed, all Interior Zones will automatically be bypassed if the Exit/Entry doors are not
opened during exit delay. If ENTER is pressed while armed Stay, exit delay will restart and Exit/Entry doors may be opened
to permit someone to exit (while others remain on premises) without causing an alarm.
Interior Bypass
Interior 1 Bypass
Interior 2 Bypass
Interior (STAY) Bypass
"Interior Bypass" zones allow freedom of movement inside the premises, while still providing perimeter protection, in "ARMED
STAY" mode by pressing
E before arming. All zones (including Interior Bypass zones) are all protected with full protec-
tion, in "ARMED AWAY" mode, by arming without the E button. The next time the zone is disarmed, the zone will be-
come a full protected zone. Interior zones can be made to be normally bypassed by enabling "Interior Normally Bypassed"
and to be unbypassed by pressing
E. The next time the zone is armed, the zone will become a partially protected zone.
To bypass interior zones, press INTERIOR for Interior 1; press again for Interior 2; press once again for both, then press
ENTER. To cancel entry delay on entry zones, press INSTANT. "ARMED**I" will display and the red light will flicker.
Jumpers (Refer to Wiring Diagram for UL configuration.)
R: (Located on the GEMC-BM/PS and GEMC-BM/PS) Cut for dry contacts on the Burg AUX Relay.
Jumpers below are located on the C-Series motherboard:
J1: Fire Keypad Configuration Jumper (top-right corner, above micro shield) is installed across top and center pins for nor-
mal operation. When configuring the GEMC-BK1 keypad, move jumper across center and lower pins. Note: Do NOT use
when configuring the GEMC-BK1 Burglary keypads if the Fire system is in operation. Use J17 BURG SERV jumper.
J4: Burg Only Jumper: The panel leaves the factory with keypad #1 programmed as a "Fire Keypad",. Since a "Burg Only"
system will not possess a Fire keypad, place a shunt across J4 to make the panel keypad #1 a Burg keypad, allowing the sys-
tem to be programmed and function as a Burg Only panel.
J17: Burg Service Jumper. Move the shunt from OFF to ON to enter Burg Service Mode when maintenance or changes to
the Burglary hardware must be performed, while keeping the Fire system in operation. Entering Burg Service Mode will pre-
vent the panel from processing any Burglary events (Areas 2-8) and will allow the Burglary keypad(s) to go into Configuration
Mode.
Keyfob Transmitters
Burg PGM1 'Chirp' on Keyfob Arm/Disarm
Select Burg Output (Bell) for Keyfob Chirp
Disable Burg PGM1 Clear on Disarm
Burg PGM1 Chirp on Keyfob Arm/Disarm will cause one 50mS chirp to sound on arming and two 50mS chirps on disarm-
ing. Use the steady output of a siren driver. Do not use a voice siren driver.
Burg Output Chirp on Keyfob Chirp will cause one 50mS chirp to sound on arming and two 50mS chirps on disarming.
Use the steady output of a siren driver. Do not use a voice siren driver.
Programming a "C as the Keyfob Aux-1 Function or Aux-2 Function will provide the ability to toggle the Aux. Relay on or
BURGLARY GLOSSARY
 Loading...