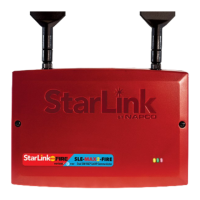
6 StarLink SLE-MAX2-FIRE Commercial Series Sole/Dual-Path Alarm Communicator -- Installation Instructions
WARNING: To ensure user safety and to satisfy FCC RF
exposure requirements, this unit must be installed so that a
minimum separation distance of 60cm (24") is always main-
tained between the antenna of the transmitting device and
nearby persons.
STEP 3: WIRING
22-gauge wire may be used if mounted up to 50 feet from the
control panel, and 18-gauge wire should be used for up to 100
feet. Reference the wiring diagrams further in this manual.
See the section CONTROL PANEL PROGRAMMING further
in this manual.
The wiring between the control panel and the StarLink com-
municator is over several wires, as follows:
• TB1: PWR Regulated DC
• TB2: PWR GND (–)
• TB21: N/C OUT1: Wired to the (+) of a zone dedicated
to monitoring the communicator status. Should be pro-
grammed on Napco GEMC control panels as Monitor or
Supervisory Zone.
• TELCO PRIMARY to FACP Telco 1 RJ-45 socket.
• TELCO SECONDARY to FACP Telco 2 RJ-45 socket.
• (Place JP1 shunt on bottom two pins)
• Optional: Wire IN2 with a 10K EOLR in parallel with the
FACP trouble relay output Common and N/O (or in series
with Common and N/C).
Wiring Methods
• Strip wire carefully to avoid exposed conductors after in-
stallation, etc.)
• Use of Certified wire, ensuring that all conductors are to be
insulated for the maximum voltage of any conductor in the
enclosure
• All wiring methods must be performed in accordance with
NFPA70, Articles 725, and 800
STEP 4: APPLY POWER
• Attach antennas before applying power !
• Apply 12/24VDC to terminals 1 and 2.
STEP 5: SIGNAL VERIFICATION
After triggering channels, use the StarLink communicator Sig-
nal Verification to ensure that the StarLink communicator Net-
work has properly received the signals.
• Verify Online: To verify that the signals have been re-
ceived by the StarLink communicator Network online, go to
www.NapcoNOC.com, log in with your Username and
Password, enter your Company ID number and the Star-
Link Radio Number, then click Signal Log.
IMPORTANT: Verify that the signals transmitted by the Star-
Link communicator have been properly received by your cen-
tral station before leaving the premises.
NOTE: This equipment has been tested and found to comply
with the limits for a Class B Unintentional Radiator, pursuant
to Part 15 of the FCC Rules. These limits are designed to
provide reasonable protection against harmful interference in
a residential installation. This equipment generates, uses,
and can radiate radio frequency energy and, if not installed
and used in accordance with the Instruction Manual, may
cause harmful interference to radio communications. Howev-
er, there is no guarantee that interference will not occur in a
The MAX2 series communicators are compatible with 4/2
Pulse Dialing formats with 10pps, 20pps, and 40pps with and
without checksum, either 1400Hz or 2300Hz handshake /
kissoff. See table on page 3 and table of formats on page 15.
Refer to WI2140 for selecting the required handshake / kissoff
frequency in the NOC (www.NapcoNOC.com) setup screens
(as required by the control panel).
NETWORK COVERAGE
The StarLink communicator constantly supervises the cell
network coverage. When the StarLink communicator detects
a loss in network coverage, the StarLink communicator must
be configured to prompt the control panel to announce a Tel-
co Line Cut failure trouble using the Management Center
screen (at www.NapcoNOC.com).
INSTALLATION STEPS
STEP 1: ACCOUNT REGISTRATION
Create a new account and register specific StarLink communi-
cator modules at www.NapcoComNet.com. Accounts and
modules registered via the Internet are enabled for activation
within 24 hours (usually within 30 minutes). Note: Activate
radio before applying power.
STEP 2: SELECT A MOUNTING LOCATION
The mounting location should be indoors within the protected
area and selected based on RF performance. It is HIGHLY
recommended that the installer carefully adhere to the follow-
ing recommendations BEFORE any wires are installed.
• Generally, high locations are best. DO NOT mount com-
municator in basements or below grade as unpredictable
performance may result.
• DO NOT mount the communicator in non-climate con-
trolled environments (i.e. attics may become extremely hot
in summer, garages may become extremely cold in win-
ter).
• Avoid mounting locations within 3 feet of AC power lines,
fluorescent light fixtures, or large metal objects (air condi-
tioners, metal garage doors, etc.) as these locations have
been shown to have a detrimental effect on signal
strength.
• A fair amount of care may be required to mount the com-
municator so as to achieve an optimal RF path. The in-
staller should spend as much time as needed to obtain the
highest signal level possible.
a. Before applying power, be sure to connect the an-
tenna. Temporarily connect power to the communica-
tor from a fully charged 12V (4AH minimum) battery.
DO NOT mount the StarLink communicator at this time.
Press Tamper switch to send a signal.
b. Position the unit in the desired mounting location, with
antenna oriented vertically. The signal strength is dis-
played by the Green "Signal Strength LED" labeled
"D3" (located at the lower right corner of the PC board).
The radio tower signal strength may fluctuate from day
to day, therefore it is best to try to find a mounting loca-
tion where the LED provides a minimum of 2 blinks.
c. After a location has been selected based on signal cov-
erage, permanently secure the unit using #8 screws
(not supplied) in the two mounting holes or to a Certified
1, 2 or 3 gang electrical box.
 Loading...