3. INSTALLATION:
3.1 Installation of stove and sensing element
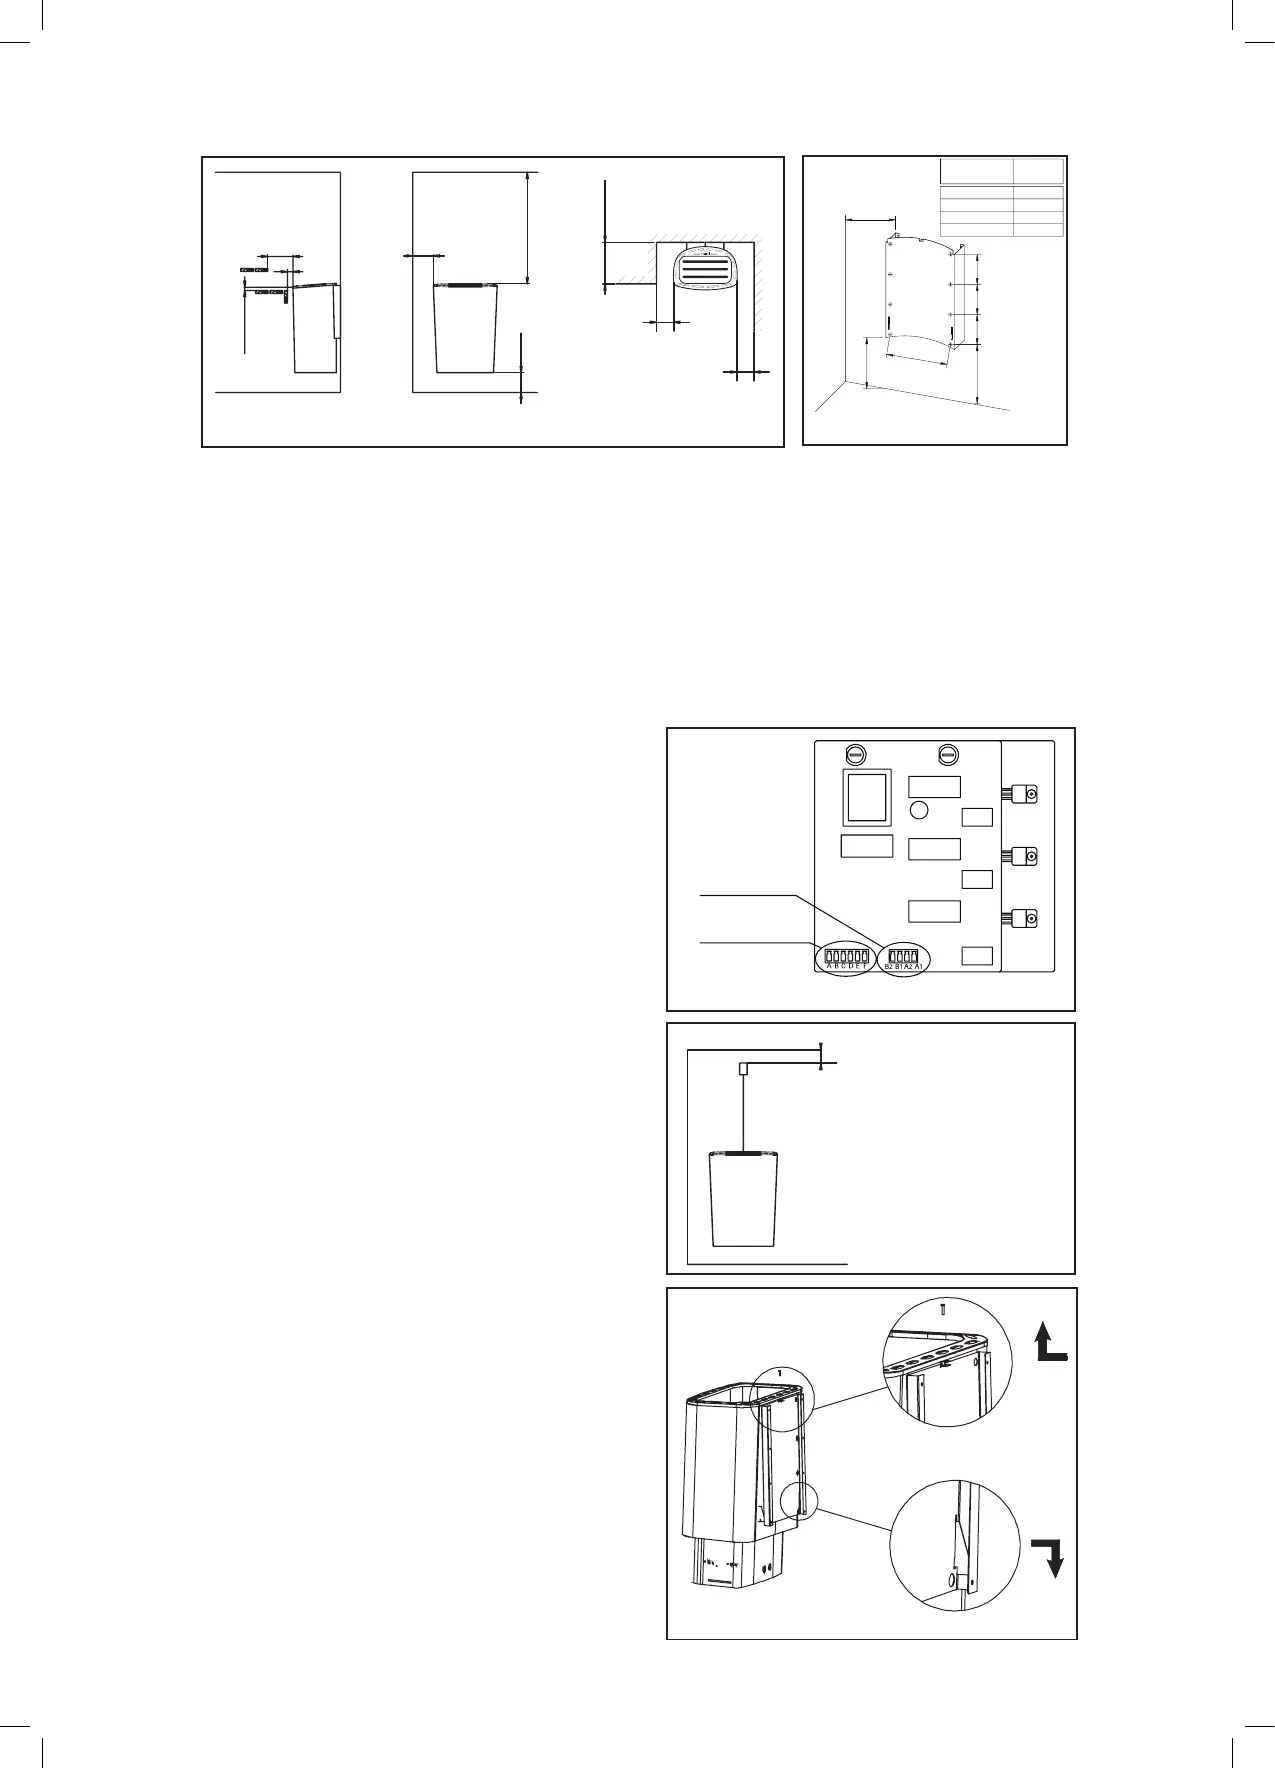
- Fasten the fixing plate for the stove on the wall as shown in Fig. 2. Use the 2 screws
included in the delivery.
- Electrical connection of the stove may only be carried out by a qualified electrician
in compliance with valid regulations.
- The connection cable shall be a rubber sheathed cable of type H07RN-F or
corresponding. Cable size and fuse rating as indicated in Table 1.
- Connection of connection cable
- turn the stove bottom up
- open the base of the electrical box
- plug in the connection cable
- There is socket for control unit and
element. Put sockets for connection
plugs. (Fig. 3.1)
- Install cable clamps to electrical box wall.
- replace the base of the electrical box
- turn the stove upright
- Install the sensing element on the wall.
Cf. Fig. 3.2.
- The wiring for the sensing element
can be embedded.
INSTALLATION ON THE WALL:
- Draw in the lugs on the rear side of
the sauna stove through the mounting slots
of the mounting plate on the wall (Fig. 4A).
- Push the upper edge of the mounting plate
between the jacket and upper frame of
the sauna stove and make sure that the
lugs of the stove are wedged into the slots
of the mounting plate on the wall (Fig. 4B).
- Tighten the upper edge of the sauna
stove
with a locking screw (Fig. 4C).
- The stone basket is now locked in the
jacket and on the mounting plate of
the sauna stove.