13
Nautilus NS200X
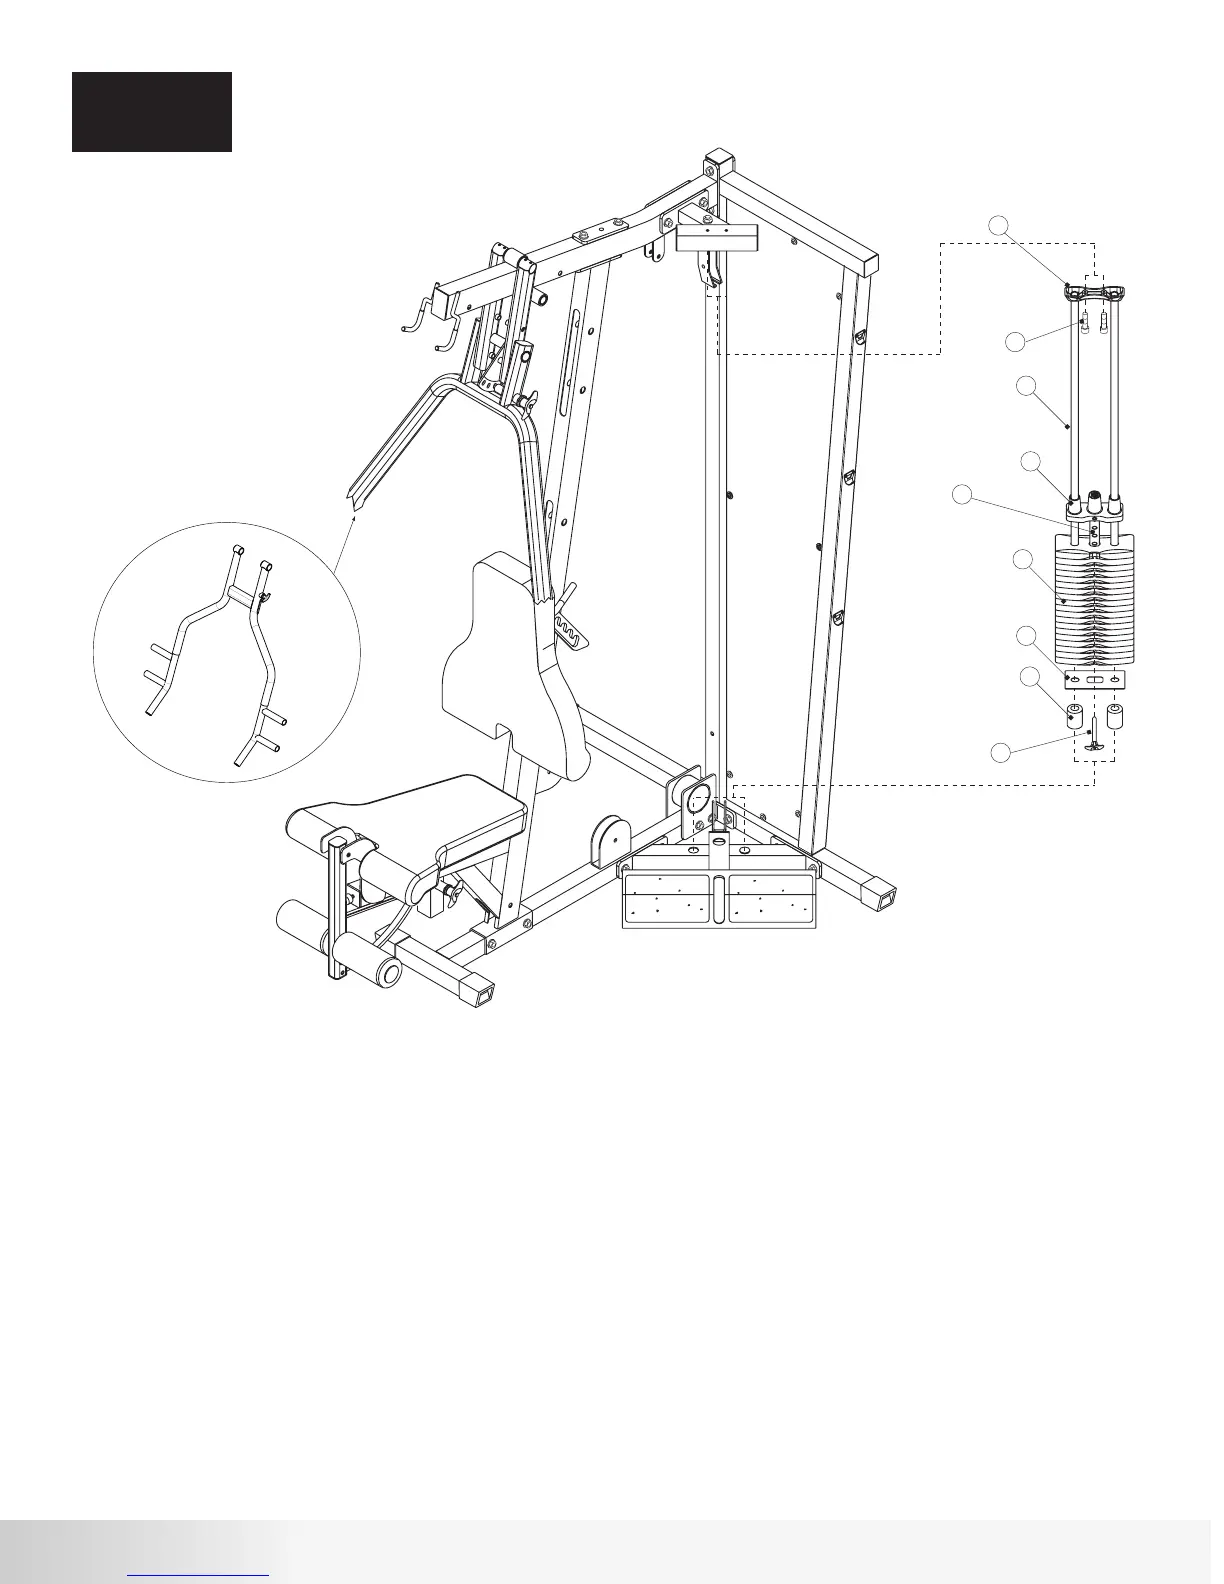
Step 5 Components:
Procedure:
ASSEMBLY
STEP 5
# Component Qty
33
34
35
36
37
38
39
56
74
Guide Rod
Weight Stack Bottom Plate
Selector Stem
Top Weight
Weight Plate
Guide Rod Holder
Weight Stack Cushion
Cap Head Allen Screw 1”L
Weight Selector Pin
2
1
1
1
19
1
2
2
1
A.
Slide Weight Stack Cushion (39) on each Guide Rod (33) allowing
approximately 3” of Guide Rod showing below the Weight Stack Cushion.
Insert Guide Rods (33) into holes in the Calf Raise/Low Pulley Frame as
shown.
B. Slide Weight Stack Bottom Plate (34) on top of Weight Stack Cushions (39).
C.
Place nineteen Weight Plates (37) and the Selector Rod/Top Plate
Assembly (35 & 36) on the Guide Rods (33) as shown. Install Weight
Plates (37) so that the selector pin hole faces forward and is located on
the bottom of the plate. Install the Selector Rod/Top Plate Assembly so
that the head of the bolt is facing forward. This gym is supplied with
individual weight plate numbering decals that should be applied to the
gym after the weight stack is assembled.
D. Slide Guide Rod Holder (38) on the top of the Guide Rods (33) and attach
the Guide Rod Holder (38) to the Top Stack Support Frame using the
hardware shown. Tighten hardware securely.
E.
Place Weight Selector Pin (74) in the bottom Weight Plate (37).
33
56
38
36
37
34
39
74
35
1”L
NS200X Press Arm
 Loading...