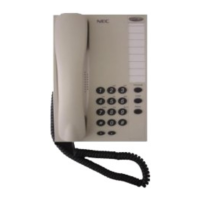
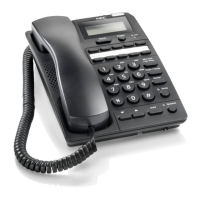
LOCATION OF CONTROLS
Single Line Telephone
AT-10
USER'S GUIDE
Wall Mount Concave
Message Waiting Lamp
PROGRAM Key
FLASH Key
REDIAL Key
Dial Keys
Receiver Volume Controls
LINE Jack
HANDSET Jack
Dial Mode Switch
1. Lift handset.
2. Hear dial tone.
3. Dial number.
1. Lift handset.
2. Press key to redial your last call (up to 31 digits).
◆Redial after flashing is not available.
When placing a call in DP (Pulse) mode, you can dial to change to MF (Tone)
dialing. The dial mode automatically reverts to DP mode when you hang up.
1. Press keys to increase/decrease handset receiver volume while on a call.
◆Volume can be increased 3 levels, decreased 2 levels against the default level.
1. Lift handset.
2. Press key.
3. Dial .
4. Dial
—
(Refer to the table in the right).
5. Press key.
6. Hang up.
1. Lift handset when the phone rings.
◆If you lift handset after setting to "0"(Off), the ringing tone automatically reverts to
the previous value.
While on a call, press key for outside line or PBX features.
1. Mark off the correct positions for the screws (included), 83.5mm apart vertically
opposed before drilling the wall.
2. Install the screw into the wooden wall.
3. Mount the telephone on the wall so that the screw head inserts into the concave on
bottom of the telephone.
1. Hang the handset on the handset holder.
Set the Dial Mode Switch either to DP(Pulse) or MF(Tone) according to the telephone
network. For installation on a PBX, check with your supplier for the correct dialing mode.
1. Fit the other end of telephone line cord to your telephone network outlet.
INSTALLATION
FEATURES
■ Package Contents
■ Installing the Telephone
■ Selecting Dial Mode
■ Wall-Mounting
To wall-mount the phone:
To store the handset without hanging up:
■ Making a Call ■ Answering a Call
■ Last Number Redial
■ Flash
■ Pulse to Tone Switching
■ Adjusting Receiver Volume
■ Selecting Ringing Pitch and Ringing Volume
83.5mm
Screw
Telephone Set
User's Guide
Wall-mount screws
(2 pieces)
Message Waiting Lamp lights when you have messages waiting (if your PBX system can
send them). Also flashes when your telephone rings.
■ Message Waiting Lamp
Ringing Volume
(Default: 6)
Ringing
Tone
Pitch
Soft Medium Loud
Slow 1 2 3
Medium 4 5 6
Fast 7 8 9
Off 0
Handset Holder
Tokyo, Japan
MM6017-1010
Nothing contained in this manual shall be deemed to be, and this manual does not constitute, a warranty of,
or representation with respect to, any of the equipment covered. This manual is subject to change without
notice and NEC has no obligation to provide any updates or corrections to this manual.
1. Avoid installing the phone where there is direct sunlight, or near heating appliances,
since this may cause discoloration and warping.
2. When the telephone becomes dirty, wet a soft cloth with diluted neutral detergent,
wring it out and wipe. Do not use strong cleaning agent or abrasive powder.
3. Keep away from TV sets, radios, etc. which may generate electrical noise.
4. Avoid dropping the handset and other rough treatment.
Warning:
The handset receiver may retain dangerous materials such as metallic pins and staples
because the receiver induces magnet.
CHECKLIST FOR TROUBLESHOOTING
CARE AND MAINTENANCE
➢Does the hookswitch pop up ?
➢Is the dial mode switch (DP/MF) set to the correct position ?
➢Are phone line cord and handset cord securely plugged in ?
If you disconnect the phone from the network, the data in phone's memory such
as redial number and ringing tone assignment will be erased (back to default) in a
few hours.
◆For other problems, contact your supplier.