English-6
Quick Start
For box contents, please refer to the Setup Manual.
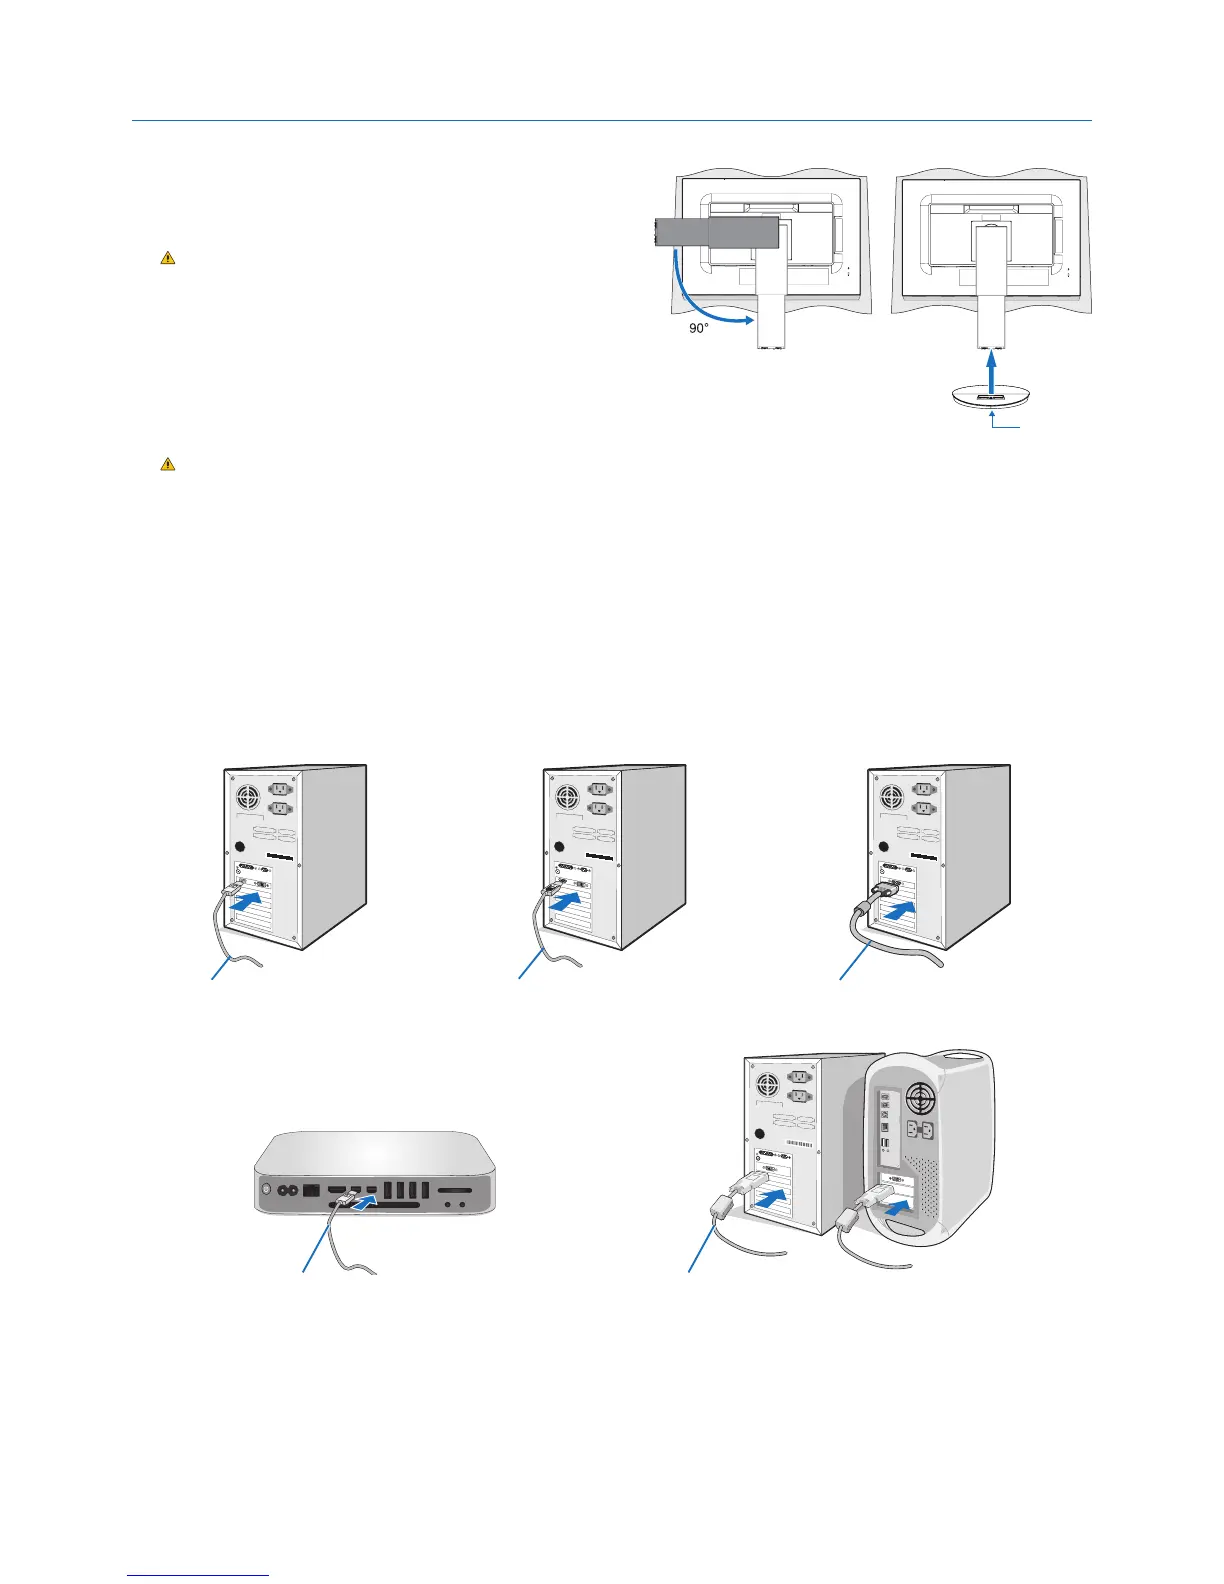
To attach the Base to the LCD stand:
1. Place monitor face down on a non-abrasive surface (Figure 1).
2. Please rotate the stand 90 degrees as shown in Figure 1.
CAUTION: Handle with care when pulling the stand.
It may pinch your fingers.
3. Attach the base to the stand and lock screw at the base’s bottom
(Figure 2).
NOTE: Reverse this procedure if you need to re-pack the monitor.
To connect the LCD monitor to your system, follow these instructions:
NOTE: Make sure to read “Recommended Use” (page 3) before installation.
CAUTION: Please tighten all screws.
NOTE: The accessories included will depend on the location where the LCD monitor was shipped.
1. Turn off the power for your computer.
2. For a PC with DisplayPort output: Connect the DisplayPort cable to the connector of the display card in your system
(Figure A.1).
ForaPCwithHDMIoutput:Connect the HDMI cable to the connector of the display card in your system (Figure A.2).
For a PC with Analog output: Connect a mini D-Sub 15-pin signal cable to the connector of the display card in your system
(Figure A.3).
For a Mac or PC with Thunderbolt or Mini DisplayPort output: Connect a Mini DisplayPort to DisplayPort cable to the
video output connector on your system (Figure A.4).
For a PC or MAC with DVI digital output: Connect the DVI signal cable to the connector of the display card in your system
(Figure A.5). Tighten all screws.
Figure A.1 Figure A.3Figure A.2
DisplayPort cable HDMI cable Mini D-Sub 15-pin signal cable
DVI cable
Figure A.4 Figure A.5
Mini DisplayPort to DisplayPort cable
NOTE: 1. When removing the DisplayPort cable, hold down the top button to release the lock.
2. Please use a High Speed HDMI cable with HDMI logo.
3. Please use a Certified DisplayPort cable.
Figure 1
Figure 2
Screw