3
12345
12345
12345
12345
INSTALLATION SET-UP INSTRUCTION.
Before Installation
The installation procedure is different according to the projection system and screen size. From the factory the projector is set for
ceiling mount, 100 inch diagonal screen size and a projection angle of 12.4 degrees (XG75A)/12.2 degrees (XG110LC/XG135LC).
Installation and preliminary adjustments are required as shown on table below.
Adjustment
items
Screen size
(diagonal)
Projection type
None (
Set the focus ring when changing projection angle
)
Yes
None (
Set the focus ring when changing projection angle
)
Yes
None (S
et the focus ring when changing projection angle
)
Yes
None (
Set the focus ring when changing projection angle
)
Yes
None
Yes
Yes
Yes
Yes
Yes
Yes
Yes
100 inch
other than 100 inch
100 inch
other than 100 inch
100 inch
other than 100 inch
100 inch
other than 100 inch
Ceiling mounting Front projection
Desk top Front projection type
Ceiling mounting/Rear projection
Desk top Rear projection
None
None
Yes
Yes
Yes
Yes
None
None
Various
adjustments
NOTE: For XG75A, the “100 inch” covers the range of screen size between 80 and 129 inches. For XG110LC/XG135LC, The ''100
inch'' covers the range of screen size between 90 and 109 inches.
NOTE: Focus ring adjustment on pages 15 and 16 for XG75A, and 17 and 18 for XG110LC/XG135LC.
H Polarity
change
Focus ring and CRT angle change
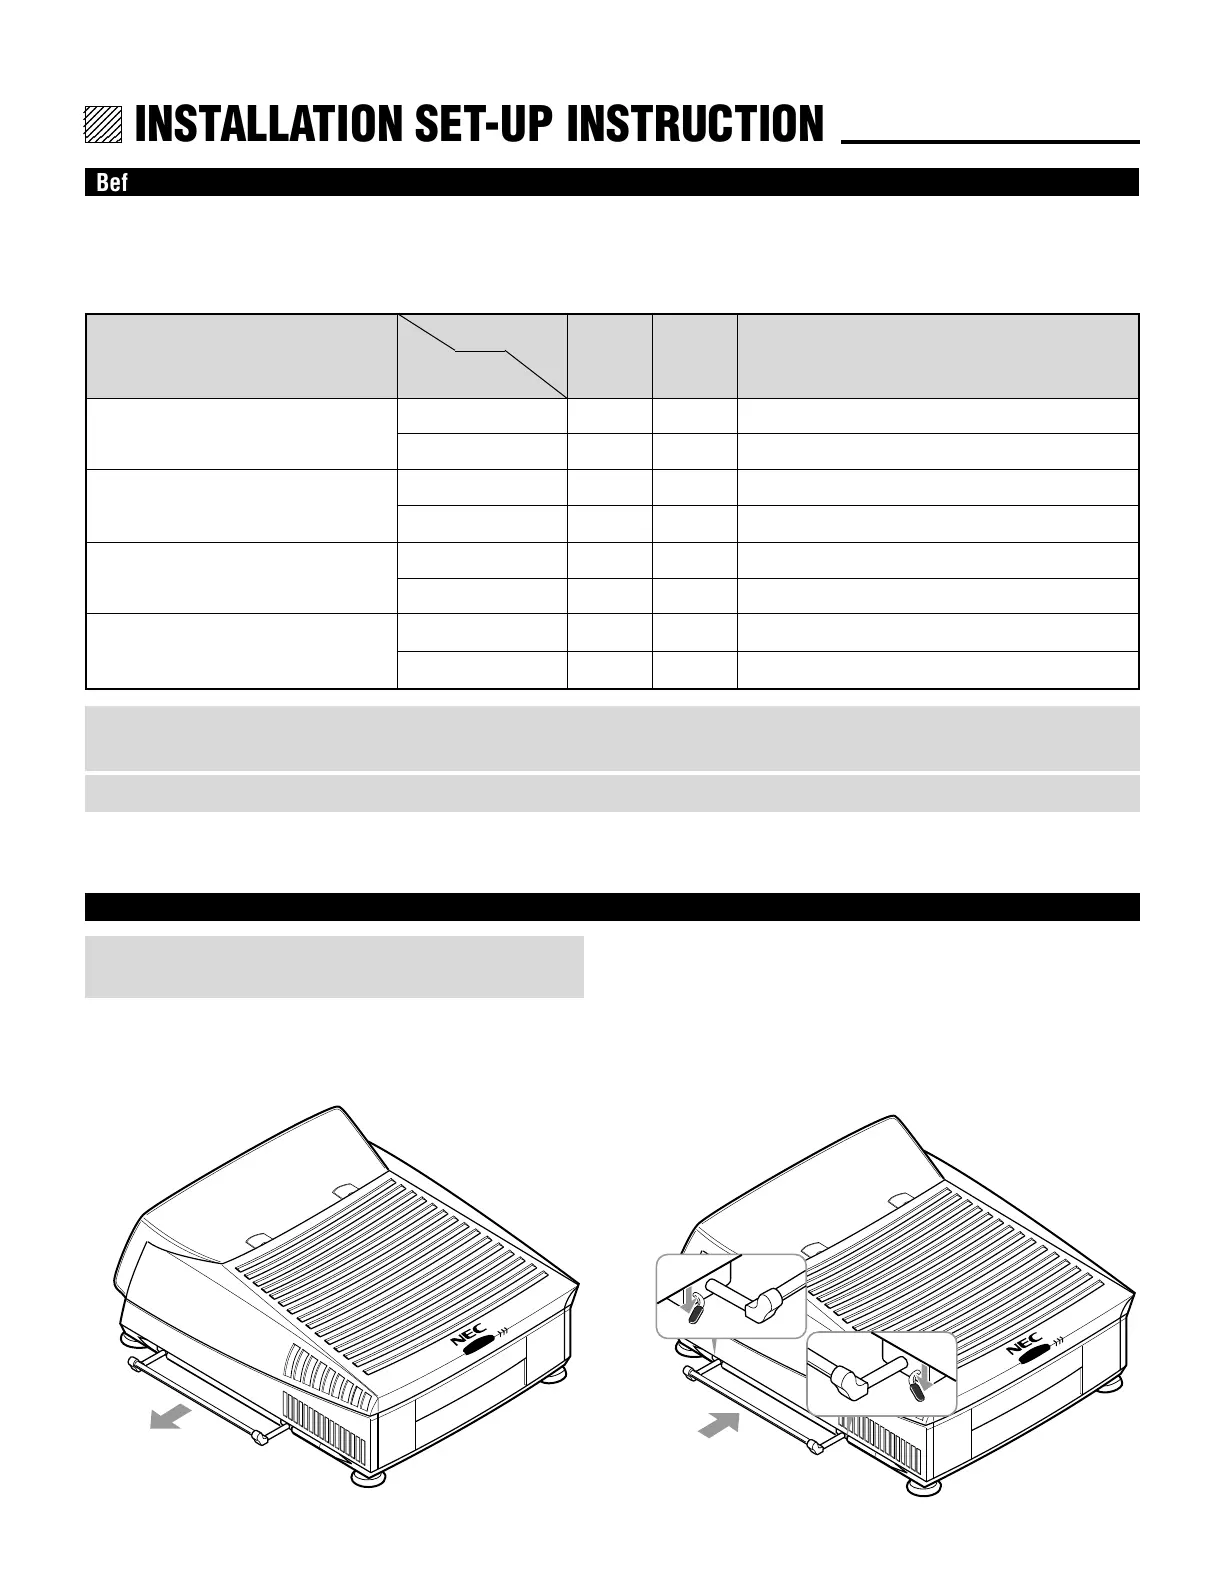
Carrying the Projector
WARNING:
Be sure to use the handles when carrying the projector.
Pulling Out the Handle
Pull out the handle from the bottom side.
Retracting the Handle
Press down the two levers at the same time to retract the
handle.