39
3. Convenient Features
TIP:
UninstallingVirtualRemoteTool
Preparation:
ExitVirtualRemoteToolbeforeuninstalling.TouninstallVirtualRemoteTool,theWindowsuseraccountmusthave
“Administrator” privilege(Windows 8.1,Windows8,Windows7andWindowsVista) or“Computer Administrator”
privilege(WindowsXP).
•ForWindows8.1,Windows8,Windows7andWindowsVista
1 Click“Start”andthen“ControlPanel”.
The Control Panel window will be displayed.
2 Click“Uninstallaprogram”under“Programs”
The“ProgramsandFeatures”windowwillbedisplayed.
3 SelectVirtualRemoteToolandclickit.
4 Click“Uninstall/Change”or“Uninstall”.
•Whenthe“UserAccountControl”windowsisdisplayed,click“Continue”.
Follow the instructions on the screens to complete the uninstallation.
•ForWindowsXP
1 Click“Start”andthen“ControlPanel”.
The Control Panel window will be displayed.
2 Double-click“Add/RemovePrograms”.
The Add / Remove Programs window will be displayed.
3 ClickVirtualRemoteToolfromthelistandthenclick“Remove”.
Follow the instructions on the screens to complete the uninstallation.
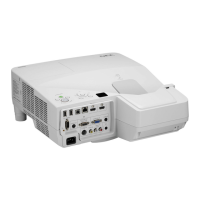
Step 2: Connect the projector to the computer
1 Usethesuppliedcomputercable(VGA)toconnecttheCOMPUTERINterminaloftheprojectordirectly
with the monitor output terminal of the computer.
2 ConnectthesuppliedpowercordtotheACINoftheprojectorandthewalloutlet.
The projector is in the standby condition.
ACInput
Supplied computer cable (VGA)
→ To wall outlet
Power cord (supplied)
TIP:
• WhenVirtualRemoteToolstartsforthersttime,“EasySetup”windowwillbedisplayedtonavigateyourconnections.
 Loading...