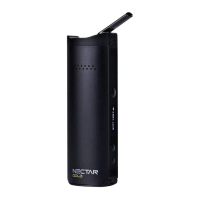
The Nectar Gold is a smart vaporizer designed for both dry herbs and extracts, aiming to provide the benefits of cannabinoids while minimizing the intake of toxins and carcinogens.
Important Technical Specifications
- Dimensions: 11cm x 3.7cm x 2.3cm
- Device Weight: 139g
- Colour: Matte Black
- Battery Capacity: 2900mAh (20A)
- Compatible Ingredients: Dry Herbs + Extracts (Resin/Wax/Hash*). Users are advised to check local jurisdictions for legality.
- Temperature Range: 100°C - 240°C / 212°F - 464°F
- Temperature Precision: 1°C Increments
- Materials: Ceramic Chamber, Aluminium Body, Zirconia Mouthpiece
- Charging Time: Approximately 2 hours
Usage Features
The Nectar Gold offers several features for an optimized vaping experience:
- Eminent Heatup Time: Ensures quick readiness for use.
- Precision Temperature Control: Allows users to set the desired temperature with 1°C increments.
- 2-in-1 Functionality: Capable of vaporizing both dry herbs and concentrates.
- Breathtaking Airflow: Designed for smooth and enjoyable draws.
Operating Guide: Charging
Before first use, it is recommended to charge the device for 1 hour. During charging, the OLED screen displays a blinking battery gauge, which becomes solid when fully charged. Overcharging should be avoided to protect and extend battery life. The device charges via a USB port and has a battery release clip for the 18650 battery.
Operating Guide: Vaping Dry Herbs
- Sterilising: Before initial use and after charging, the device should be sterilised (refer to the sterilisation section for details).
- Packing the Chamber/Bowl: Grind herbs and detach the cooling unit. Fill the chamber at least halfway for best results. Gently compact the herbs to avoid restricting airflow.
- Turning on the Device: Press and hold the power button for 5 seconds. The device will begin to heat up, indicated by a continuously blinking icon on the screen.
- Setting the Temperature: Use the 'up' and 'down' buttons to adjust the temperature. The device vibrates and the icon becomes solid once the desired temperature is reached.
- Vaping: After the desired temperature is reached, wait 20 seconds for even heating. Take long, slow, and smooth draws (5-10 seconds per draw) without pressing any buttons.
- Choosing a Temperature: A starting temperature of 180°C is recommended, increasing by 10°C per session to find personal preference.
Operating Guide: Timer
The device has an automatic 5-minute timer to conserve battery and prevent overheating. A vibration alerts the user when the device turns off. The timer setting can be toggled between 5 and 10 minutes by holding the 'power' and 'up' buttons for 2 seconds.
Operating Guide: Toggles & Indicators
The OLED screen displays:
- Desired Temperature
- Temperature Unit (Celsius/Fahrenheit)
- Battery Power
- Heating Indicator
- Timer
- Real Temperature
To toggle between Celsius and Fahrenheit, hold the 'power' and 'down' buttons simultaneously for 2 seconds.
Operating Guide: Vaping Extracts
- Place the Wax Pad: Ensure the chamber is cool and free of loose leaf/resin. Place the provided extract/concentrate/wax pad into the chamber.
- Adding Extracts: Place a small amount of extract (roughly half a grain of rice) onto the pad, gradually increasing to two grains of rice to find the preferred amount. Avoid overfilling to prevent overspill and blocked airflow holes.
- Heating the Concentrate/Wax: Concentrates require higher boiling points. Set the temperature to 230°C-240°C. After the device vibrates, wait an additional 20 seconds, then take long, slow, and smooth draws (5-10 seconds depending on desired hit strength).
Maintenance Features
Cleaning: Light Clean
A light clean is recommended every 5 sessions and involves three steps:
- Prepare for Cleaning: Allow the device to cool completely. Detach the cooling unit and brush away any loose leaf.
- Cleaning the Mouthpiece: Soak a pipe cleaner in isopropyl alcohol (ISO) and scrub the inside of the mouthpiece. Wipe away ISO and particles with a clean, dry pipe cleaner. Clean the outside with an alcohol pad.
- Cleaning the Heating Chamber: Soak a cotton swab or cleaning brush with ISO. Insert into the chamber and scrub the sides and bottom with a circular motion. Dry with a clean cloth or cotton swab.
Cleaning: Deep Clean
A deep clean is recommended every 20 sessions and involves six steps:
- Dismantle the Cooling Unit:
- Pull the rubber holder out of the cooling unit.
- Invert the rubber holder.
- Push out the rubber holder filter and ceramic holder.
- Pull out the horseshoe slip.
- Detach the ceramic mouthpiece.
- Method 1: Cleaning the Filters: Use alcohol pads to rub away residue from each part individually. Reassemble, sterilise, and use.
- Method 2: Cleaning the Filters: Soak all ceramic and metal parts from the cooling unit in ISO. Scrub each part with an ISO-soaked brush. Rinse with lukewarm water and dry with a clean cloth. Reassemble, sterilise, and use.
- Note: Isopropyl alcohol deforms rubber. Do NOT soak rubber parts for more than 30 seconds.
Sterilising in 3 Steps
- Prepare for Sterilising: Ensure the device is sufficiently charged. If sterilising after a clean, ensure parts are wiped dry.
- Setting Your Temperature: Set the vaporizer to the maximum temperature (240°C) by holding the 'up' button.
- Sterilising: Allow the device to heat for 5 minutes with an empty chamber. The built-in 5-minute timer will turn it off. Repeat this step twice: once with the cooling unit detached and once with it attached.
Warnings
- Liquids & Extracts: Do not submerge the device or chamber in water, ISO, or other substances. Do not use with viscous liquids/oils, as this may block airflow. Extracts should only be used with the wax pad.
- Error Codes: "Out short" or "low voltage" messages indicate a battery issue. Replacing with an original battery should fix it. Contact customer service via WhatsApp if the issue persists.
- Charging: Do NOT charge with a charger exceeding 5V/1A. Avoid leaving the device uncharged for over 2 months to prevent capacity reduction and battery failure.
- Law & Age: Users must check local jurisdictions for legality and minimum age restrictions regarding herbs and extracts.
Warranty and Support
The Nectar Gold comes with a 2-year warranty, which can be activated by registering the device online. Nectar also offers a "Nectar Club Subscription" with benefits like annual refurbished device replacements, lifetime insurance, product value, free upgrades/vaporizers every 2 years, and a lifetime discount.
Customer support is available via WhatsApp, email, and telephone, with specified average response times. YouTube support videos are also provided for cleaning, changing filters, and general usage.