11
Your adjustable bed is also created for platform or slatpack bed systems. Before installing on a platform or slat
pack bed, apply an-skid pads under the adjustable bed to keep it in place.
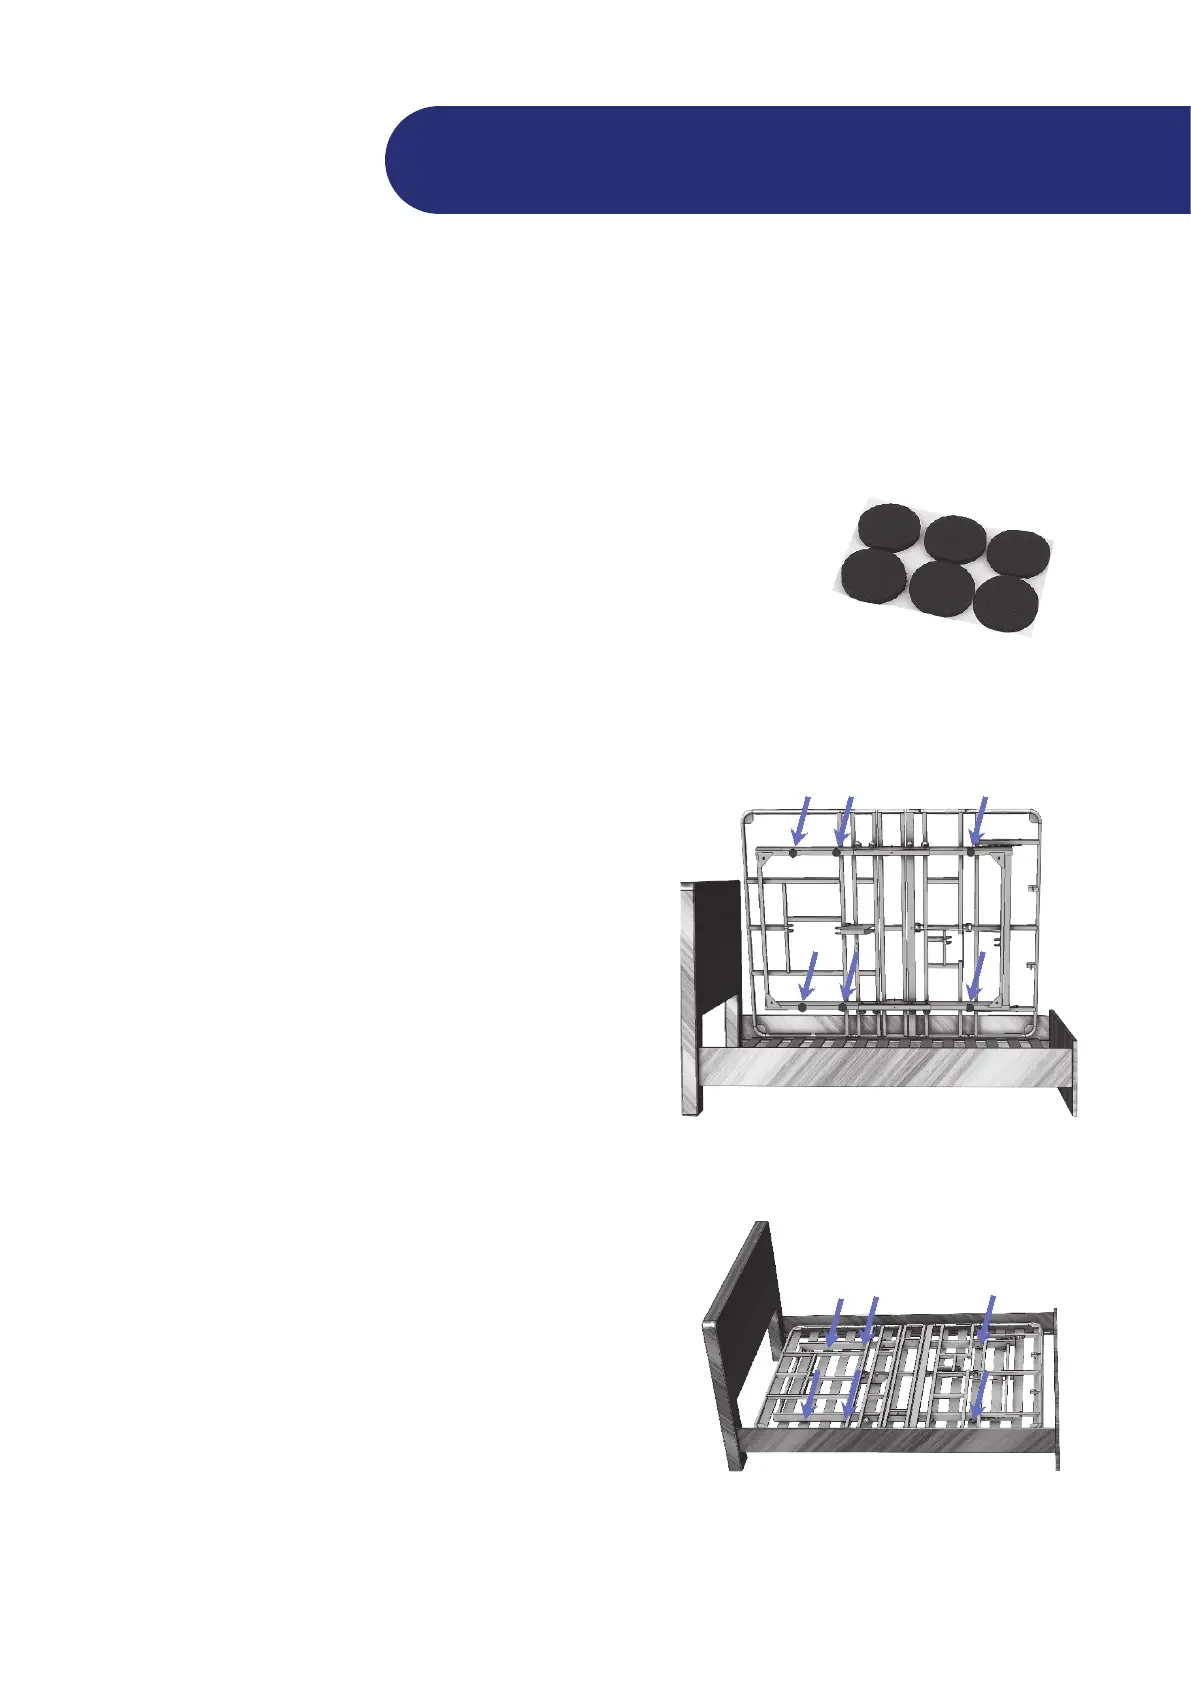
Turn your adjustable bed on its side and then locate the
areas near the center brackets and corner brackets of
the frame.
NOTE: For safe reasons, liing of the adjustable bed
must always be performed by two (2) people.
1
Aer applying all the an-skid pads under the power
base, carefully place the power base onto the platform
or slats.
4
Take the an-skid pads and remove them from the
adhesive backer.
2
The an-skid pads are packed
inside the parts box.
Apply the an-skid pads on each of the idened areas
near the center and corner brackets as shown.
3
IMPORTANT!
• Make sure to align the an-skid pads so that they
will rest on one of the slats under the power base. If
your bed system is a solid deck surface, there is no
need to align the pads to a slat.
• For the areas near the center brackets, you may
apply the an-skid pads to either side of the center
bracket. Make sure to align them with the slats.
• A total of 6 an-skid pads must be applied to the
power base to secure the frame in place and keep it
from slipping.
Connue seing up the electronics and other parts of
your power base on page 9.
5
Applying an-skid pads for platform use
Installaon Guide