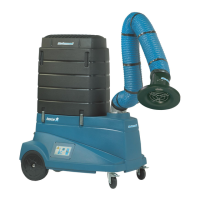
FilterCart Original
15
EN
7 Changing the HEPA lter (accessory)
If the unit has been supplied with a HEPA lter, the lter is to be changed
when the main lter cartridge is changed.
WARNING! Risk of personal injury.
Use necessary personal safety equipment when changing the HEPA lter.
Change the HEPA lter cartridge as follows (see also Figure 6):
1. Disconnect the mains connection cable.
2. Unscrew the top cover.
3. Remove the used HEPA lter and put it in the plastic bag which comes
with the new HEPA lter. Close the plastic bag.
4. Handle the used HEPA lter according to the relevant regulations for the
substances that have been collected.
5. Check that the new HEPA lter not is damaged. Note that the lter surface
must not be touched. Handle the HEPA lter very carefully and t it
in the unit. Ensure it is tted in the correct position and that the seal is
downwards. Check that the seal not is damaged. Note the UP-arrows.
6. Ret the top cover. Fasten it securaly.
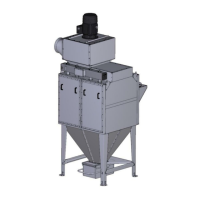
8 Maintenance
Installation, repair and maintenance work must be carried out by qualied
personnel using only original spare parts. Contact your nearest authorised
distributor or AB Ph. Nederman & Co. for advice on technical service or if you
require spare parts. See also www.nederman.com.
Maintenance is recommended at least once a year.
WARNING! Risk of personal injury.
• Disconnect the mains connection cable before starting any maintenance work.
• Use necessary personal safety equipment.
Perform maintenance work as follows:
• Change the lter cartridge (and optional HEPA-lter) if necessary.
• Check the airow capacity of the unit.
• Check that the Fume Extractor hose is not damaged. If necessary, change
the hose.
• Check that the hose to the fan inlet is not damaged. If necessary, change
the hose.
• Check that no objects have been caught on the guard net on the fan inlet.
• If necessary, adjust the Fume Extractor links.
• If necessary, tighten the arm prole bolts, see the * symbols in Figure 7.
• Check that the mains connection cable and the fan motor cable are not
worn or damaged.
• Check that the eccentric locks tighten the lter casing properly. Adjust the
eccentric locks if necessary.
 Loading...