Time Setting Options
Option Use
Timer
Time-setting options en
11
2.
Use the or button to select the required heating
function.
3.
Use the button to navigate to the next row.
4.
Use the or button to select the required temperat-
ure or setting.
5.
Press to start.
a The cooking time will appear on the display.
a The heat-up indicator bar visualises the rising tem-
perature.
6.
When the food is ready, press to switch the appli-
ance off.
7.5 Changing the temperature
You can also change the temperature once you have
started the appliance.
1.
Use the or button to select the temperature
row.
2.
Use the or button to select the required temperat-
ure.
a The temperature will now be changed.
7.6 Changing the type of heating
If you switch to a different heating function, the appli-
ance will reset all the settings.
1.
Press to pause operation.
2.
Use the or button to select the required heating
function.
3.
Use the button to navigate to the next row.
4.
Use the or button to select the required temperat-
ure.
5.
Press to start.
7.7 Pausing operation
1.
Press .
2.
Press again to resume operation.
7.8 Cancelling operation
Note:Some functions, e.g. cleaning functions, cannot
be cancelled.
▶▶
Press and hold the button until the function that is
currently in progress is cancelled.
a Operation will stop and all the settings will be reset.
a The cooling fan will continue to run until the cooking
compartment has cooled down.
7.9 Viewing the current temperature
You can view the current temperature while the appli-
ance is heating up.
▶▶
Press .
a The temperature will be displayed for a few
seconds.
7.10 Displaying information
Requirement:The button must be lit.
▶▶
Press .
a The information will be displayed for a few seconds.
8 Time-setting options
Your appliance has different time-setting options, with
which you can control its operation.
8.1 Overview of the time-setting options
When you are setting a time, the time values will in-
crease by greater increments as you scroll through the
higher values. The cooking time, for example, can be
set in 1-minute increments up to 1 hour, and then in 5-
minute increments thereafter.
Time-setting
option
Use
Timer When you set a time on the timer,
the timer will run independently of
the appliance and will not intervene
in its operation. The timer does not
affect the appliance.
Cooking
time
Once the cooking time has elapsed,
the appliance automatically stops
heating.
Ready at
Along with the cooking time (dura-
tion), you can set the time at which
you want cooking to end. The appli-
ance will start up automatically so
that it finishes cooking at the re-
quired time.
8.2 Timer
You can set the timer regardless of whether the appli-
ance is on or off.
Setting the timer
1.
Press .
2.
Once the appliance is switched on, use the but-
ton to select "Timer"
.
3.
Use the or button to select the timer duration.
4.
Press to start the timer.
a
will appear on the display. The timer duration will
then count down.
a Once the timer duration has elapsed, an audible sig-
nal will sound.
5.
Press any button to end the audible signal.
Changing the timer
1.
Press .
2.
Use the or button to change the timer duration.
a The setting will then be applied.
Cancelling the timer
1.
Press .
2.
Use the button to set a timer duration of "00:00".
a This cancels the current timer duration.
When you set a time on the timer, the timer will run independently of
the appliance. The timer does not aect the operation of the appliance.
Cooking time
*
Time-setting options en
11
2.
Use the or button to select the required heating
function.
3.
Use the button to navigate to the next row.
4.
Use the or button to select the required temperat-
ure or setting.
5.
Press to start.
a The cooking time will appear on the display.
a The heat-up indicator bar visualises the rising tem-
perature.
6.
When the food is ready, press to switch the appli-
ance off.
7.5 Changing the temperature
You can also change the temperature once you have
started the appliance.
1.
Use the or button to select the temperature
row.
2.
Use the or button to select the required temperat-
ure.
a The temperature will now be changed.
7.6 Changing the type of heating
If you switch to a different heating function, the appli-
ance will reset all the settings.
1.
Press to pause operation.
2.
Use the or button to select the required heating
function.
3.
Use the button to navigate to the next row.
4.
Use the or button to select the required temperat-
ure.
5.
Press to start.
7.7 Pausing operation
1.
Press .
2.
Press again to resume operation.
7.8 Cancelling operation
Note:Some functions, e.g. cleaning functions, cannot
be cancelled.
▶▶
Press and hold the button until the function that is
currently in progress is cancelled.
a Operation will stop and all the settings will be reset.
a The cooling fan will continue to run until the cooking
compartment has cooled down.
7.9 Viewing the current temperature
You can view the current temperature while the appli-
ance is heating up.
▶▶
Press .
a The temperature will be displayed for a few
seconds.
7.10 Displaying information
Requirement:The button must be lit.
▶▶
Press .
a The information will be displayed for a few seconds.
8 Time-setting options
Your appliance has different time-setting options, with
which you can control its operation.
8.1 Overview of the time-setting options
When you are setting a time, the time values will in-
crease by greater increments as you scroll through the
higher values. The cooking time, for example, can be
set in 1-minute increments up to 1 hour, and then in 5-
minute increments thereafter.
Time-setting
option
Use
Timer
When you set a time on the timer,
the timer will run independently of
the appliance and will not intervene
in its operation. The timer does not
affect the appliance.
Cooking
time
Once the cooking time has elapsed,
the appliance automatically stops
heating.
Ready at
Along with the cooking time (dura-
tion), you can set the time at which
you want cooking to end. The appli-
ance will start up automatically so
that it finishes cooking at the re-
quired time.
8.2 Timer
You can set the timer regardless of whether the appli-
ance is on or off.
Setting the timer
1.
Press .
2.
Once the appliance is switched on, use the but-
ton to select "Timer"
.
3.
Use the or button to select the timer duration.
4.
Press to start the timer.
a
will appear on the display. The timer duration will
then count down.
a Once the timer duration has elapsed, an audible sig-
nal will sound.
5.
Press any button to end the audible signal.
Changing the timer
1.
Press .
2.
Use the or button to change the timer duration.
a The setting will then be applied.
Cancelling the timer
1.
Press .
2.
Use the button to set a timer duration of "00:00".
a This cancels the current timer duration.
Once the cooking time has elapsed, the appliance automatically stops
heating.
Ready at
*
Time-setting options en
11
2.
Use the or button to select the required heating
function.
3.
Use the button to navigate to the next row.
4.
Use the or button to select the required temperat-
ure or setting.
5.
Press to start.
a The cooking time will appear on the display.
a The heat-up indicator bar visualises the rising tem-
perature.
6.
When the food is ready, press to switch the appli-
ance off.
7.5 Changing the temperature
You can also change the temperature once you have
started the appliance.
1.
Use the or button to select the temperature
row.
2.
Use the or button to select the required temperat-
ure.
a The temperature will now be changed.
7.6 Changing the type of heating
If you switch to a different heating function, the appli-
ance will reset all the settings.
1.
Press to pause operation.
2.
Use the or button to select the required heating
function.
3.
Use the button to navigate to the next row.
4.
Use the or button to select the required temperat-
ure.
5.
Press to start.
7.7 Pausing operation
1.
Press .
2.
Press again to resume operation.
7.8 Cancelling operation
Note:Some functions, e.g. cleaning functions, cannot
be cancelled.
▶▶
Press and hold the button until the function that is
currently in progress is cancelled.
a Operation will stop and all the settings will be reset.
a The cooling fan will continue to run until the cooking
compartment has cooled down.
7.9 Viewing the current temperature
You can view the current temperature while the appli-
ance is heating up.
▶▶
Press .
a The temperature will be displayed for a few
seconds.
7.10 Displaying information
Requirement:The button must be lit.
▶▶
Press .
a The information will be displayed for a few seconds.
8 Time-setting options
Your appliance has different time-setting options, with
which you can control its operation.
8.1 Overview of the time-setting options
When you are setting a time, the time values will in-
crease by greater increments as you scroll through the
higher values. The cooking time, for example, can be
set in 1-minute increments up to 1 hour, and then in 5-
minute increments thereafter.
Time-setting
option
Use
Timer
When you set a time on the timer,
the timer will run independently of
the appliance and will not intervene
in its operation. The timer does not
affect the appliance.
Cooking
time
Once the cooking time has elapsed,
the appliance automatically stops
heating.
Ready at
Along with the cooking time (dura-
tion), you can set the time at which
you want cooking to end. The appli-
ance will start up automatically so
that it finishes cooking at the re-
quired time.
8.2 Timer
You can set the timer regardless of whether the appli-
ance is on or off.
Setting the timer
1.
Press .
2.
Once the appliance is switched on, use the but-
ton to select "Timer"
.
3.
Use the or button to select the timer duration.
4.
Press to start the timer.
a
will appear on the display. The timer duration will
then count down.
a Once the timer duration has elapsed, an audible sig-
nal will sound.
5.
Press any button to end the audible signal.
Changing the timer
1.
Press .
2.
Use the or button to change the timer duration.
a The setting will then be applied.
Cancelling the timer
1.
Press .
2.
Use the button to set a timer duration of "00:00".
a This cancels the current timer duration.
Along with the cooking time (duration), you can set the time at which
you want cooking to end. The appliance will start up automatically
so that it nishes cooking at the required time. No need to set
the start time.
*Press the clock symbol to return to the main menu.
*The cooking time and ready at options can only be selected once you have selected a heating function.
1. Press
en Familiarising yourself with your appliance
6
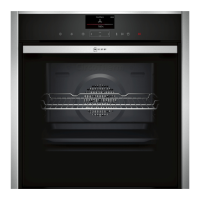
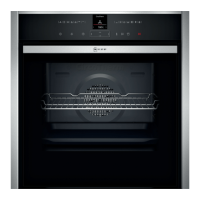
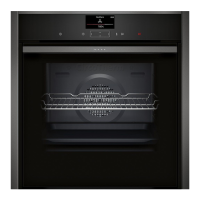
4 Familiarising yourself with your appliance
4.1 Control panel
You can use the control panel to configure all functions of your appliance and to obtain information about the operat-
ing status.
1
2 23
Control element
4.2 Buttons
The buttons are touch-sensitive areas. To select a function, press the corresponding button.
Symbol Name Use
On/off Switch the appliance on or off
Main menu Select operating modes and settings
Time-setting options/
childproof lock
¡ Set the "timer", "cooking time" or "Ready at" time for delayed starts
¡ Activate or deactivate the "childproof lock"
Information ¡ View additional information
¡ View the current temperature
Rapid heat-up ¡ Activate or deactivate the "Rapid heat-up" function
¡ Activate or deactivate the "PowerBoost" function
Start/stop Start or pause the appliance
4.3 Control element
You can configure all the functions on your appliance using the control element. You can change the setting values
that are displayed more brightly.
Press and hold a button to scroll through the setting values quickly. Release the button to stop scrolling quickly.
Button Name Use
Left Navigate to the left on the display
to switch the appliance on. The heating functions will
then be displayed.
2. Use the
en Familiarising yourself with your appliance
6
4 Familiarising yourself with your appliance
4.1 Control panel
You can use the control panel to configure all functions of your appliance and to obtain information about the operat-
ing status.
Control element
4.2 Buttons
The buttons are touch-sensitive areas. To select a function, press the corresponding button.
Symbol Name Use
On/off Switch the appliance on or off
Main menu Select operating modes and settings
Time-setting options/
childproof lock
¡ Set the "timer", "cooking time" or "Ready at" time for delayed starts
¡ Activate or deactivate the "childproof lock"
Information ¡ View additional information
¡ View the current temperature
Rapid heat-up ¡ Activate or deactivate the "Rapid heat-up" function
¡ Activate or deactivate the "PowerBoost" function
Start/stop Start or pause the appliance
4.3 Control element
You can configure all the functions on your appliance using the control element. You can change the setting values
that are displayed more brightly.
Press and hold a button to scroll through the setting values quickly. Release the button to stop scrolling quickly.
Button Name Use
Left Navigate to the left on the display
or
en Familiarising yourself with your appliance
6
4 Familiarising yourself with your appliance
4.1 Control panel
You can use the control panel to configure all functions of your appliance and to obtain information about the operat-
ing status.
Control element
4.2 Buttons
The buttons are touch-sensitive areas. To select a function, press the corresponding button.
Symbol Name Use
On/off Switch the appliance on or off
Main menu Select operating modes and settings
Time-setting options/
childproof lock
¡ Set the "timer", "cooking time" or "Ready at" time for delayed starts
¡ Activate or deactivate the "childproof lock"
Information ¡ View additional information
¡ View the current temperature
Rapid heat-up ¡ Activate or deactivate the "Rapid heat-up" function
¡ Activate or deactivate the "PowerBoost" function
Start/stop Start or pause the appliance
4.3 Control element
You can configure all the functions on your appliance using the control element. You can change the setting values
that are displayed more brightly.
Press and hold a button to scroll through the setting values quickly. Release the button to stop scrolling quickly.
Button Name Use
Left Navigate to the left on the display
button to select the required heating function.
3. Use the
en Familiarising yourself with your appliance
6
4 Familiarising yourself with your appliance
4.1 Control panel
You can use the control panel to configure all functions of your appliance and to obtain information about the operat-
ing status.
Control element
4.2 Buttons
The buttons are touch-sensitive areas. To select a function, press the corresponding button.
Symbol Name Use
On/off Switch the appliance on or off
Main menu Select operating modes and settings
Time-setting options/
childproof lock
¡ Set the "timer", "cooking time" or "Ready at" time for delayed starts
¡ Activate or deactivate the "childproof lock"
Information ¡ View additional information
¡ View the current temperature
Rapid heat-up ¡ Activate or deactivate the "Rapid heat-up" function
¡ Activate or deactivate the "PowerBoost" function
Start/stop Start or pause the appliance
4.3 Control element
You can configure all the functions on your appliance using the control element. You can change the setting values
that are displayed more brightly.
Press and hold a button to scroll through the setting values quickly. Release the button to stop scrolling quickly.
Button Name Use
Left Navigate to the left on the display
button to navigate to the next row.
4. Use the
en Familiarising yourself with your appliance
6
4 Familiarising yourself with your appliance
4.1 Control panel
You can use the control panel to configure all functions of your appliance and to obtain information about the operat-
ing status.
Control element
4.2 Buttons
The buttons are touch-sensitive areas. To select a function, press the corresponding button.
Symbol Name Use
On/off Switch the appliance on or off
Main menu Select operating modes and settings
Time-setting options/
childproof lock
¡ Set the "timer", "cooking time" or "Ready at" time for delayed starts
¡ Activate or deactivate the "childproof lock"
Information ¡ View additional information
¡ View the current temperature
Rapid heat-up ¡ Activate or deactivate the "Rapid heat-up" function
¡ Activate or deactivate the "PowerBoost" function
Start/stop Start or pause the appliance
4.3 Control element
You can configure all the functions on your appliance using the control element. You can change the setting values
that are displayed more brightly.
Press and hold a button to scroll through the setting values quickly. Release the button to stop scrolling quickly.
Button Name Use
Left Navigate to the left on the display
or
en Familiarising yourself with your appliance
6
4 Familiarising yourself with your appliance
4.1 Control panel
You can use the control panel to configure all functions of your appliance and to obtain information about the operat-
ing status.
Control element
4.2 Buttons
The buttons are touch-sensitive areas. To select a function, press the corresponding button.
Symbol Name Use
On/off Switch the appliance on or off
Main menu Select operating modes and settings
Time-setting options/
childproof lock
¡ Set the "timer", "cooking time" or "Ready at" time for delayed starts
¡ Activate or deactivate the "childproof lock"
Information ¡ View additional information
¡ View the current temperature
Rapid heat-up ¡ Activate or deactivate the "Rapid heat-up" function
¡ Activate or deactivate the "PowerBoost" function
Start/stop Start or pause the appliance
4.3 Control element
You can configure all the functions on your appliance using the control element. You can change the setting values
that are displayed more brightly.
Press and hold a button to scroll through the setting values quickly. Release the button to stop scrolling quickly.
Button Name Use
Left Navigate to the left on the display
button to select the required temperature
or setting.
5. Use the
Familiarising yourself with your appliance en
7
4 Familiarising yourself with your appliance
4.1 Control panel
You can use the control panel to configure all functions of your appliance and to obtain information about the operat-
ing status.
1
2 23
Control element
4.2 Buttons
The buttons are touch-sensitive areas. To select a function, press the corresponding button.
Symbol Name Use
On/off Switch the appliance on or off
Steam assistance Switch on steam assistance
Main menu Select operating modes and settings
Time-setting options/
childproof lock
¡ Set the "timer", "cooking time" or "Ready at" time for delayed starts
¡ Activate or deactivate the "childproof lock"
Information ¡ View additional information
¡ View the current temperature
Rapid heat-up ¡ Activate or deactivate the "Rapid heat-up" function
¡ Activate or deactivate the "PowerBoost" function
Open control panel Fill or empty the water tank
Start/stop Start or pause the appliance
4.3 Control element
You can configure all the functions on your appliance using the control element. You can change the setting values
that are displayed more brightly.
Press and hold a button to scroll through the setting values quickly. Release the button to stop scrolling quickly.
button to switch on VarioSteam assistance.
6. Use the
en Familiarising yourself with your appliance
6
4 Familiarising yourself with your appliance
4.1 Control panel
You can use the control panel to configure all functions of your appliance and to obtain information about the operat-
ing status.
Control element
4.2 Buttons
The buttons are touch-sensitive areas. To select a function, press the corresponding button.
Symbol Name Use
On/off Switch the appliance on or off
Main menu Select operating modes and settings
Time-setting options/
childproof lock
¡ Set the "timer", "cooking time" or "Ready at" time for delayed starts
¡ Activate or deactivate the "childproof lock"
Information ¡ View additional information
¡ View the current temperature
Rapid heat-up ¡ Activate or deactivate the "Rapid heat-up" function
¡ Activate or deactivate the "PowerBoost" function
Start/stop Start or pause the appliance
4.3 Control element
You can configure all the functions on your appliance using the control element. You can change the setting values
that are displayed more brightly.
Press and hold a button to scroll through the setting values quickly. Release the button to stop scrolling quickly.
Button Name Use
Left Navigate to the left on the display
to navigate to the row to select the level of
VarioSteam.
7. Use the
en Familiarising yourself with your appliance
6
4 Familiarising yourself with your appliance
4.1 Control panel
You can use the control panel to configure all functions of your appliance and to obtain information about the operat-
ing status.
Control element
4.2 Buttons
The buttons are touch-sensitive areas. To select a function, press the corresponding button.
Symbol Name Use
On/off Switch the appliance on or off
Main menu Select operating modes and settings
Time-setting options/
childproof lock
¡ Set the "timer", "cooking time" or "Ready at" time for delayed starts
¡ Activate or deactivate the "childproof lock"
Information ¡ View additional information
¡ View the current temperature
Rapid heat-up ¡ Activate or deactivate the "Rapid heat-up" function
¡ Activate or deactivate the "PowerBoost" function
Start/stop Start or pause the appliance
4.3 Control element
You can configure all the functions on your appliance using the control element. You can change the setting values
that are displayed more brightly.
Press and hold a button to scroll through the setting values quickly. Release the button to stop scrolling quickly.
Button Name Use
Left Navigate to the left on the display
or
en Familiarising yourself with your appliance
6
4 Familiarising yourself with your appliance
4.1 Control panel
You can use the control panel to configure all functions of your appliance and to obtain information about the operat-
ing status.
Control element
4.2 Buttons
The buttons are touch-sensitive areas. To select a function, press the corresponding button.
Symbol Name Use
On/off Switch the appliance on or off
Main menu Select operating modes and settings
Time-setting options/
childproof lock
¡ Set the "timer", "cooking time" or "Ready at" time for delayed starts
¡ Activate or deactivate the "childproof lock"
Information ¡ View additional information
¡ View the current temperature
Rapid heat-up ¡ Activate or deactivate the "Rapid heat-up" function
¡ Activate or deactivate the "PowerBoost" function
Start/stop Start or pause the appliance
4.3 Control element
You can configure all the functions on your appliance using the control element. You can change the setting values
that are displayed more brightly.
Press and hold a button to scroll through the setting values quickly. Release the button to stop scrolling quickly.
Button Name Use
Left Navigate to the left on the display
to select low, medium or high level of VarioSteam.
8. Press
en Familiarising yourself with your appliance
6
4 Familiarising yourself with your appliance
4.1 Control panel
You can use the control panel to configure all functions of your appliance and to obtain information about the operat-
ing status.
1
2 23
Control element
4.2 Buttons
The buttons are touch-sensitive areas. To select a function, press the corresponding button.
Symbol Name Use
On/off Switch the appliance on or off
Main menu Select operating modes and settings
Time-setting options/
childproof lock
¡ Set the "timer", "cooking time" or "Ready at" time for delayed starts
¡ Activate or deactivate the "childproof lock"
Information ¡ View additional information
¡ View the current temperature
Rapid heat-up ¡ Activate or deactivate the "Rapid heat-up" function
¡ Activate or deactivate the "PowerBoost" function
Start/stop Start or pause the appliance
4.3 Control element
You can configure all the functions on your appliance using the control element. You can change the setting values
that are displayed more brightly.
Press and hold a button to scroll through the setting values quickly. Release the button to stop scrolling quickly.
Button Name Use
Left Navigate to the left on the display
to start. The cooking time will appear on the display
and the heat-up indicator bar visualises the rising temperature.
9. When the food is ready, press
en Familiarising yourself with your appliance
6
4 Familiarising yourself with your appliance
4.1 Control panel
You can use the control panel to configure all functions of your appliance and to obtain information about the operat-
ing status.
1
2 23
Control element
4.2 Buttons
The buttons are touch-sensitive areas. To select a function, press the corresponding button.
Symbol Name Use
On/off Switch the appliance on or off
Main menu Select operating modes and settings
Time-setting options/
childproof lock
¡ Set the "timer", "cooking time" or "Ready at" time for delayed starts
¡ Activate or deactivate the "childproof lock"
Information ¡ View additional information
¡ View the current temperature
Rapid heat-up ¡ Activate or deactivate the "Rapid heat-up" function
¡ Activate or deactivate the "PowerBoost" function
Start/stop Start or pause the appliance
4.3 Control element
You can configure all the functions on your appliance using the control element. You can change the setting values
that are displayed more brightly.
Press and hold a button to scroll through the setting values quickly. Release the button to stop scrolling quickly.
Button Name Use
Left Navigate to the left on the display
to switch the appliance o.
TIPS:
• To change the temperature or VarioSteam level once you have
started the appliance use the
en Familiarising yourself with your appliance
6
4 Familiarising yourself with your appliance
4.1 Control panel
You can use the control panel to configure all functions of your appliance and to obtain information about the operat-
ing status.
Control element
4.2 Buttons
The buttons are touch-sensitive areas. To select a function, press the corresponding button.
Symbol Name Use
On/off Switch the appliance on or off
Main menu Select operating modes and settings
Time-setting options/
childproof lock
¡ Set the "timer", "cooking time" or "Ready at" time for delayed starts
¡ Activate or deactivate the "childproof lock"
Information ¡ View additional information
¡ View the current temperature
Rapid heat-up ¡ Activate or deactivate the "Rapid heat-up" function
¡ Activate or deactivate the "PowerBoost" function
Start/stop Start or pause the appliance
4.3 Control element
You can configure all the functions on your appliance using the control element. You can change the setting values
that are displayed more brightly.
Press and hold a button to scroll through the setting values quickly. Release the button to stop scrolling quickly.
Button Name Use
Left Navigate to the left on the display
or
en Familiarising yourself with your appliance
6
4 Familiarising yourself with your appliance
4.1 Control panel
You can use the control panel to configure all functions of your appliance and to obtain information about the operat-
ing status.
Control element
4.2 Buttons
The buttons are touch-sensitive areas. To select a function, press the corresponding button.
Symbol Name Use
On/off Switch the appliance on or off
Main menu Select operating modes and settings
Time-setting options/
childproof lock
¡ Set the "timer", "cooking time" or "Ready at" time for delayed starts
¡ Activate or deactivate the "childproof lock"
Information ¡ View additional information
¡ View the current temperature
Rapid heat-up ¡ Activate or deactivate the "Rapid heat-up" function
¡ Activate or deactivate the "PowerBoost" function
Start/stop Start or pause the appliance
4.3 Control element
You can configure all the functions on your appliance using the control element. You can change the setting values
that are displayed more brightly.
Press and hold a button to scroll through the setting values quickly. Release the button to stop scrolling quickly.
Button Name Use
Left Navigate to the left on the display
button to adjust.
• To turn o VarioSteam assistance press the
Familiarising yourself with your appliance en
7
4 Familiarising yourself with your appliance
4.1 Control panel
You can use the control panel to configure all functions of your appliance and to obtain information about the operat-
ing status.
1
2 23
Control element
4.2 Buttons
The buttons are touch-sensitive areas. To select a function, press the corresponding button.
Symbol Name Use
On/off Switch the appliance on or off
Steam assistance Switch on steam assistance
Main menu Select operating modes and settings
Time-setting options/
childproof lock
¡ Set the "timer", "cooking time" or "Ready at" time for delayed starts
¡ Activate or deactivate the "childproof lock"
Information ¡ View additional information
¡ View the current temperature
Rapid heat-up ¡ Activate or deactivate the "Rapid heat-up" function
¡ Activate or deactivate the "PowerBoost" function
Open control panel Fill or empty the water tank
Start/stop Start or pause the appliance
4.3 Control element
You can configure all the functions on your appliance using the control element. You can change the setting values
that are displayed more brightly.
Press and hold a button to scroll through the setting values quickly. Release the button to stop scrolling quickly.
.
Drying your Oven Cavity
You can manually dry your oven cavity or use the 'Dry Appliance'
function after adding VarioSteam to your heating function.
1. Allow the appliance to cool down. Remove any remaining food.
2. Empty the water tank and dry the cooking compartment, use
a sponge to absorb any residual water in the base of the oven.
3. Use the
en Familiarising yourself with your appliance
6
4 Familiarising yourself with your appliance
4.1 Control panel
You can use the control panel to configure all functions of your appliance and to obtain information about the operat-
ing status.
Control element
4.2 Buttons
The buttons are touch-sensitive areas. To select a function, press the corresponding button.
Symbol Name Use
On/off Switch the appliance on or off
Main menu Select operating modes and settings
Time-setting options/
childproof lock
¡ Set the "timer", "cooking time" or "Ready at" time for delayed starts
¡ Activate or deactivate the "childproof lock"
Information ¡ View additional information
¡ View the current temperature
Rapid heat-up ¡ Activate or deactivate the "Rapid heat-up" function
¡ Activate or deactivate the "PowerBoost" function
Start/stop Start or pause the appliance
4.3 Control element
You can configure all the functions on your appliance using the control element. You can change the setting values
that are displayed more brightly.
Press and hold a button to scroll through the setting values quickly. Release the button to stop scrolling quickly.
Button Name Use
Left Navigate to the left on the display
or
en Familiarising yourself with your appliance
6
4 Familiarising yourself with your appliance
4.1 Control panel
You can use the control panel to configure all functions of your appliance and to obtain information about the operat-
ing status.
Control element
4.2 Buttons
The buttons are touch-sensitive areas. To select a function, press the corresponding button.
Symbol Name Use
On/off Switch the appliance on or off
Main menu Select operating modes and settings
Time-setting options/
childproof lock
¡ Set the "timer", "cooking time" or "Ready at" time for delayed starts
¡ Activate or deactivate the "childproof lock"
Information ¡ View additional information
¡ View the current temperature
Rapid heat-up ¡ Activate or deactivate the "Rapid heat-up" function
¡ Activate or deactivate the "PowerBoost" function
Start/stop Start or pause the appliance
4.3 Control element
You can configure all the functions on your appliance using the control element. You can change the setting values
that are displayed more brightly.
Press and hold a button to scroll through the setting values quickly. Release the button to stop scrolling quickly.
Button Name Use
Left Navigate to the left on the display
button to select "Dry appliance"
The temperature and drying time will appear on the display.
These cannot be changed.
4. Press
en Familiarising yourself with your appliance
6
4 Familiarising yourself with your appliance
4.1 Control panel
You can use the control panel to configure all functions of your appliance and to obtain information about the operat-
ing status.
1
2 23
Control element
4.2 Buttons
The buttons are touch-sensitive areas. To select a function, press the corresponding button.
Symbol Name Use
On/off Switch the appliance on or off
Main menu Select operating modes and settings
Time-setting options/
childproof lock
¡ Set the "timer", "cooking time" or "Ready at" time for delayed starts
¡ Activate or deactivate the "childproof lock"
Information ¡ View additional information
¡ View the current temperature
Rapid heat-up ¡ Activate or deactivate the "Rapid heat-up" function
¡ Activate or deactivate the "PowerBoost" function
Start/stop Start or pause the appliance
4.3 Control element
You can configure all the functions on your appliance using the control element. You can change the setting values
that are displayed more brightly.
Press and hold a button to scroll through the setting values quickly. Release the button to stop scrolling quickly.
Button Name Use
Left Navigate to the left on the display
button to start drying the appliance. Once the duration
has elapsed, an audible signal will sound and the appliance will
stop heating.
Press
en Familiarising yourself with your appliance
6
4 Familiarising yourself with your appliance
4.1 Control panel
You can use the control panel to configure all functions of your appliance and to obtain information about the operat-
ing status.
1
2 23
Control element
4.2 Buttons
The buttons are touch-sensitive areas. To select a function, press the corresponding button.
Symbol Name Use
On/off Switch the appliance on or off
Main menu Select operating modes and settings
Time-setting options/
childproof lock
¡ Set the "timer", "cooking time" or "Ready at" time for delayed starts
¡ Activate or deactivate the "childproof lock"
Information ¡ View additional information
¡ View the current temperature
Rapid heat-up ¡ Activate or deactivate the "Rapid heat-up" function
¡ Activate or deactivate the "PowerBoost" function
Start/stop Start or pause the appliance
4.3 Control element
You can configure all the functions on your appliance using the control element. You can change the setting values
that are displayed more brightly.
Press and hold a button to scroll through the setting values quickly. Release the button to stop scrolling quickly.
Button Name Use
Left Navigate to the left on the display
button to switch the appliance o.
5. Leave the appliance door open for 1-2 minutes so that the
cooking compartment dries completely.
Setting Heating Type & Temperature with VarioSteam
Please refer to your user manual for more detailed information.
1. Press
en Familiarising yourself with your appliance
6
4 Familiarising yourself with your appliance
4.1 Control panel
You can use the control panel to configure all functions of your appliance and to obtain information about the operat-
ing status.
1
2 23
Control element
4.2 Buttons
The buttons are touch-sensitive areas. To select a function, press the corresponding button.
Symbol Name Use
On/off Switch the appliance on or off
Main menu Select operating modes and settings
Time-setting options/
childproof lock
¡ Set the "timer", "cooking time" or "Ready at" time for delayed starts
¡ Activate or deactivate the "childproof lock"
Information ¡ View additional information
¡ View the current temperature
Rapid heat-up ¡ Activate or deactivate the "Rapid heat-up" function
¡ Activate or deactivate the "PowerBoost" function
Start/stop Start or pause the appliance
4.3 Control element
You can configure all the functions on your appliance using the control element. You can change the setting values
that are displayed more brightly.
Press and hold a button to scroll through the setting values quickly. Release the button to stop scrolling quickly.
Button Name Use
Left Navigate to the left on the display
to switch the appliance on. The heating functions will then be displayed.
2. Use the
en Familiarising yourself with your appliance
6
4 Familiarising yourself with your appliance
4.1 Control panel
You can use the control panel to configure all functions of your appliance and to obtain information about the operat-
ing status.
Control element
4.2 Buttons
The buttons are touch-sensitive areas. To select a function, press the corresponding button.
Symbol Name Use
On/off Switch the appliance on or off
Main menu Select operating modes and settings
Time-setting options/
childproof lock
¡ Set the "timer", "cooking time" or "Ready at" time for delayed starts
¡ Activate or deactivate the "childproof lock"
Information ¡ View additional information
¡ View the current temperature
Rapid heat-up ¡ Activate or deactivate the "Rapid heat-up" function
¡ Activate or deactivate the "PowerBoost" function
Start/stop Start or pause the appliance
4.3 Control element
You can configure all the functions on your appliance using the control element. You can change the setting values
that are displayed more brightly.
Press and hold a button to scroll through the setting values quickly. Release the button to stop scrolling quickly.
Button Name Use
Left Navigate to the left on the display
or
en Familiarising yourself with your appliance
6
4 Familiarising yourself with your appliance
4.1 Control panel
You can use the control panel to configure all functions of your appliance and to obtain information about the operat-
ing status.
Control element
4.2 Buttons
The buttons are touch-sensitive areas. To select a function, press the corresponding button.
Symbol Name Use
On/off Switch the appliance on or off
Main menu Select operating modes and settings
Time-setting options/
childproof lock
¡ Set the "timer", "cooking time" or "Ready at" time for delayed starts
¡ Activate or deactivate the "childproof lock"
Information ¡ View additional information
¡ View the current temperature
Rapid heat-up ¡ Activate or deactivate the "Rapid heat-up" function
¡ Activate or deactivate the "PowerBoost" function
Start/stop Start or pause the appliance
4.3 Control element
You can configure all the functions on your appliance using the control element. You can change the setting values
that are displayed more brightly.
Press and hold a button to scroll through the setting values quickly. Release the button to stop scrolling quickly.
Button Name Use
Left Navigate to the left on the display
button to select the required heating function.
3. Use the
en Familiarising yourself with your appliance
6
4 Familiarising yourself with your appliance
4.1 Control panel
You can use the control panel to configure all functions of your appliance and to obtain information about the operat-
ing status.
Control element
4.2 Buttons
The buttons are touch-sensitive areas. To select a function, press the corresponding button.
Symbol Name Use
On/off Switch the appliance on or off
Main menu Select operating modes and settings
Time-setting options/
childproof lock
¡ Set the "timer", "cooking time" or "Ready at" time for delayed starts
¡ Activate or deactivate the "childproof lock"
Information ¡ View additional information
¡ View the current temperature
Rapid heat-up ¡ Activate or deactivate the "Rapid heat-up" function
¡ Activate or deactivate the "PowerBoost" function
Start/stop Start or pause the appliance
4.3 Control element
You can configure all the functions on your appliance using the control element. You can change the setting values
that are displayed more brightly.
Press and hold a button to scroll through the setting values quickly. Release the button to stop scrolling quickly.
Button Name Use
Left Navigate to the left on the display
button to navigate to the next row.
4. Use the
en Familiarising yourself with your appliance
6
4 Familiarising yourself with your appliance
4.1 Control panel
You can use the control panel to configure all functions of your appliance and to obtain information about the operat-
ing status.
Control element
4.2 Buttons
The buttons are touch-sensitive areas. To select a function, press the corresponding button.
Symbol Name Use
On/off Switch the appliance on or off
Main menu Select operating modes and settings
Time-setting options/
childproof lock
¡ Set the "timer", "cooking time" or "Ready at" time for delayed starts
¡ Activate or deactivate the "childproof lock"
Information ¡ View additional information
¡ View the current temperature
Rapid heat-up ¡ Activate or deactivate the "Rapid heat-up" function
¡ Activate or deactivate the "PowerBoost" function
Start/stop Start or pause the appliance
4.3 Control element
You can configure all the functions on your appliance using the control element. You can change the setting values
that are displayed more brightly.
Press and hold a button to scroll through the setting values quickly. Release the button to stop scrolling quickly.
Button Name Use
Left Navigate to the left on the display
or
en Familiarising yourself with your appliance
6
4 Familiarising yourself with your appliance
4.1 Control panel
You can use the control panel to configure all functions of your appliance and to obtain information about the operat-
ing status.
Control element
4.2 Buttons
The buttons are touch-sensitive areas. To select a function, press the corresponding button.
Symbol Name Use
On/off Switch the appliance on or off
Main menu Select operating modes and settings
Time-setting options/
childproof lock
¡ Set the "timer", "cooking time" or "Ready at" time for delayed starts
¡ Activate or deactivate the "childproof lock"
Information ¡ View additional information
¡ View the current temperature
Rapid heat-up ¡ Activate or deactivate the "Rapid heat-up" function
¡ Activate or deactivate the "PowerBoost" function
Start/stop Start or pause the appliance
4.3 Control element
You can configure all the functions on your appliance using the control element. You can change the setting values
that are displayed more brightly.
Press and hold a button to scroll through the setting values quickly. Release the button to stop scrolling quickly.
Button Name Use
Left Navigate to the left on the display
button to select the required temperature or setting.
5. Press
en Familiarising yourself with your appliance
6
4 Familiarising yourself with your appliance
4.1 Control panel
You can use the control panel to configure all functions of your appliance and to obtain information about the operat-
ing status.
1
2 23
Control element
4.2 Buttons
The buttons are touch-sensitive areas. To select a function, press the corresponding button.
Symbol Name Use
On/off Switch the appliance on or off
Main menu Select operating modes and settings
Time-setting options/
childproof lock
¡ Set the "timer", "cooking time" or "Ready at" time for delayed starts
¡ Activate or deactivate the "childproof lock"
Information ¡ View additional information
¡ View the current temperature
Rapid heat-up ¡ Activate or deactivate the "Rapid heat-up" function
¡ Activate or deactivate the "PowerBoost" function
Start/stop Start or pause the appliance
4.3 Control element
You can configure all the functions on your appliance using the control element. You can change the setting values
that are displayed more brightly.
Press and hold a button to scroll through the setting values quickly. Release the button to stop scrolling quickly.
Button Name Use
Left Navigate to the left on the display
to start. The cooking time will appear on the display and the heat-up
indicator bar visualises the rising temperature.
6.When the food is ready, press
en Familiarising yourself with your appliance
6
4 Familiarising yourself with your appliance
4.1 Control panel
You can use the control panel to configure all functions of your appliance and to obtain information about the operat-
ing status.
1
2 23
Control element
4.2 Buttons
The buttons are touch-sensitive areas. To select a function, press the corresponding button.
Symbol Name Use
On/off Switch the appliance on or off
Main menu Select operating modes and settings
Time-setting options/
childproof lock
¡ Set the "timer", "cooking time" or "Ready at" time for delayed starts
¡ Activate or deactivate the "childproof lock"
Information ¡ View additional information
¡ View the current temperature
Rapid heat-up ¡ Activate or deactivate the "Rapid heat-up" function
¡ Activate or deactivate the "PowerBoost" function
Start/stop Start or pause the appliance
4.3 Control element
You can configure all the functions on your appliance using the control element. You can change the setting values
that are displayed more brightly.
Press and hold a button to scroll through the setting values quickly. Release the button to stop scrolling quickly.
Button Name Use
Left Navigate to the left on the display
to switch the appliance o.
TIP:
• To change the temperature once you have started the appliance use the
en Familiarising yourself with your appliance
6
4 Familiarising yourself with your appliance
4.1 Control panel
You can use the control panel to configure all functions of your appliance and to obtain information about the operat-
ing status.
Control element
4.2 Buttons
The buttons are touch-sensitive areas. To select a function, press the corresponding button.
Symbol Name Use
On/off Switch the appliance on or off
Main menu Select operating modes and settings
Time-setting options/
childproof lock
¡ Set the "timer", "cooking time" or "Ready at" time for delayed starts
¡ Activate or deactivate the "childproof lock"
Information ¡ View additional information
¡ View the current temperature
Rapid heat-up ¡ Activate or deactivate the "Rapid heat-up" function
¡ Activate or deactivate the "PowerBoost" function
Start/stop Start or pause the appliance
4.3 Control element
You can configure all the functions on your appliance using the control element. You can change the setting values
that are displayed more brightly.
Press and hold a button to scroll through the setting values quickly. Release the button to stop scrolling quickly.
Button Name Use
Left Navigate to the left on the display
or
en Familiarising yourself with your appliance
6
4 Familiarising yourself with your appliance
4.1 Control panel
You can use the control panel to configure all functions of your appliance and to obtain information about the operat-
ing status.
Control element
4.2 Buttons
The buttons are touch-sensitive areas. To select a function, press the corresponding button.
Symbol Name Use
On/off Switch the appliance on or off
Main menu Select operating modes and settings
Time-setting options/
childproof lock
¡ Set the "timer", "cooking time" or "Ready at" time for delayed starts
¡ Activate or deactivate the "childproof lock"
Information ¡ View additional information
¡ View the current temperature
Rapid heat-up ¡ Activate or deactivate the "Rapid heat-up" function
¡ Activate or deactivate the "PowerBoost" function
Start/stop Start or pause the appliance
4.3 Control element
You can configure all the functions on your appliance using the control element. You can change the setting values
that are displayed more brightly.
Press and hold a button to scroll through the setting values quickly. Release the button to stop scrolling quickly.
Button Name Use
Left Navigate to the left on the display
button to select the required temperature.
Setting Heating Type & Temperature

 Loading...