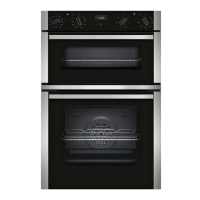
en Childproof lock
12
Requirements
¡ A type of heating and a temperature or setting are
set for the main oven .
¡ A cooking time is set.
1.
Press the button repeatedly until is highlighted
in the display.
2.
Press the or button.
a The display shows the calculated end time.
3.
Use the or button to delay the end time.
a After a few seconds, the appliance applies the set-
ting and the display shows the set end time.
a Once the calculated start time has been reached,
the appliance starts heating up and the cooking
time starts counting down.
a Once the time has elapsed, an audible signal
sounds and the display shows the cooking time as
zero.
4.
When the cooking time has elapsed:
‒ Press any button to end the signal prematurely.
‒ To set another cooking time, press the button.
‒ When your food is ready, switch off the appli-
ance.
Changing the end time
In order to achieve a good cooking result, you can only
change the set end time before operation starts and
the cooking time starts counting down.
Requirement: is highlighted on the display.
▶
Use the or button to delay the end time.
a The appliance applies the change after a few
seconds.
Cancelling the end time
You can delete the set end at any time.
Requirement: is highlighted on the display.
▶
Reset the end time to the current time plus the set
cooking time using the button.
a After a few seconds, the appliance applies the
change and starts heating up. The cooking time
counts down.
8.5 Setting the time on the clock
Once the appliance has been connected to the mains
or following a power failure, the time flashes on the dis-
play. The time starts at "12:00". Set the current time.
Requirement:The function selector must be set to the
"Off" position .
1.
Use the or button to set the time.
2.
Press the button.
a The time that is set appears on the display.
Tip:You can go to the basic settings →Page13 to
specify whether or not the time should be shown on
the display.
Changing the time on the clock
You can change the time on the clock at any time.
Requirement:The function selector must be set to the
"Off" position .
1.
Press the button repeatedly until is highlighted
in the display.
2.
Use the or button to change the time.
a The appliance applies the change after a few
seconds.
9 Childproof lock
Secure your appliance to prevent children from acci-
dentally switching on the main oven or changing the
settings.
Notes
¡
You can go to the basic settings →Page13 to
specify whether you want the option to set the child-
proof lock.
¡ After a power cut, the childproof lock is deactivated.
The childproof lock only allows you to lock the controls
for the main oven .
9.1 Automatic childproof lock
When the appliance is switched off, it locks automatic-
ally. You need to pause the automatic childproof lock
before you switch on the appliance.
You can activate and deactivate the automatic child-
proof lock in the basic settings.
→"Basic settings", Page13
Pausing the automatic childproof lock
Requirement:The automatic childproof lock is activ-
ated in the basic settings.
→"Basic settings", Page13
▶
Press and hold the button until goes out on
the display.
10 Rapid heating
To save time, you can use rapid heating to shorten the
preheat time.
Only use rapid heat-up when a temperature of over
100°C has been set.
After rapid heating, it is best to use the following types
of heating:
¡ CircoTherm hot air
10.1 Setting rapid heating
To ensure an even cooking result, do not place the
food in the cooking compartment until rapid heating
has come to an end.
1.
Use the function selector to select rapid heating .
2.
Use the temperature selector to set the required
temperature.
a Rapid heating starts after a few seconds.
 Loading...