6 Nektar Impact LX Mini owner’s manual www.nektartech.com
DAW & MIDI Control
Impact LX Mini can be used to play and control a Digital Audio Workstation (DAW), MIDI software instruments and MIDI hardware
connected to your computer. Getting Impact LX Mini set up with your computer may require some basic setup but for the most part
is straight forward.
Updating firmware & downloading Nektar DAW Integration software
your product. Make sure to select any DAW you use as well as your OS. Without completing this part correctly, you may not see the DAW
Start by creating a Nektar user account here: www.nektartech.com/registration
Using Impact LX Mini as a generic USB MIDI controller
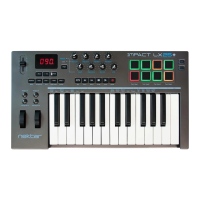
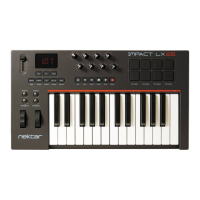
Impact LX Mini works as a generic USB MIDI controller straight out of the box. For MIDI control, the LX Mini’s large pot (12) sends MIDI cc#7
to control volume and in Internal mode, the eight pots (13) send MIDI messages that can be used to control instruments.
To get the most out of your setup you may need to customize the LX Mini setup, which can all be done in the Setup menu.
Power on and get started
The Impact LX Mini is USB Class compliant. This means there is no driver to install. Impact LX Mini uses the built-in USB MIDI driver which
is already part of operating systems such as Windows, Mac OS and iOS (via the optional camera connection kit). On Linux you will need to
install JACK and ALSA for MIDI.
• Locate the included USB cable and plug one end in to your computer and the other in to your Impact LX Mini (see page 5, bullet 18).
• If you want to connect a foot switch to control sustain, plug it in to the 1/8” jack socket on the side of the keyboard (see page 5 bullet
19). Use the included 1/8” to 1/4” adaptor cable if your foot switch has a 1/4” jack.
• Set the power switch to On.
Keyboard
The Impact LX Mini features a 25 note mini velocity sensitive keyboard which, despite its compact size, allows surprisingly expressive
control. There are 3 different keyboard velocity curves and 3 fixed velocity levels to choose from, depending on how sensitive and dynamic
you want the Impact LX Mini keyboard to play.
We recommend you spend a little time playing with the default velocity curve and then determine if you need more or less sensitivity.
You can learn more about velocity curves, and how to select them, in the “Setup” section on page 18.
Octave buttons
T
• With each press, the left Octave button will shift the keyboard down one octave.
• The right Octave button will similarly shift the keyboard up 1 octave at a time, when pressed.
• Pressing both Octave buttons at the same time resets the setting to 0.
Using octave shift, the keyboard covers the entire MIDI keyboard range of 128 notes.
 Loading...