20
Repair
ServiceManualC91/D91 enVersion1.0
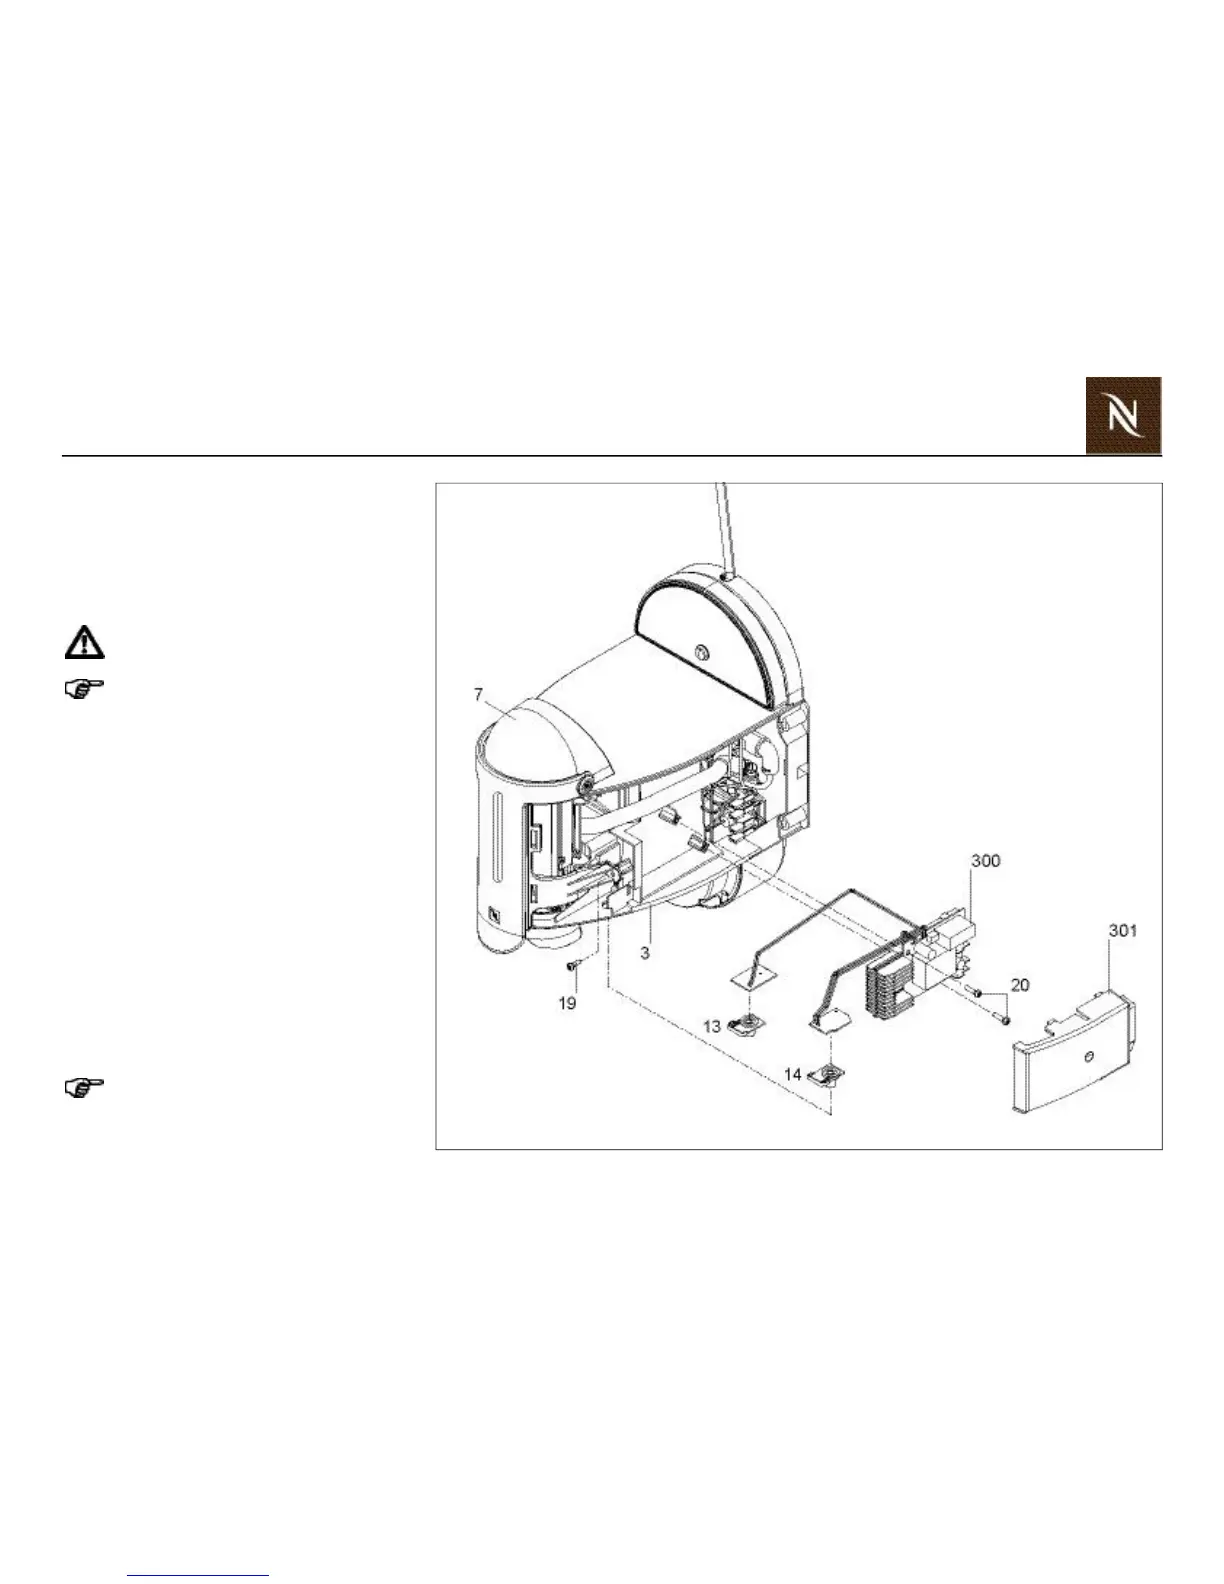
Replacingelectroniccontrolboard
withbutt onprints
Tools:
TorxscrewdriverPinTX10
Theserviceengineermustbe
earthedusinganearthingstrap!
Onlytouchbuttonprintswithdedi
catedglovestoavoidoxydation.
Procedure:
1. Followgeneraldisassembly(seepage
17).
2. DetachprintsofOn/Offbutton(13)and
coffeebutton(14)fromupperchassis(3).
3. Remove2screws(19)andliftcover(7)at
thefrontsidetothreadoutcableswith
buttonprints.
4. Removehousing(301)fromelectronic
controlboard(300).
5. UnplugNTCconnectorandallwiresfrom
electroniccontrolboard(300).
6. Remove2screws(20)andreplacedefect
electroniccontrolboardwithbuttonprints.
7. Assembleinreversesequence.
Checkforcorrectwiringofelectronic
controlboard(seepage23).
 Loading...