2. Orient the controller canister so that the slot for the battery faces toward you.
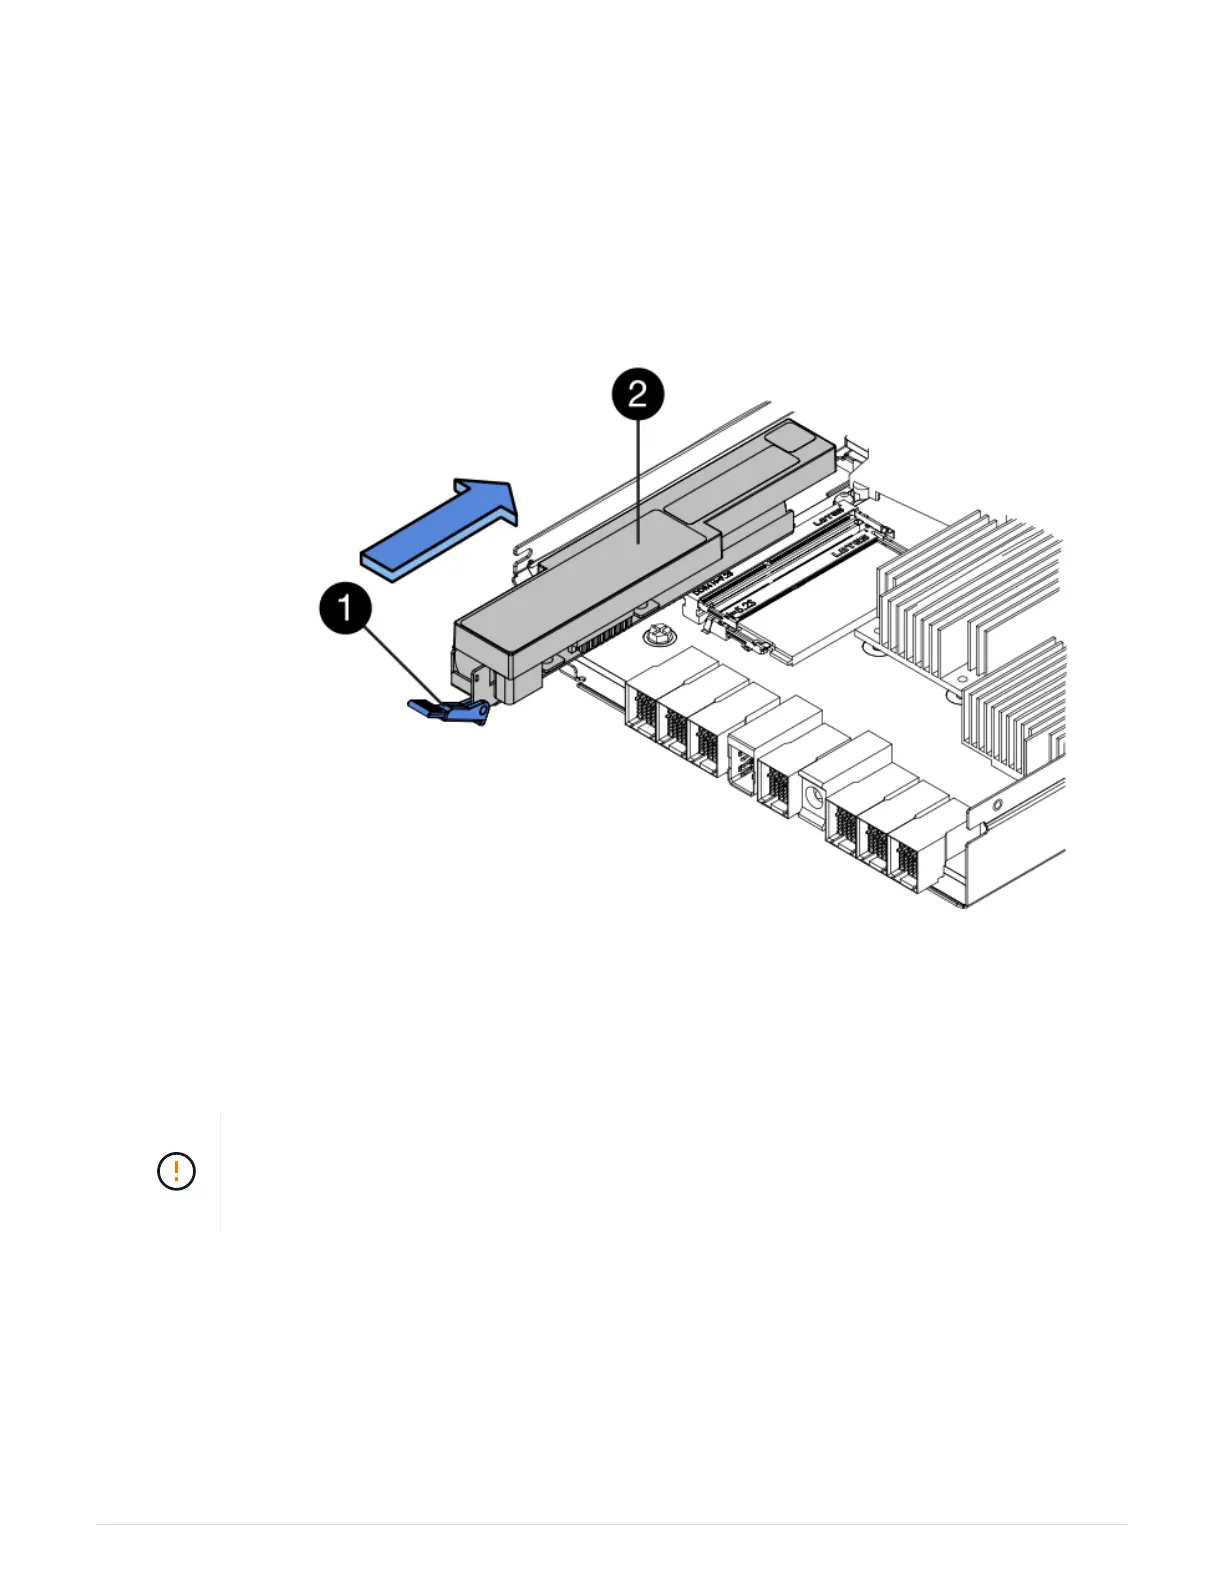
3. Insert the battery into the controller canister at a slight downward angle.
You must insert the metal flange at the front of the battery into the slot on the bottom of the controller
canister, and slide the top of the battery beneath the small alignment pin on the left side of the canister.
4. Move the battery latch up to secure the battery.
When the latch clicks into place, the bottom of the latch hooks into a metal slot on the chassis.
(1) Battery release latch
(2) Battery
5. Turn the controller canister over to confirm that the battery is installed correctly.
Possible hardware damage — The metal flange at the front of the battery must be
completely inserted into the slot on the controller canister (as shown in the first figure). If the
battery is not installed correctly (as shown in the second figure), the metal flange might
contact the controller board, causing damage to the controller when you apply power.
◦ Correct — The battery’s metal flange is completely inserted in the slot on the controller:
273
 Loading...


