6. Hand-tighten the HIC thumbscrew.
Do not use a screwdriver, or you might over tighten the screws.
7. Using a #1 Phillips screwdriver, attach the HIC faceplate you removed from the original controller canister
to the new controller canister with the two screws.
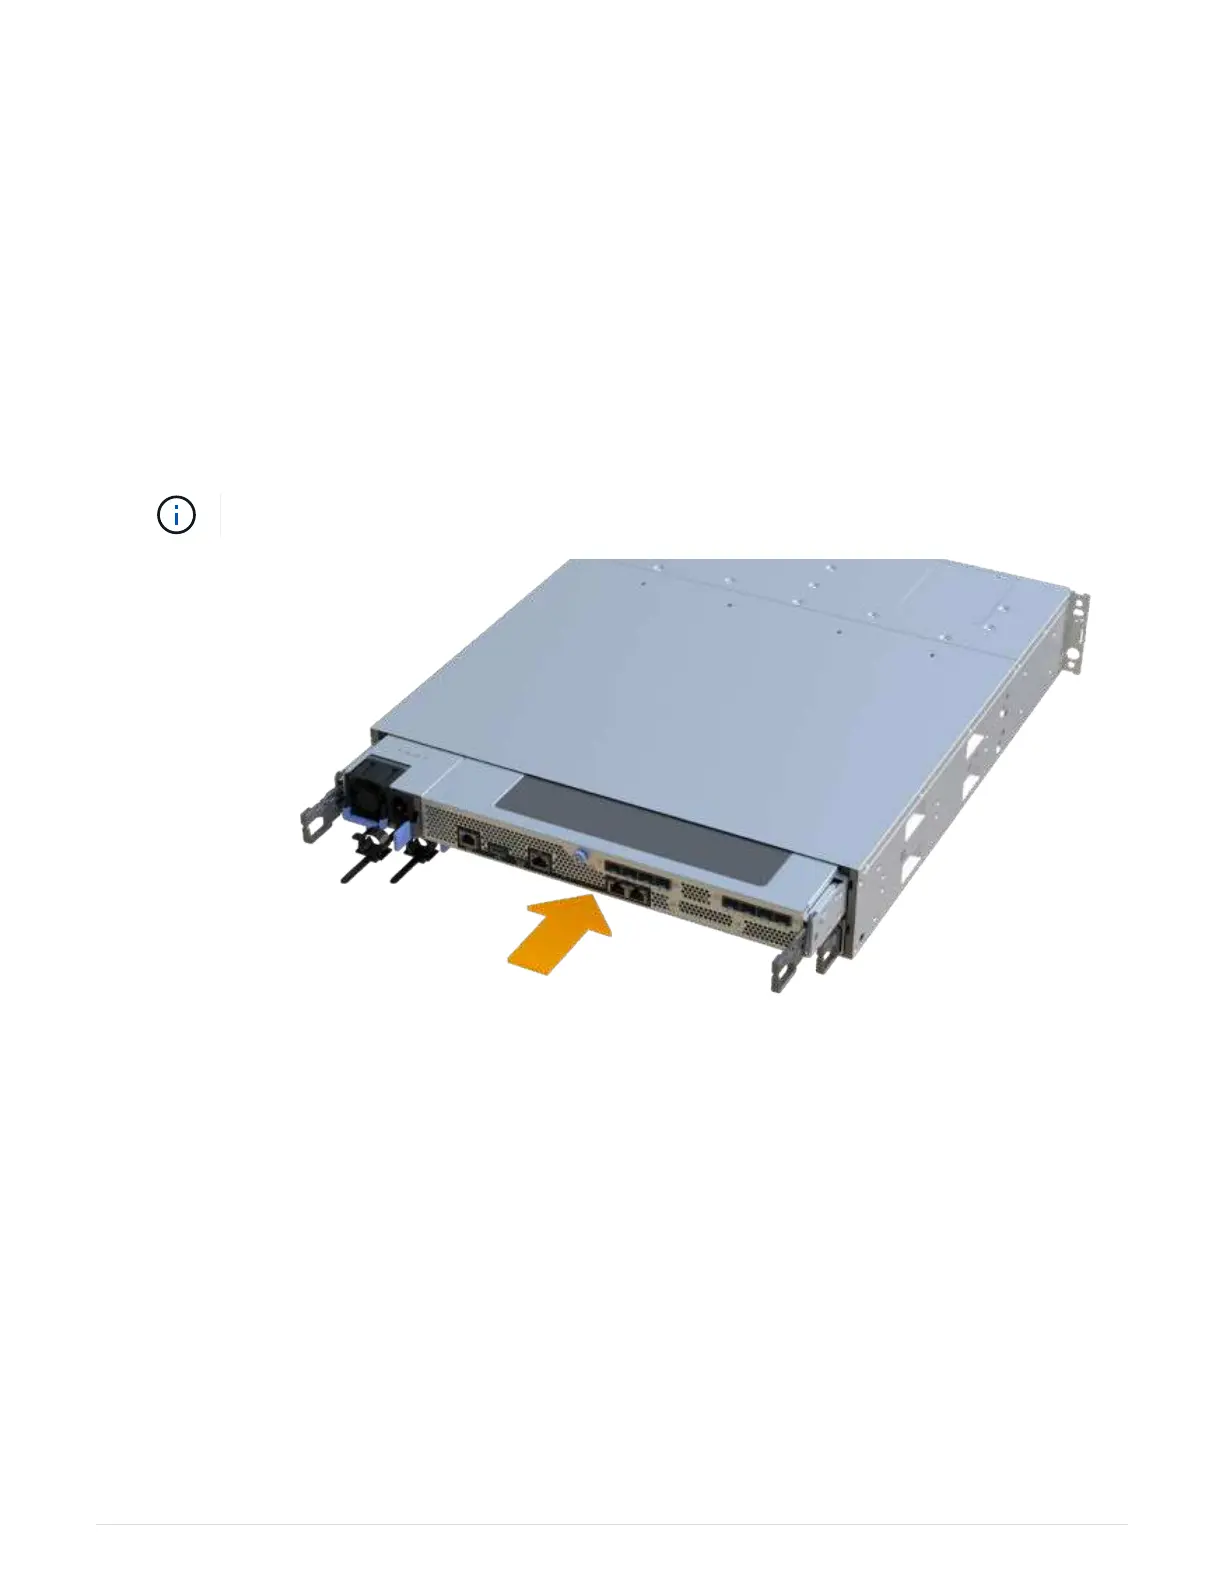
Step 4: Reinstall the controller canister
Reinstall the controller canister into the controller shelf after installing the HIC.
Steps
1. Lower the cover on the controller canister and secure the thumbscrew.
2. While squeezing the controller handles, gently slide the controller canister all the way into the controller
shelf.
The controller audibly clicks when correctly installed into the shelf.
3. If removed, install the SFPs into the new HIC and reconnect all the cables.
If you are using more than one host protocol, be sure to install the SFPs in the correct host ports.
Step 5: Complete HIC addition
Place the controller online, collect support data, and resume operations.
Steps
1. Place controller online.
a. Plug in power cables.
64
 Loading...


