Installation Guide
NETGEAR ProSAFE™ Dual WAN Gigabit SSL VPN Firewall
FVS336G v3
Package Contents
Thank you for purchasing this NETGEAR product. Your package contains the
following items:
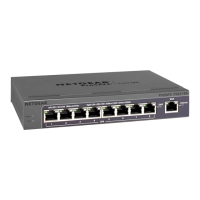
• NETGEAR ProSAFE™ Dual WAN Gigabit SSL VPN Firewall FVS336G v3
• AC power cable
• Rubber feet for tabletop installation
• Category 5 (Cat5) Ethernet cable
• Installation Guide
• Resource CD
• ProSAFE VPN Client Software—one user license
Connect the Firewall
To connect the cables between the Firewall, the modems, and a computer:
1. Turn off and unplug your broadband modems.
2. Connect an Ethernet cable from a modem into the WAN1 port (1) on the
firewall.
3. Connect an Ethernet cable from the other modem into the WAN2 port (2) on
the firewall.
4. Connect the Ethernet cable that came with your firewall into a LAN port (3) and
insert the other end into the Ethernet port on your computer.
Your network cables are connected and you are ready to restart your network.
To restart your network in the correct sequence:
WARNING: Failure to restart your network in the correct sequence might prevent
you from connecting to the Internet.
1. Power on your broadband modems and wait approximately two minutes until
they power up.
2. Connect the power adapter to the AC power connection port (4) on the rear of
the firewall.
3. Connect the power adapter to an electrical outlet.
The Test LED (5) lights and turns off.
4. Power on your computer.
5. Check the status LEDs:
• Power. The power LED (6) lights solid green. If it does not light solid green,
see the Troubleshooting section of the reference manual.
• Test. When you first turn on the router, the amber test LED (5) lights for
approximately two minutes. If it is still on after several minutes, see the
reference manual.
• WAN. The Active LEDs on WAN Port 1 and WAN Port 2 light (7). If not,
make sure that the Ethernet cables are securely attached to the modems
and the WAN ports, and that the modems are powered on. The Link/Act
LEDs (8) indicate activity over the port. The Speed LEDs (7) respond as
follows:
• Green. Your computer is communicating at 1 Gbps.
• Amber. Your computer is communicating at 100 Mbps.
• No light. Your computer is communicating at 10 Mbps.
• LAN. The LAN ports Speed and Link/Act LEDs responds in the same
manner as the WAN ports for the connected LAN ports.
Configure the Firewall for Internet Access
Before you begin, locate your Internet Service Provider (ISP) configuration
information.
Note: To connect to the firewall, your computer must be configured to obtain an IP
address automatically via DHCP. For more information, see the reference manual.
To configure the firewall for internet access:
1. Use a browser to connect to https://192.168.1.1
2. Enter the default user name and password.
• User name. admin
• Password. password
3. Click the Login button.
The Router Status screen displays.
4. Select WAN Settings > WAN1 ISP Settings.
The WAN 1 ISP Settings screen displays.

 Loading...