a. When the Print Server Setup Wizard finishes, you are prompted to run the
Add Printer Port Wizard. Click Ye s to proceed.
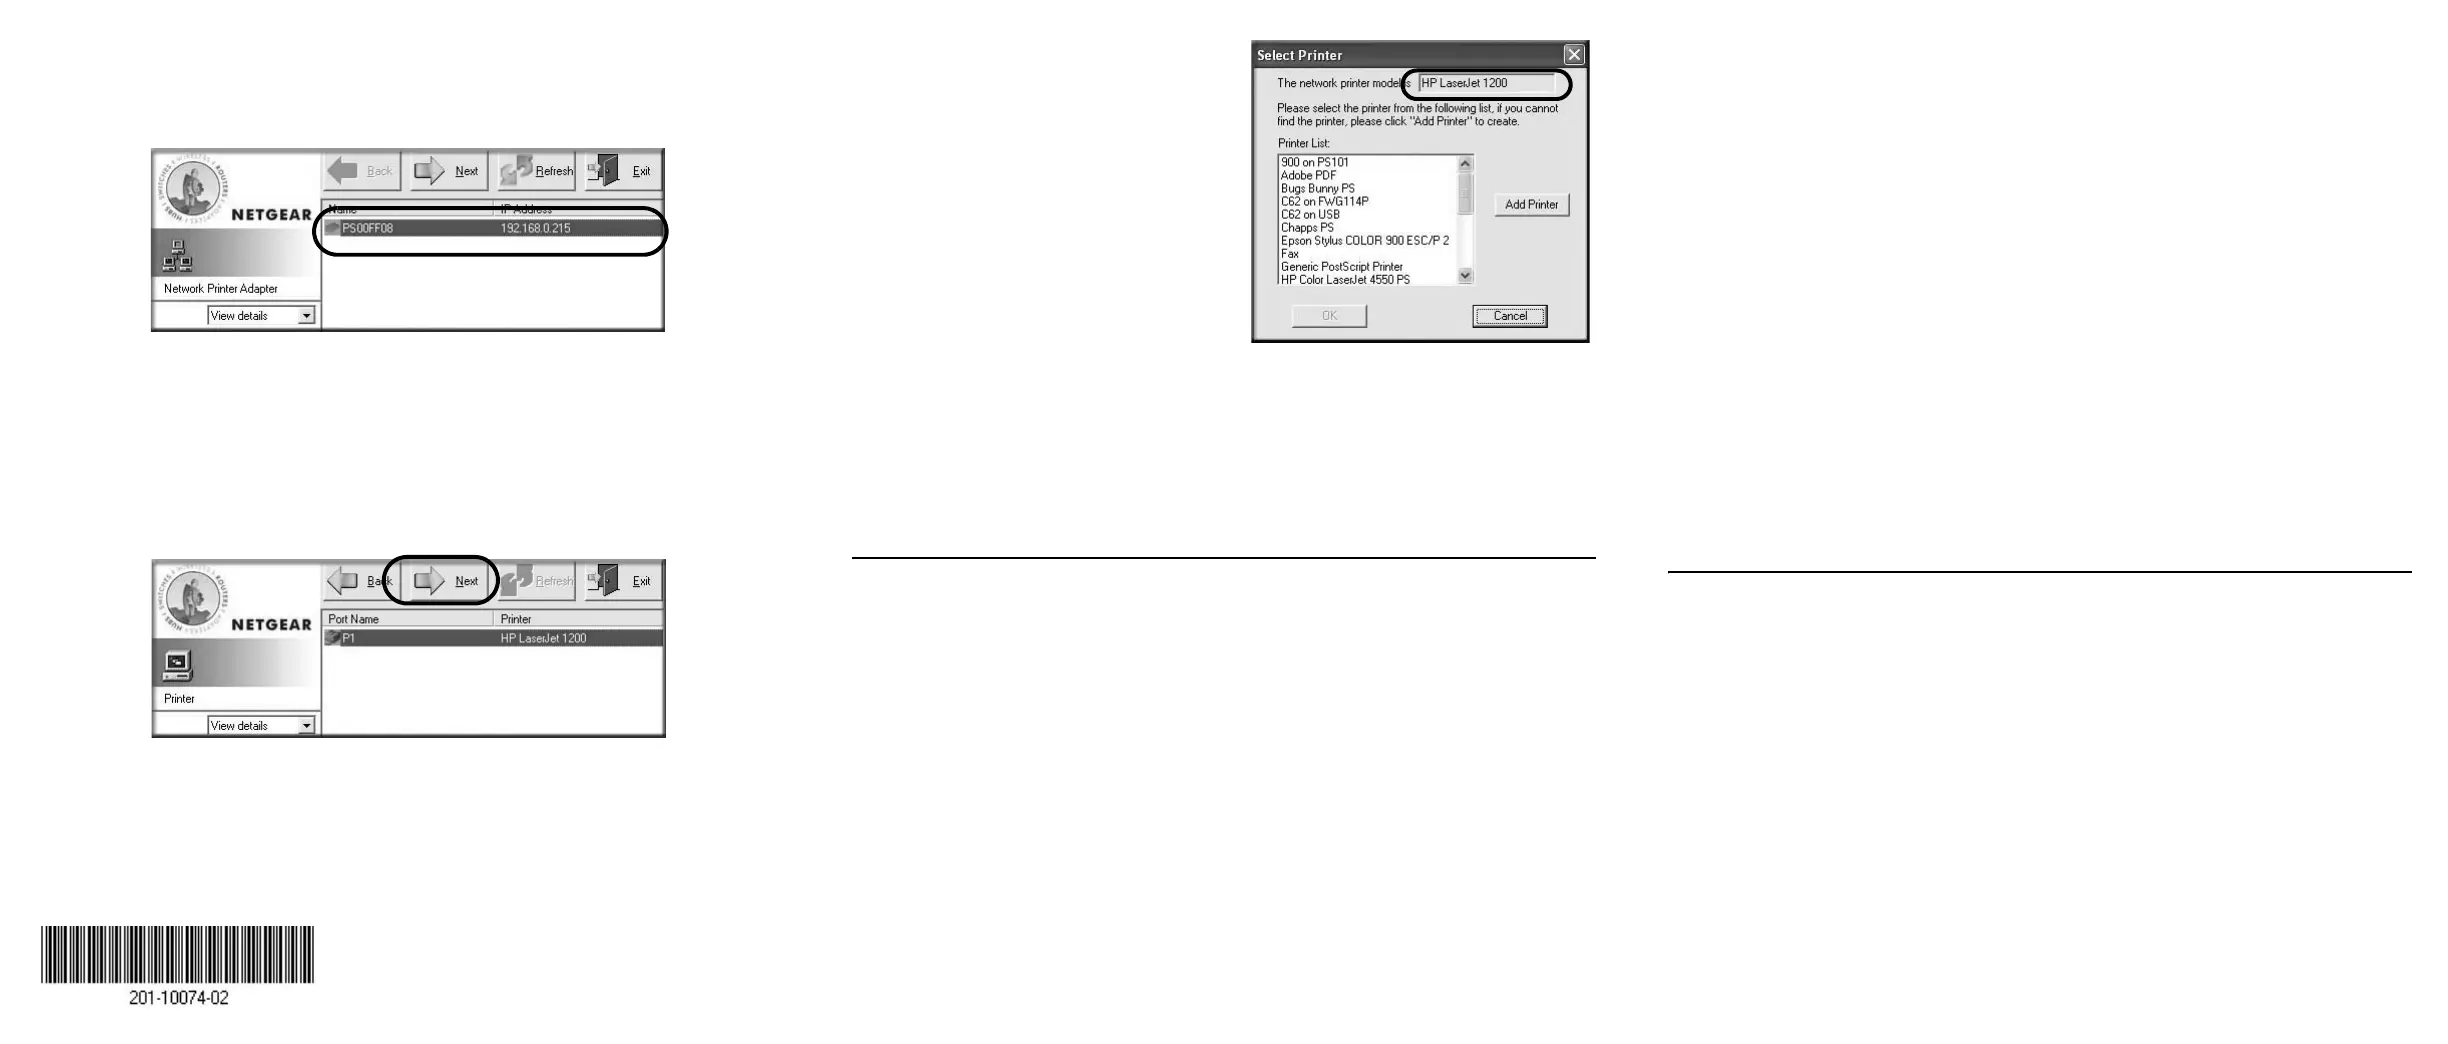
b. The Add Printer Port Wizard searches your network for the PS121.
If the Print Server Setup Wizard cannot find your PS121, check the USB
cable connections, the network cable connections, and the status lights on
the PS121. Then, click the Refresh button.
c. Click Next to proceed to the Port/Printer name screen. Take note of the
printer model number listed.
d. Click Next to proceed to the Select Printer screen.
If you see the exact printer model
number in the list, click it to select
it from the list.
If your printer model is not on the
list, click the Add Printer button
and follow the Windows add
printer wizard prompts to complete
the installation of your printer. If
you need help with the Windows
wizard, please see the Reference
Manual on the PS121 Resource
CD.
e. If prompted, print a test page to verify operation of the printer and the
PS121. Keep the test page for future reference. Then, close any remaining
Add Printer Port Wizard or Windows Add Printer Wizard windows.
Use the PS121 Resource CD to run the Add Printer Port Wizard to set up each
PC on you network that you want to use with the PS121.
Troubleshooting Tips
• No lights are lit on the print server
It takes a few seconds for the status light to be lit. Wait a minute and check the
status light on the print server.
• The printer is printing "garbage" characters
If the printer does not match the printer driver in the operating system, then run
the Add Printer Port Wizard.
• A Windows error message appears when printing
Consult Windows help.
• The print server is not found
See if you can access it from other computers on your network. If so,
troubleshoot your computer or network connectivity.
If you are running a software firewall, disable it. This includes the Windows XP
firewall — which may have been turned on during Windows upgrade or
installation without you being aware of it.
• Nothing is printing
– Try printing from another computer. If this is successful, then there is a
problem with your computer configuration, not the print server. Consult the
computer and operating system documentation.
– If the printer does not match the printer driver in the operating system, then
run the Add Printer Port Wizard.
– Disable the printer's bidirectional feature, if it is turned on.
– If printer manager software is installed, uninstall it.
– Consult the troubleshooting section of the Reference Manual on the PS121
Resource CD.
• I am using a DHCP server, and the Print Server gets an IP Address conflict
This problem can happen when the PS121 uses a static IP Address in the range
used by the DHCP server. If so, use another address outside of the range used by
the DHCP server. Typically IP addresses between 200 to 250 are outside the
range of DHCP servers found on home networks.
Technical Support
Thank you for selecting NETGEAR products.
To register your product, go to:
http://www.NETGEAR.com/register
Go to http://www.NETGEAR.com/support for additional support information.
©2004 by NETGEAR, Inc. All rights reserved.
NETGEAR is a registered trademark of NETGEAR, Inc. in the United States and/or
other countries.
Other brand and product names are trademarks or registered trademarks of their
respective holders. Information is subject to change without notice.
February 2004
 Loading...