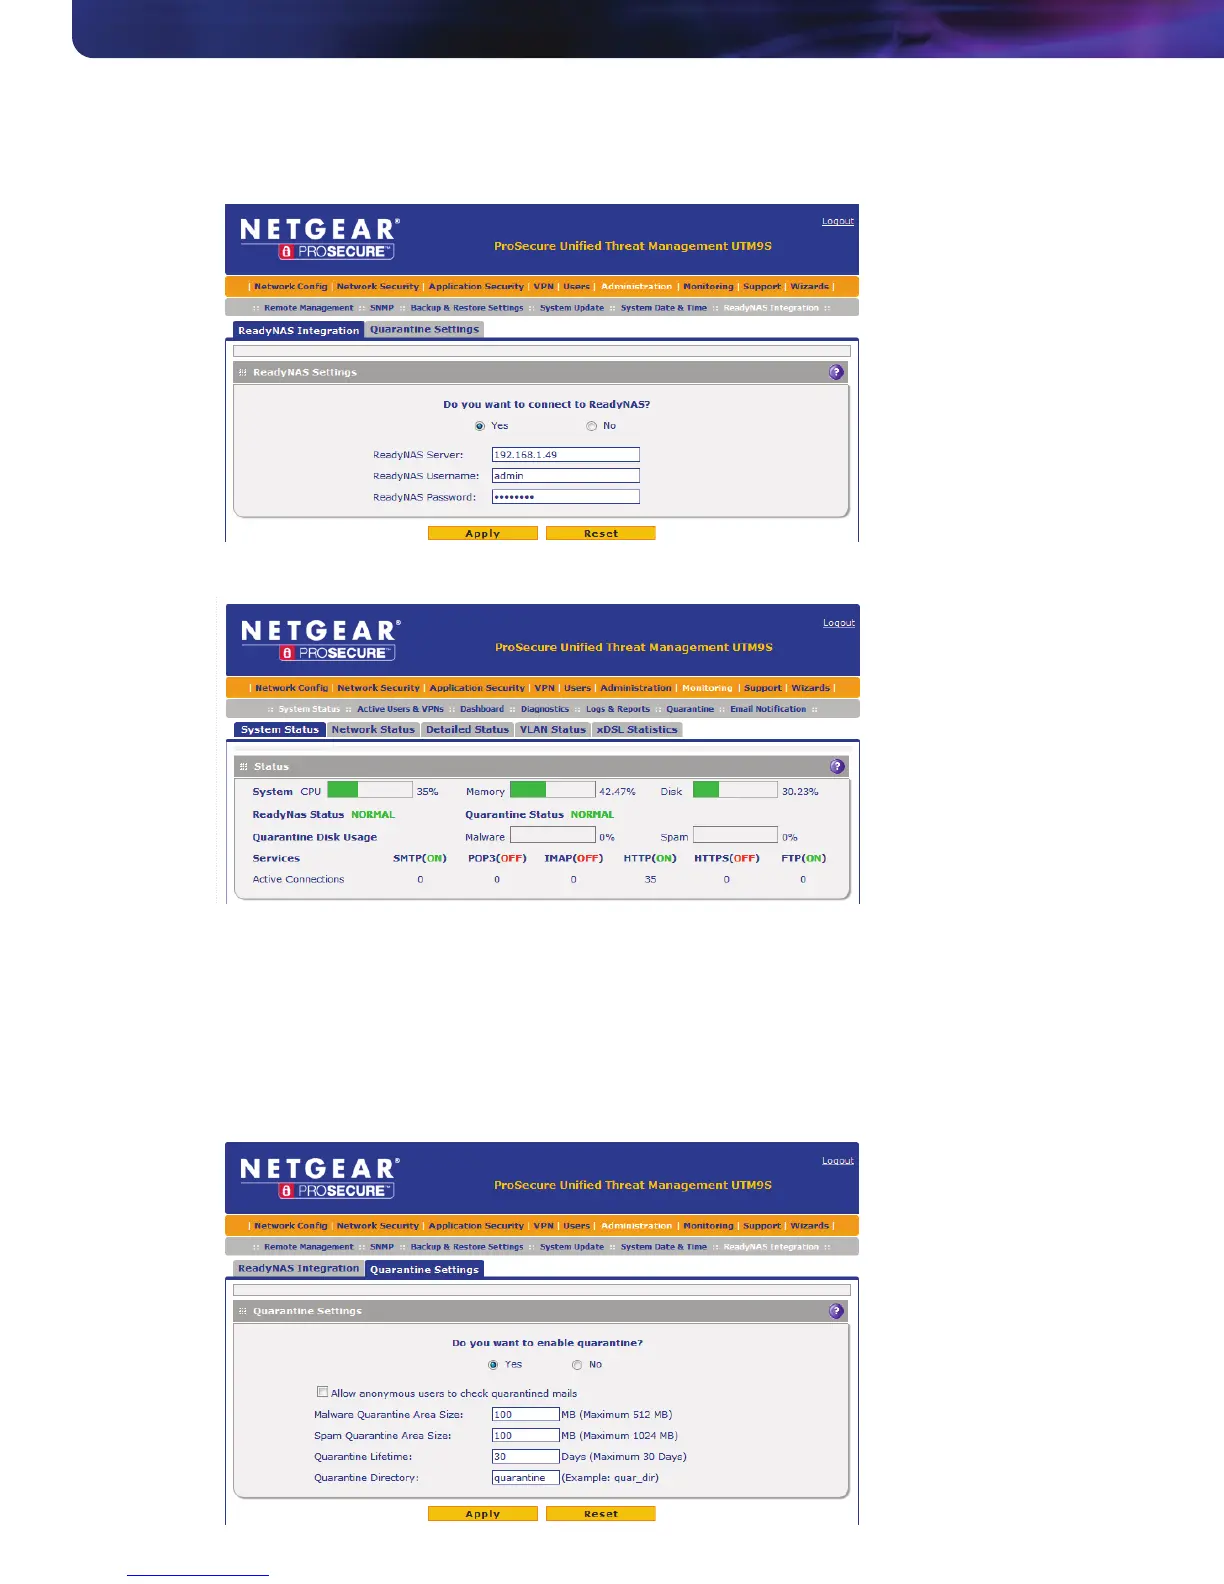
5. Select Yes to connect to the ReadyNAS and enter the IP address of the ReadyNAS and the admin username and
password you use to manage the ReadyNAS and click Apply.
6. Go to Monitoring –> System Status and you should see the ReadyNAS and Quarantine Status set to Normal.
You're all set! Now you'll have quarantine and the logs on the UTM will be persistent.
Enabling Quarantine on the UTM
Now that we've connected the UTM with the ReadyNAS, we have the option to enable quarantine for malware infected
files and spam emails.
1. First, click on the Quarantine Settings tab and enable quarantine.
7
Application Notes
 Loading...