Click “OK” and go to the “Profiles” tab. Highlight the net-6.
work you just added and click “Activate” to use that profile.
You will notice the connection go from red to green when
you are connected. Your wireless connection is now set up
and ready to be used.
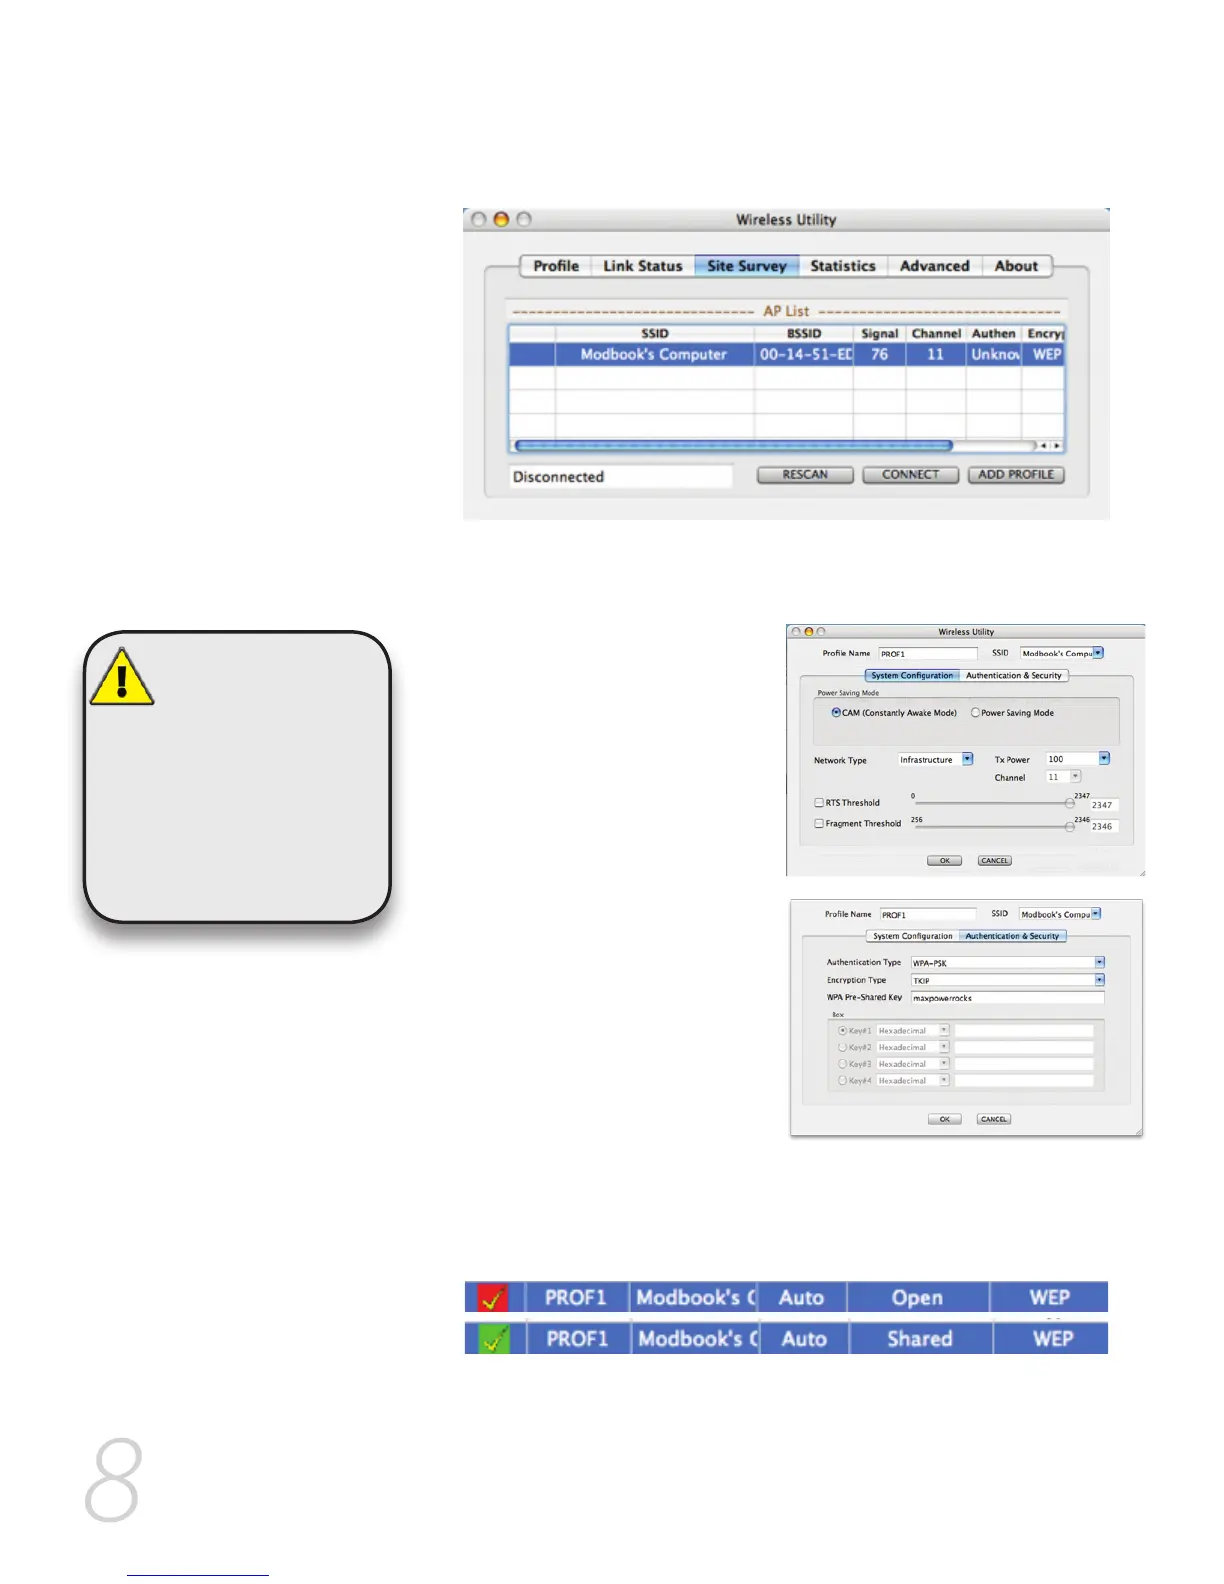
Once the Wireless Utility window is active, click on the “Site 2.
Survey” tab. You should see your wireless network listed here.
If you don’t, click “Rescan”. If your network still doesn’t appear,
consult your wireless router’s manual or technical support.
Click on the wireless network you want to connect so it is 3.
highlighted and click “Add Profile”.
In the “System Configura-4.
tion” tab, you can name the
profile and adjust any set-
tings needed to connect to
the network.
As settings for
wireless routers
can vary, you will
want to check your
particular router’s manual
or technical support for
information regarding
security settings and
wireless configuration.
Click on “Authentication & 5.
Security” to enter any se-
curity information needed
to connect to your wireless
network.